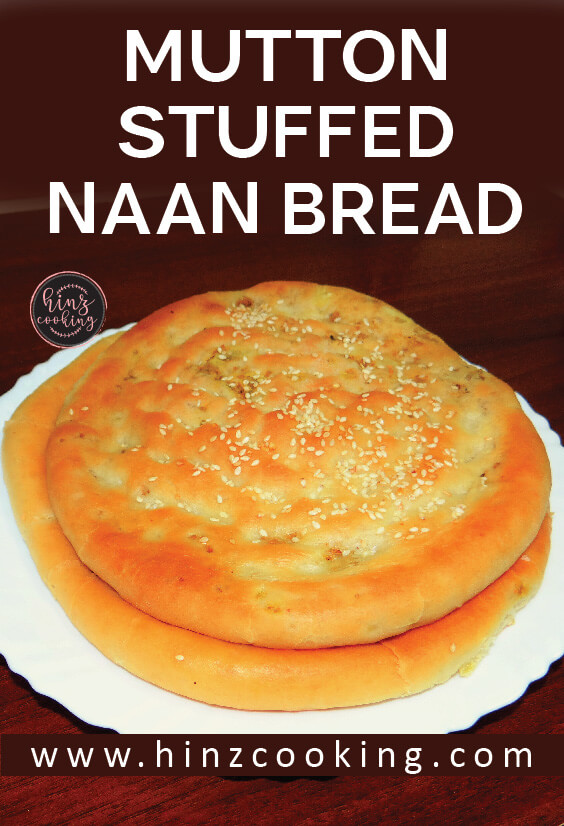
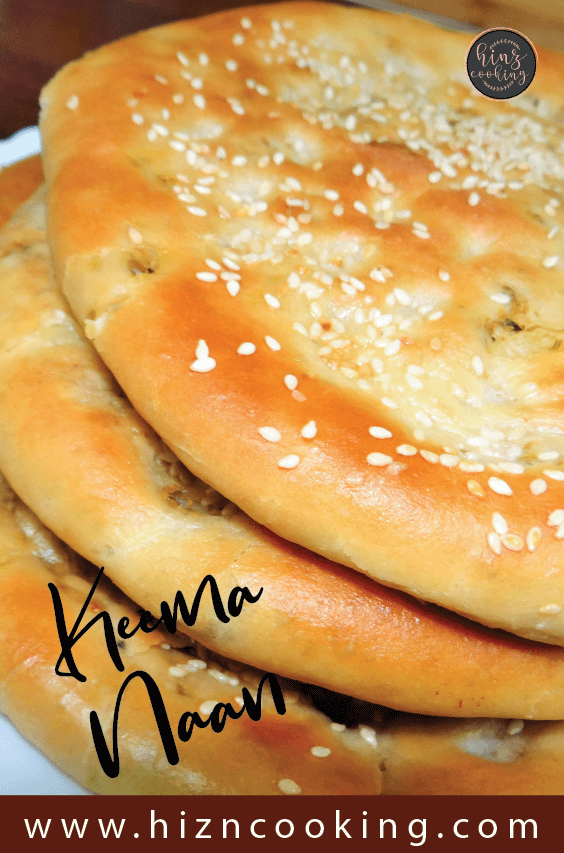
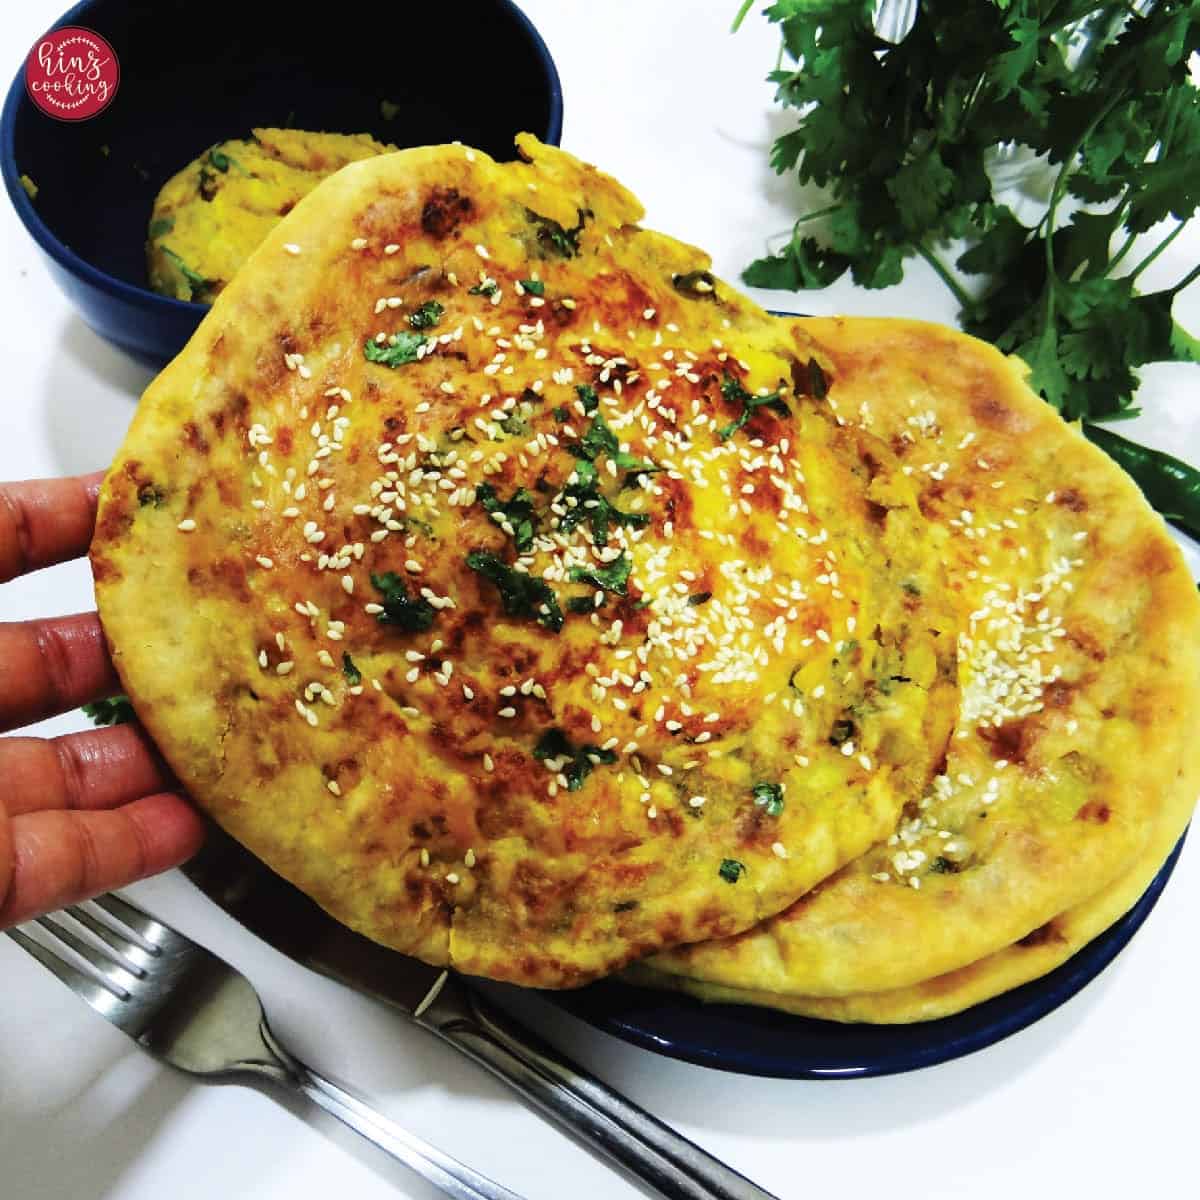
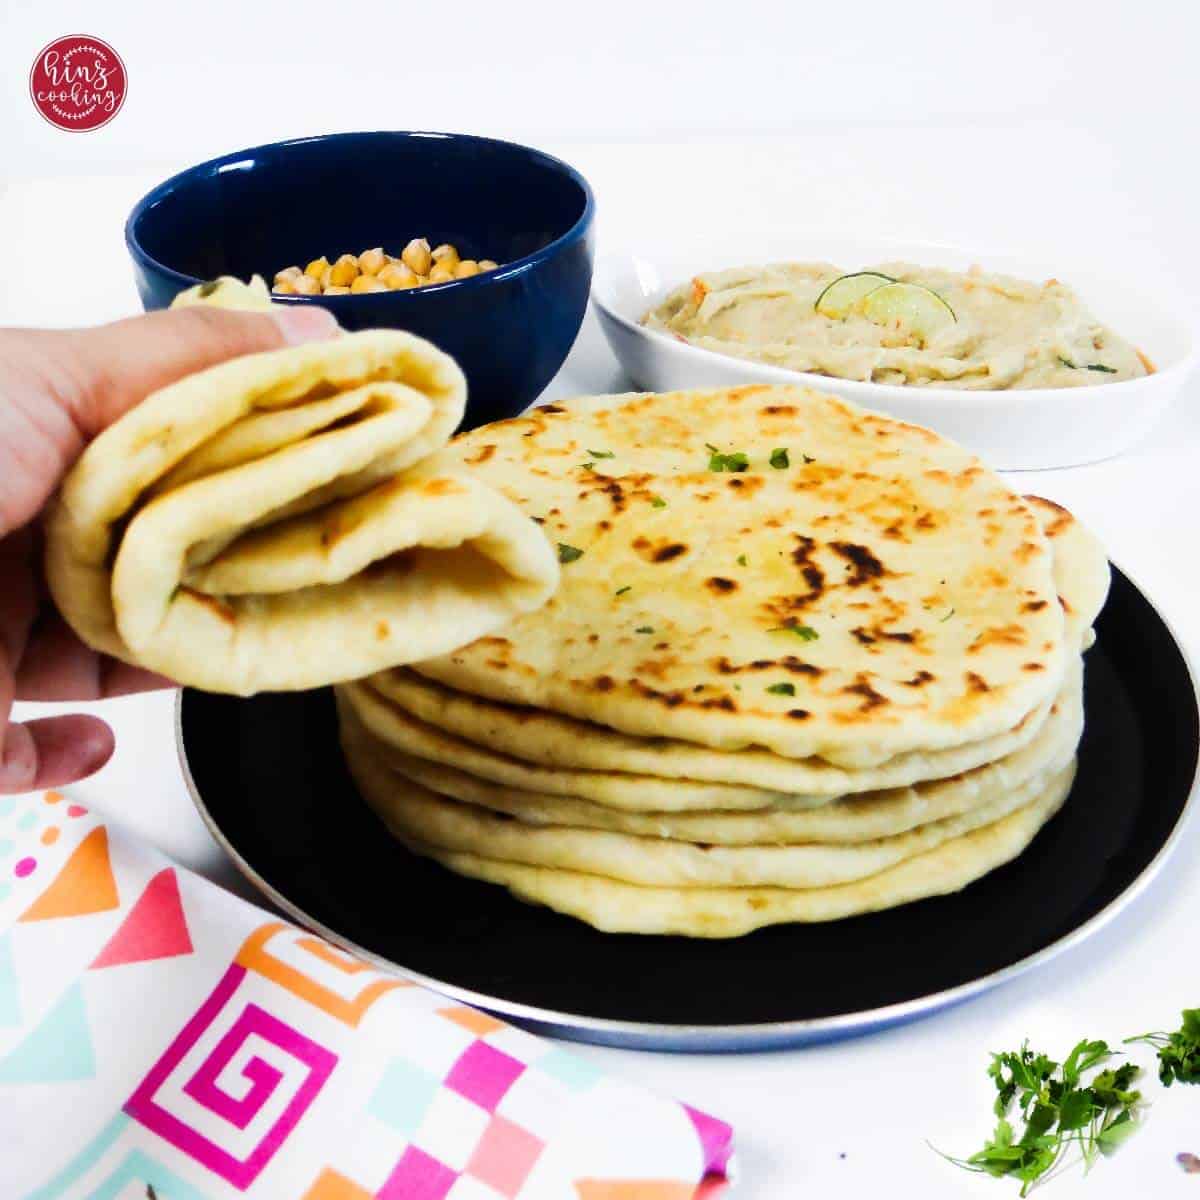
Keema naan is the most satisfying naan in Pakistani cuisine — soft, oven-baked flatbread stuffed with a filling of spiced minced meat, cooked until the dough is golden and the meat inside is fragrant with garam masala, green chilies, and fresh coriander. When you slice it open, steam rises from the spiced filling. It is simultaneously a bread and a complete meal.
Think of it as Pakistan's answer to a meat-filled flatbread — similar in concept to a Cornish pasty or a Lebanese meat pie, but unmistakably South Asian in its spice profile. If you've eaten at a Pakistani or Punjabi restaurant and seen keema naan on the menu, this is that dish — made at home in your oven without a tandoor.
This is a Lahori-style keema naan. On the food streets of Lahore — Anarkali, Food Street, Burns Road — keema naan is cooked in clay tandoors at extreme heat. At home, a very hot oven replicates the result beautifully: crispy sesame-topped crust, soft and fluffy interior, and a spiced meat filling that stays moist throughout baking.
This is part of my Pakistani naan collection — alongside roghni naan, garlic naan, and aloo naan. If you've made any of those, the dough here is exactly the same.
Jump to:
- What is Keema Naan? (Pakistan's Meat-Stuffed Flatbread)
- Why You'll Love This Recipe
- How to Make Keema Naan — Step by Step
- How Keema Naan Should Look and Taste
- How to Make Perfect Keema Naan Every Time
- What to Serve with Keema Naan
- Frequently Asked Questions
- More Naan Recipes from My Kitchen
- Keema Naan — Spiced Minced Meat Stuffed Naan (Lahori Style)
What is Keema Naan? (Pakistan's Meat-Stuffed Flatbread)
Keema naan is a leavened Pakistani flatbread filled with keema — spiced minced or ground meat. The word keema (also spelled qeema) means minced meat in Urdu and Hindi. The filling is cooked with onion, garlic, ginger, green chilies, and a blend of whole and ground spices before being stuffed into naan dough, sealed, shaped, and baked at high heat.
It is a street food staple across Punjab — both Pakistani and Indian sides of the border. In Lahore, keema naan is sold at every tandoor bakery and late-night food stall. In Amritsar, it appears in the same form. It is the naan that orders itself — one piece is never enough.
How does keema naan taste? The outer naan is identical to roghni naan — soft, slightly chewy, with a golden sesame-seeded crust. The filling is warmly spiced with garam masala and the distinct freshness of raw ginger, green chilies, and coriander added at the end. It is rich but not heavy — the meat filling is deliberately kept dry so it doesn't make the bread soggy. The combination of bread and spiced meat in one bite is deeply satisfying. If butter chicken is the introductory Pakistani dish for Western readers, keema naan is the one that keeps them coming back.
Keema naan vs aloo naan — what's the difference? Both are stuffed naans made with the same leavened dough. Aloo naan has a spiced potato filling and is vegetarian — lighter, milder. Keema naan has a spiced minced meat filling — richer, more substantial, and a complete meal in one bread. Aloo naan is the weekday lunch; keema naan is the Friday night dinner.
Why You'll Love This Recipe
- A complete meal in one bread — protein, carbs, spice, and satisfaction in every piece. No need for a main dish alongside — just yogurt, raita, and chutney.
- Oven-baked at home — no tandoor, no clay oven. Your regular oven at maximum temperature does the job. A very hot oven and a preheated tray give you the golden, slightly blistered crust of street-style keema naan.
- Same dough as all my naan recipes — if you've made my garlic naan, roghni naan or aloo naan, you already know this dough. Reliable, tested, always soft.
- Use any minced meat — beef, lamb, mutton, or chicken. Each gives a slightly different flavour profile. Full guide in the ingredient notes below.
- Leftover keema filling works perfectly — if you have leftover keema curry or keema fry, drain any excess liquid and use it straight as the filling. The already-cooked spiced meat makes the best keema naan I've made.
Best Way to Cook Keema Naan — 3 Methods Compared
| Priority | Method | Temp | Time | Result | Best for |
|---|---|---|---|---|---|
| 1 — Most recommended | 🔥 Oven | 180–200°C / 356–392°F | 10–12 min | Golden, even, tandoori-style | Families, batches of 4–6 |
| 2 — Crispiest result | 💨 Air Fryer | 175°C / 350°F (lower than plain naan) | 8–10 min | Crispiest blistered exterior | 1–2 naans quickly |
| 3 — Quick option | 🍳 Tawa/Stovetop | Medium heat only | 5–7 min | Golden spots, softer crust | Leftover naan, thin naans |
Why priority differs from plain naan:
- Oven is #1 because surrounding consistent heat cooks the dough AND the meat filling simultaneously. The sustained heat is exactly what stuffed naan needs.
- Air fryer is #2 not #1 because you can only cook 1 naan at a time and the lower temperature is essential — 175°C not 190°C, or the outside browns before the filling heats through.
- Tawa is #3 because direct one-sided heat means you must cover with a lid for the first 2 minutes to steam-heat the filling through before flipping.
Ingredients
For the Keema Filling:
Minced meat (500g) — the most important choice in this recipe. Your options:
- Beef mince — the authentic choice for most Pakistani keema naan. Bold, meaty flavour. Use 80% lean — too lean and the filling is dry; too fatty and it makes the naan greasy.
- Lamb or mutton mince — the UK and Australian equivalent. Deeper, slightly gamey flavour that pairs beautifully with garam masala. The traditional Lahori choice.
- Chicken mince — lighter, milder. Works well but needs a more generous spice hand as chicken absorbs spice differently. Popular choice for a lighter version.
All three work with exactly the same spice quantities and technique. Choose based on your preference and what's available.
Oil (2 tbsp) — for cooking the filling. Neutral vegetable oil. Don't use olive oil — its flavour competes with the spices.
Onion (1 medium, finely chopped) — the base of the filling. Must be cooked until translucent and soft before anything else goes in — raw onion releases water which makes the filling wet.
Ginger-garlic paste (1 tsp) — always fresh. The aromatic backbone of the filling. Freshly blended paste has a sharpness that jarred paste can't replicate.
Green chilies (2, finely chopped) — for heat and freshness. Adjust to your tolerance — the filling should have a noticeable warmth without being overwhelming.
Tomato (1 small, finely chopped) — adds moisture and slight acidity during cooking. The tomato must be cooked completely into the filling before you add the mince — visible tomato chunks in the filling make it too wet.
Red chili powder (1 tsp), Coriander powder (1 tsp), Cumin powder (½ tsp), Garam masala (1 tsp), Salt (1 tsp) — the spice blend. Add after the onion softens, cook for 1 minute to eliminate rawness before the meat goes in.
Fresh coriander (cilantro), 2 tablespoon finely chopped — added off the heat at the very end. Never cook it — raw coriander stirred into the hot finished filling is what gives keema naan its signature fresh note.
Lemon juice (1 tsp, optional) — a squeeze at the end brightens the whole filling. Street food in Lahore is always served with a wedge of lemon — this brings that acidity inside the naan.
For the Naan Dough: (identical to roghni naan and aloo naan dough — use the same quantities)
- 3 cups (375g) all-purpose flour
- 11g instant yeast
- 100ml warm water (for yeast activation)
- 1 teaspoon sugar
- 1 tablespoon plain yogurt
- 1 tablespoon oil
- 1 teaspoon salt
- Warm milk as needed for kneading
Topping & Finish:
- 2 teaspoon milk (for milk wash)
- 2 teaspoon white sesame seeds
- 2 teaspoon butter, melted (for brushing after baking)
How to Make Keema Naan — Step by Step
Phase 1 — Make the Keema Filling (do this first, then cool)
Step 1 — Cook the onion base Heat oil in a heavy pan over medium-high heat. Add finely chopped onion and cook for 4–5 minutes, stirring regularly, until golden and softened. Don't rush — undercooked onion releases water into the filling during baking and makes the naan soggy.
Step 2 — Add ginger-garlic and green chilies Add fresh ginger-garlic paste and finely chopped green chilies. Cook for 1–2 minutes, stirring constantly, until the raw smell disappears and the paste turns golden.
Step 3 — Add tomato and cook down Add finely chopped tomato. Stir through and cook on medium heat for 3–4 minutes until the tomato breaks down completely and the oil starts to separate slightly from the edges. No visible tomato chunks should remain.
Step 4 — Add spices Add red chili powder, coriander powder, cumin powder, garam masala, and salt. Stir together and cook for 1 minute to eliminate the raw spice smell.
Step 5 — Add the mince and cook through Add the minced meat. Break it up immediately with a wooden spoon — no clumps. Cook on high heat for 2–3 minutes, stirring constantly, until the meat changes colour throughout.
Step 6 — The most critical step — dry the filling
💡 Hina's Note: Keema naan fails when the filling is too wet. Any liquid inside the filling turns to steam during baking, making the naan soggy and causing it to break open. After the meat is cooked through, turn up to high heat and keep stirring until you see absolutely no liquid in the pan — the meat should look slightly dry and the oil should pool slightly around the edges. This takes 5–8 minutes. Don't skip this.
Step 7 — Finish and cool Remove from heat. Add freshly chopped coriander and a squeeze of lemon juice if using. Stir through. Taste and adjust seasoning — the filling should be well-seasoned since the naan dough itself is lightly salted. Spread onto a plate and allow to cool completely — at least 30 minutes. The filling must be fully cold before stuffing.
Phase 2 — Make the Naan Dough
Step 8 — Activate yeast Combine instant yeast, warm water, and sugar. Cover and rest 5–10 minutes until frothy. If no froth appears, discard and start with fresh yeast.
Step 9 — Make the dough Add yogurt and oil to the yeast. Add flour and salt. Bring together and knead 8–10 minutes until smooth and slightly tacky. Add warm milk one tablespoon at a time if the dough feels stiff. The dough should be noticeably soft — softer than you expect.
Step 10 — Rise 2 hours Oil the dough, cover tightly, rest in a warm place for 2 hours until doubled. Overnight in the fridge is even better.
Phase 3 — Shape, Fill, and Bake
Step 11 — Divide and roll Knock back the risen dough and divide into 6 equal portions. Roll each into a smooth ball. Take one ball and roll into a circle approximately 15cm (6 inches) wide.
Step 12 — Fill and seal Place 2–3 tablespoons of the fully cooled keema filling in the centre. Leave 3cm of clean dough around the edge. Bring edges up and pinch tightly together to seal completely. Remove any excess dough. Place sealed-side down and gently flatten with your hands.
Step 13 — Shape the naan Roll gently into an oval or circle — approximately 20–22cm wide. Apply light, even pressure. Make dimple marks across the surface with your fingertips.
Step 14 — Milk wash and sesame Brush generously with milk. Sprinkle sesame seeds and press lightly with your palm.
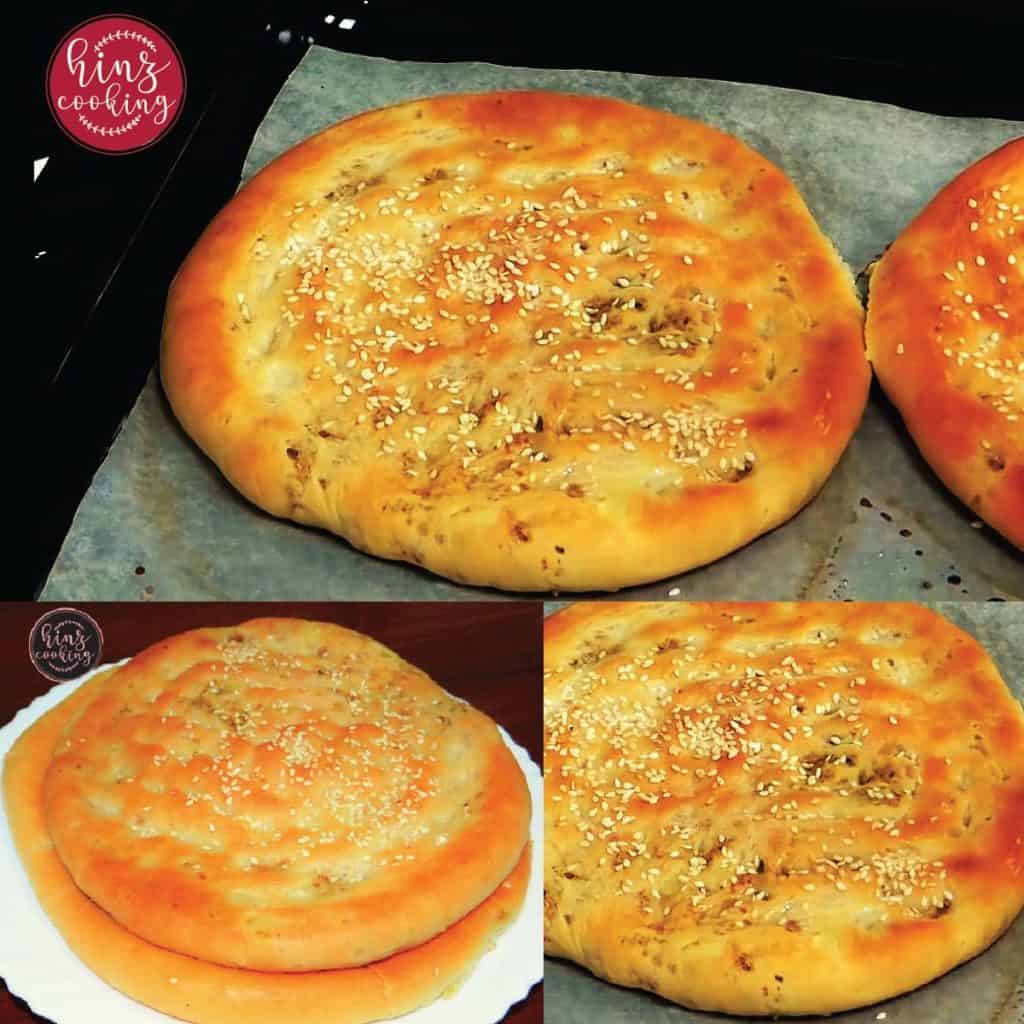
Step 15 — Bake Preheat oven to 200°C (392°F) for 10 minutes. Line a baking tray with foil and brush generously with oil. Place naans on the tray. Bake 12–15 minutes until golden with lightly toasted sesame seeds. Check at 12 minutes — every oven differs. For a charred crust: broil/grill for the final 60–90 seconds.
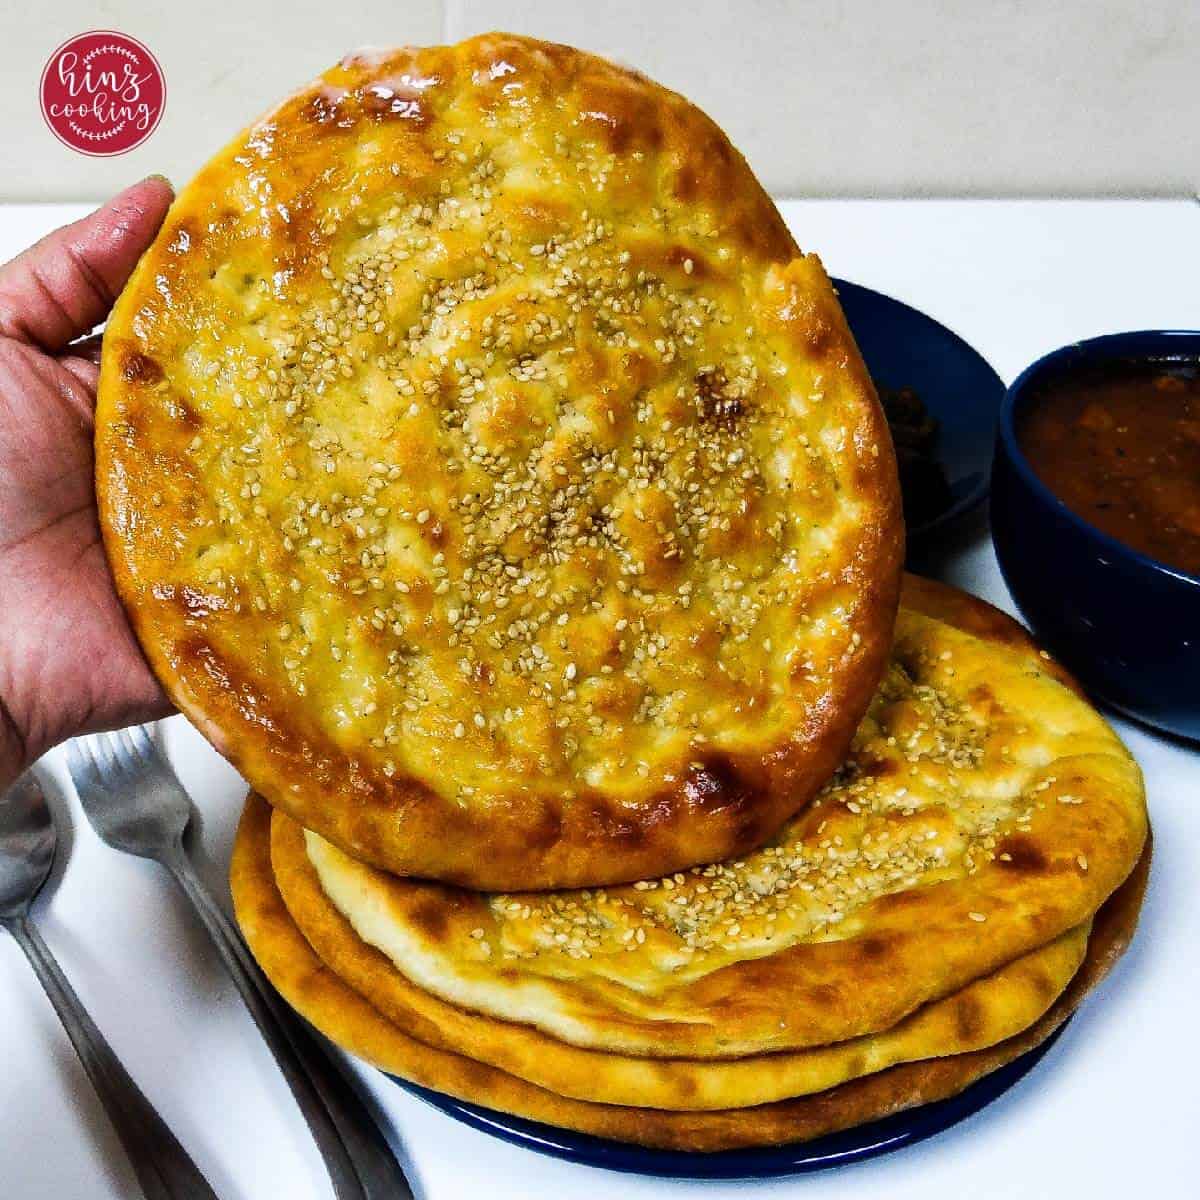
Step 16 — Butter finish Brush immediately with melted butter the moment the naan comes out of the oven. Serve hot — keema naan is best eaten within 10 minutes of baking.
How Keema Naan Should Look and Taste
Fresh from the oven, the surface is golden-brown with lightly toasted sesame seeds and the slightly darker patches where the thin edges of dough blistered against the tray. The butter glaze makes it glossy. When you lift it, it feels noticeably heavier than plain naan — you can feel the filling inside.
Slice it open (or tear it) and the filling is visible throughout — evenly distributed, aromatic, steaming slightly. The meat is fully cooked and dry enough to hold its shape but not so dry that it crumbles. You should smell garam masala and fresh coriander immediately.
The first bite has three layers of flavour: the buttery, slightly chewy naan exterior, then the savoury, warmly spiced meat filling, then the brightness of coriander and the gentle heat of green chili at the finish.
If the naan is soggy in the middle, the filling had too much moisture. If the filling tastes flat, it needed more salt or the spices weren't cooked long enough. If the dough broke open during baking, it was overstuffed or the seal wasn't tight.
How to Make Perfect Keema Naan Every Time
Dry filling is everything. The single most important rule. Cook the keema on high heat until completely dry — oil separating at the edges is your signal. Any moisture turns to steam inside the sealed naan and blows a hole through the top.
Cool the filling completely before stuffing. Hot filling softens the dough immediately on contact and makes it impossible to roll. Minimum 30 minutes room temperature rest. Speed this up by spreading on a plate in the fridge for 15 minutes.
Don't overstuff. 2–3 tablespoons per naan. If you try to get more in, the filling pushes through the dough at the thinnest points during rolling.
Seal the naan tightly. After bringing the edges together, pinch firmly and twist any excess dough off. A weak seal opens in the oven — the filling spills out, dries up on the tray, and the naan deflates.
Use leftover keema. If you have keema curry leftover from yesterday, drain it well and use it as your filling. Already-cooked, well-seasoned keema is the best shortcut for keema naan — the concentrated flavour from sitting overnight is unbeatable.
The oven must be fully preheated. 10 minutes minimum at 200°C. A cold or warm oven gives you pale, steamed naan rather than the golden, slightly charred result you want.
What to Serve with Keema Naan
Keema naan is rich and complete enough to stand alone — just add cool, simple accompaniments to balance the warmth of the spiced filling:
- Raita — cold, creamy yogurt with fresh coriander and cumin. The essential pairing.
- Green chutney — the sharp, herby freshness cuts through the richness perfectly.
- Sliced raw onion and lemon wedges — the classic Lahori street food accompaniment. Squeeze the lemon over the filling side as you eat.
- Seekh kabab — if serving to a group, keema naan and seekh kabab together is a Lahori street food combination.
- Plain yogurt — simpler than raita and just as effective for cooling the heat of the filling.
Frequently Asked Questions
Keema is a form of ground meat or minced meat of mutton, lamb, beef, or chicken. The meat is grounded thick or thin on the basis of people's choice.
Traditionally beef or mutton mince is used for Pakistani keema naan — both give a rich, deep flavour that pairs well with garam masala. Lamb mince is the closest equivalent in UK and Australian supermarkets and works equally well. Chicken mince produces a lighter, milder filling — good for those who prefer less richness. All three use exactly the same spice quantities and technique. The key for all types: the filling must be cooked until completely dry before stuffing.
Keema naans are soft, buttery, and chewy in flavor. It has a fluffy texture, filled with ground meat (keema) stuffing that makes it tasty after baking.
Yes — this is one of the best shortcuts in Pakistani home cooking. Take leftover keema curry, spread it in a dry pan over high heat, and cook until all liquid has evaporated and the meat is dry. Let it cool completely. Use exactly as you would fresh-made filling. The concentrated flavor from overnight resting makes it even more delicious than freshly made keema.
Yes — use the no-yeast dough base from my garlic naan without yeast recipe. The same baking soda and yogurt dough works as the naan base. The result is slightly less fluffy than the yeast version but ready in 20 minutes with no resting time. Use exactly the same keema filling and baking method.
Yes, it is! But the level of spiciness can be managed if you are making it at home. Green chilies and red chili powder are the main ingredients to add spiciness to keema. There is no spice in naan!
Make sure the keema is not watery. If it is then cook on high heat to evaporate water. This is one of the main factor of soggy naan.
Use the proper quantity of flour, yeast, yogurt, and oil. Monitor the water while making dough. Make a soft dough! Properly knead the dough and give it a resting time to get settled. Now make the naan, it will be fluffy and soft.
Yes — keema naan contains both carbohydrate (from the leavened dough) and protein (from the minced meat filling), making it nutritionally balanced as a main meal. Serve with raita and a simple salad and you have a complete Pakistani dinner. One keema naan is typically enough for one person as a main course.
Keema naan uses leavened yeast dough and is baked in an oven — the result is soft, fluffy, and slightly chewy like restaurant naan. Keema paratha uses unleavened whole wheat dough and is cooked on a tawa/griddle with oil — thinner, crispier, and denser. Both use the same spiced minced meat filling. Naan is richer and more of a special-occasion bread; paratha is the everyday version.
Yes — and the air fryer gives an excellent result for keema naan, with a crispier exterior than the oven method. The key difference from plain naan is temperature: cook keema naan at a slightly lower heat — 175°C (350°F) rather than the 190°C used for garlic or plain naan. The meat filling retains moisture during cooking and needs a gentler, slightly longer heat to cook the naan through without the surface over-browning before the inside is done.
Preheat your air fryer at 175°C for 3 minutes. Lightly oil the basket. Place one shaped, milk-washed, sesame-topped keema naan in the basket — check that there is at least 3cm clearance above it as the dough puffs significantly. Air fry for 8–10 minutes until the surface is golden with lightly toasted sesame seeds. Do not open the basket in the first 5 minutes. Check at 8 minutes — if the surface is golden and the naan feels firm when you press the center gently, it is done.
Brush immediately with melted butter on removal. The air fryer keema naan will be noticeably crispier on the outside than the oven version — the filling inside stays moist and fully cooked. For larger or more generously stuffed naans, add 1–2 extra minutes. As with the oven method, the filling must be completely dry before stuffing — any moisture in the keema will steam aggressively inside the air fryer's intense circulating heat and can blow a hole through the top of the naan.
More Naan Recipes from My Kitchen
Keema naan is just one of the naan breads I make regularly in my Dubai kitchen. If you love stuffed and flavoured naans, explore the full collection:
- Aloo Kulcha — similar to aloo naan but made with a slightly different dough. The Punjabi street food favourite.
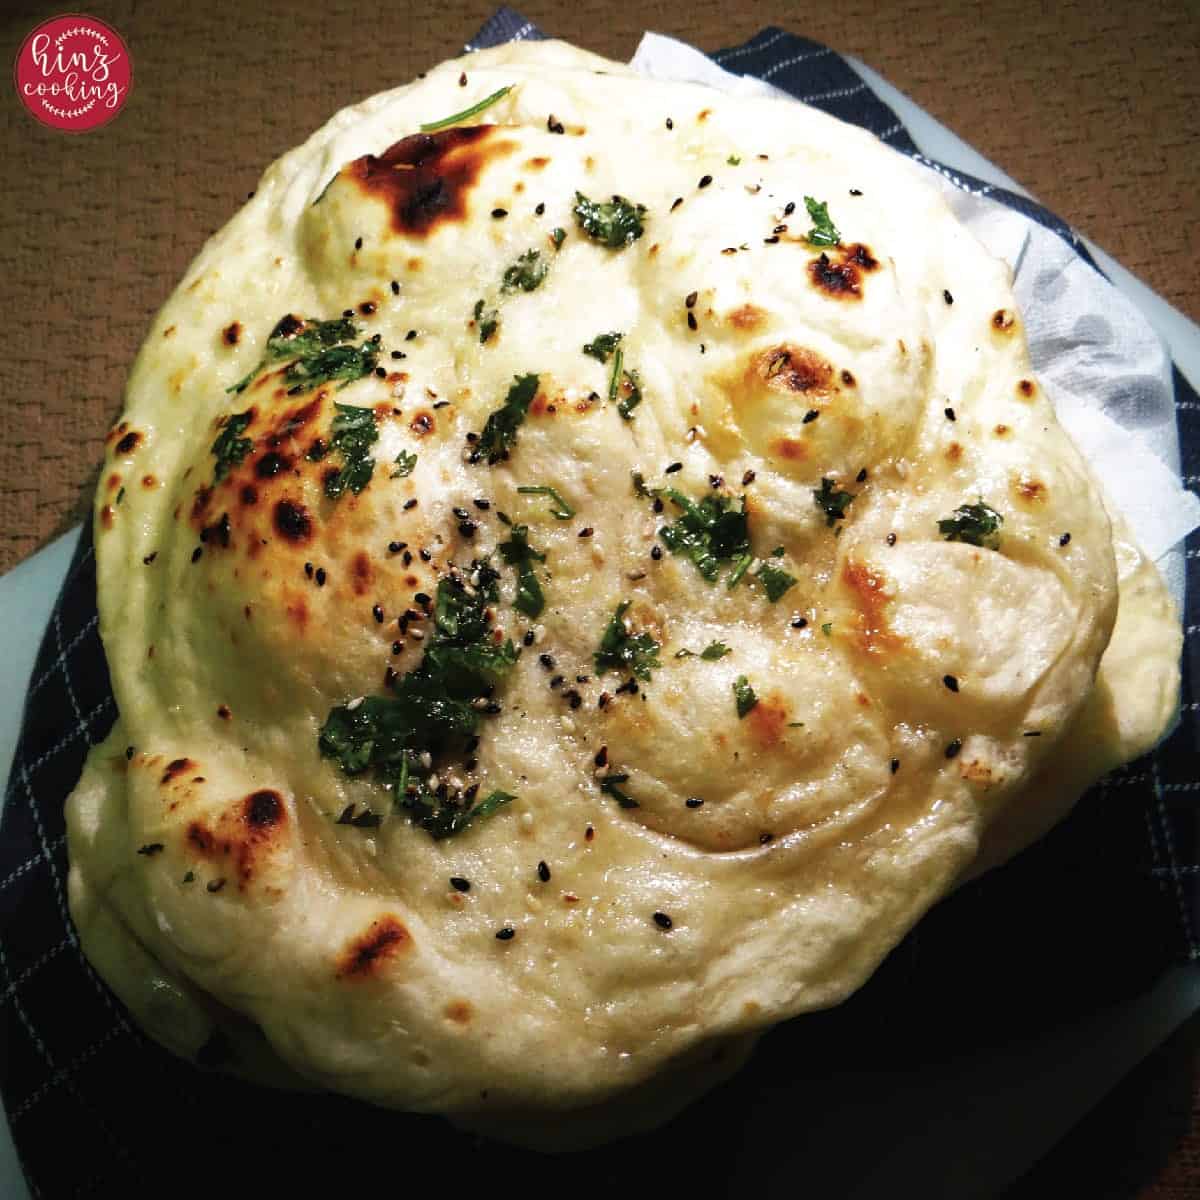
- Roghni Naan — Pakistan's buttery celebration bread. Soft, sesame-topped, and brushed with ghee. The naan that appears at every wedding and Eid table.
- Aloo Naan — spiced potato-stuffed naan. The vegetarian counterpart to keema naan — same dough, lighter filling. Made in oven, tawa, or air fryer.
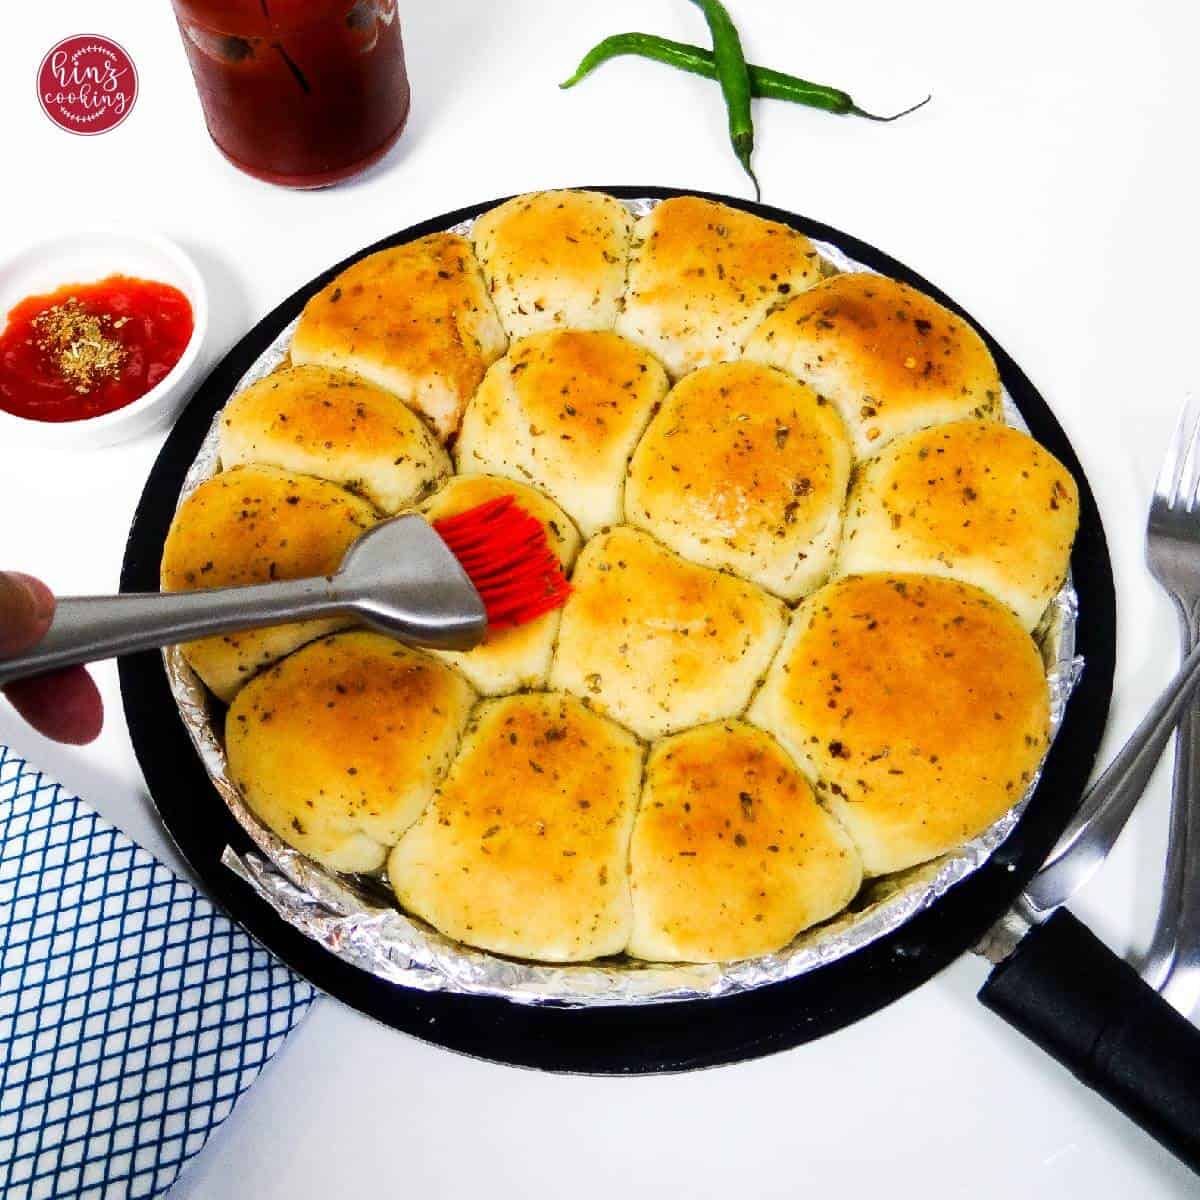
- Garlic Naan — no yeast, ready in 20 minutes. The best-known naan in Western restaurants — made better at home with double garlic.
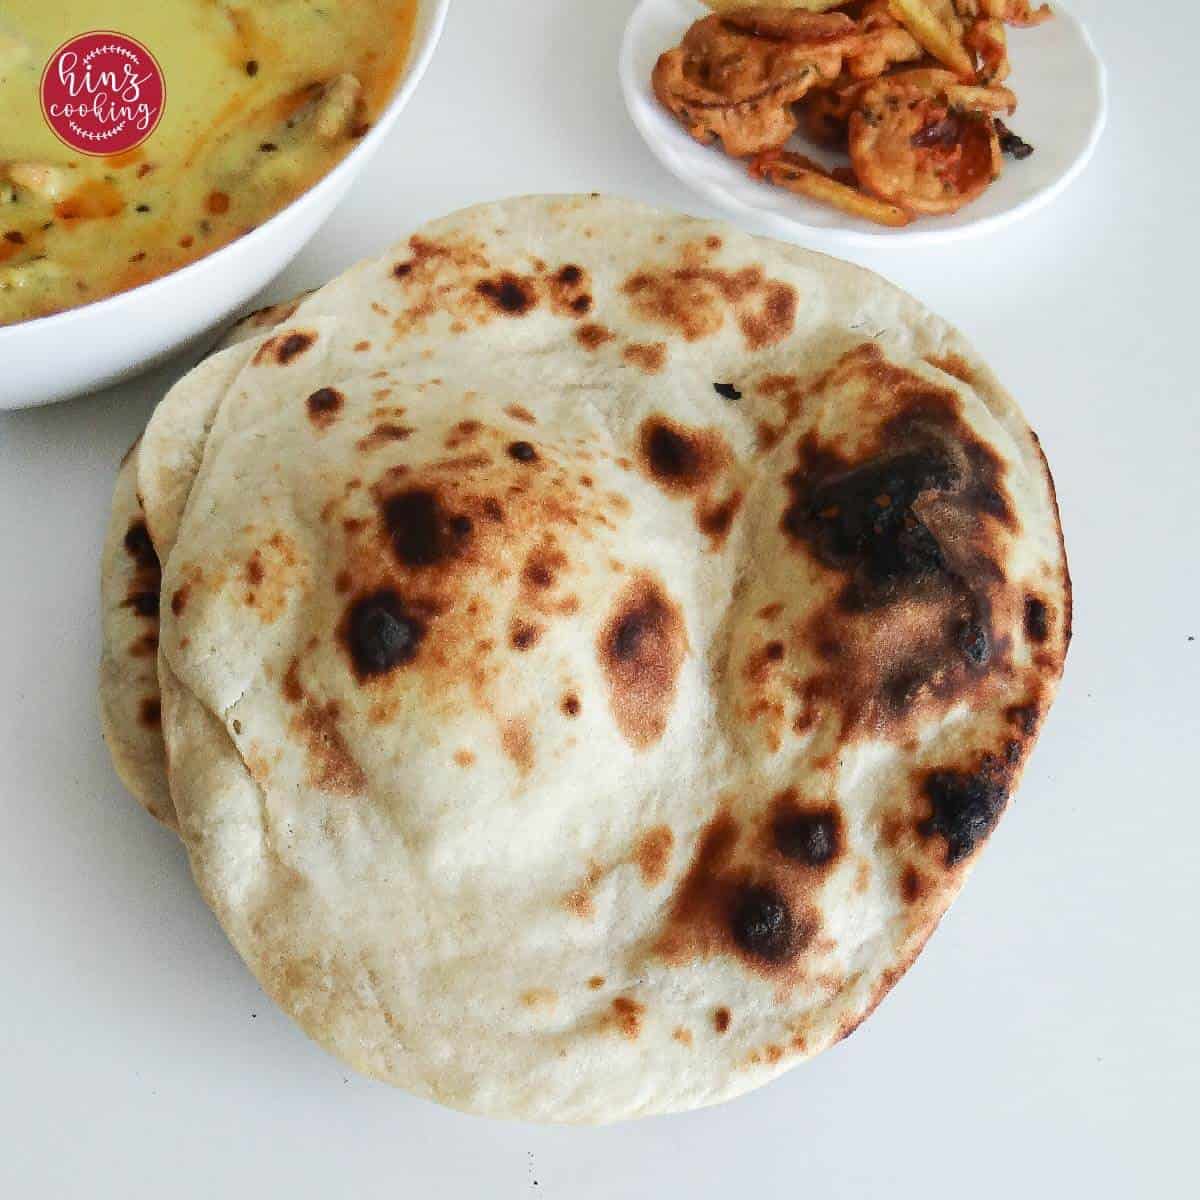
- Tandoori Naan — simple plain naan on a tawa without yeast. The everyday naan to have with any curry or kebab.
🥣 Do you like to try keema naan in air fryer?
⭐ Rate this recipe below
💬 Drop your questions in the comments
📲 Follow along on Instagram for more recipes.
Note: If you prefer to make your Keema Naan using raw mince (keema) rather than cooked, please check the comments section below. I have shared detailed, step-by-step instructions in a reply there.

Keema Naan — Spiced Minced Meat Stuffed Naan (Lahori Style)
Equipment
- Heavy pan (for keema)
- Large dough mixing bowl
- Oven tray with parchment paper
- Rolling Pin
Ingredients
Keema Stage 1 (cook the mince)
- 300 g Mutton or lamb mince (keema) Beef mince is equally authentic and most common in Lahori street food. Chicken for a lighter version. All three use same quantities.
- 1 teaspoon Ginger garlic paste, fresh Added with raw mince — cooks for 25 minutes to build deep integrated garlic flavor
- ½ teaspoon Salt Season generously — filling needs to punch through the naan dough
- 1 teaspoon Coriander powder Primary spice note — earthy, citrus-like warmth
- 1 teaspoon Red chili powder Full teaspoon = medium-hot. Reduce to ½ for mild, increase for Lahori street heat
- 1 teaspoon Turmeric powder Warm golden color — use exactly 1 tsp, too much makes it bitter
- 1 teaspoon Garam masala powder The signature warm spice — develops over the 25-minute cook
- 240 ml Water (1 glass) Tenderizes the meat during cooking. Must fully evaporate — this is the drying stage
Keema Stage 2 (tarka — flavour finish)
- 2 teaspoon Oil Used in a separate pan for the tempering (tarka). The two-stage method is the Lahori technique — cooking mince and tarka separately then combining gives deeper, layered flavor
- ½ teaspoon Cumin seeds (zeera) First into hot oil — bloom 10–15 seconds until darkened and nutty
- ½ teaspoon Coriander seeds (sabut dhania) Added with cumin — whole seeds give a textural, citrusy note different from powder
- 1 medium Onion, finely chopped Sauté until softened and lightly golden — should melt into the filling
- 2 teaspoon Fresh coriander (cilantro), finely chopped Added OFF the heat at the very end. Never cook it — the fresh herbal note is the signature top flavor
- 3×3 inch Fresh ginger, julienned (matchstick) Thin ginger strips that stay slightly textural — part of the authentic street food experience
- 2 Green chilies, finely chopped Brighter, fresher heat than the chili powder in Stage 1 — both are needed
Naan Dough
- 100 ml Lukewarm water (for yeast) 40–43°C — warm on wrist, not hot. Too hot kills yeast instantly
- 1 teaspoon Sugar Feeds yeast during activation
- 2 teaspoons Instant yeast (7g) Always proof in warm water + sugar 10 minutes first. Must produce frothy foam — if no foam, yeast is dead. Do not proceed.
- 3 cups All-purpose flour (maida), sieved Sieve before using. Do not use bread flour.
- 1 teaspoon Salt Add to flour — never directly onto the yeast before mixing
- 1 pinch Baking soda Works with yogurt for additional lift. Pinch only — too much = soapy taste
- ½ teaspoon Baking powder Extra oven lift — used alongside yeast here, different from no-yeast recipes
- 1 tablespoon Oil Keeps dough soft during 2-hour rise. Do not reduce.
- 1 tablespoon Plain yogurt, full-fat Tenderizes gluten, adds mild tang. Full-fat only
- 1 tablespoon Milk (for dough) Adds richness during kneading. Add gradually.
Topping & Finish
- 2 teaspoon Milk (for brushing naan surface) Gives golden color, helps sesame seeds grip
- 2 teaspoon White sesame seeds Press lightly onto milk-washed surface
- 1 tablespoon Butter or ghee, melted Brush within 30 seconds of cooking while steaming hot. Ghee = more authentic flavor
Instructions
Keema Stage 1 (cook the mince)
- Combine mince with spices:In a heavy pan, add mutton/lamb mince, ginger garlic paste, salt, coriander powder, red chili powder, turmeric, and garam masala. Mix thoroughly so spices coat every part of the raw mince.
- Add water and cook 25 minutes:Add 1 glass (240ml) water. Mix well. Cover with lid and cook on low-medium heat for 25 minutes until meat is tender. Check at 15 minutes — if water evaporates too fast, add a small splash more.
- Dry the filling completely:Remove lid and turn heat to high. Stir continuously until all water evaporates — the pan should look completely dry with oil pooling at the edges. Takes 5–8 minutes. Do not proceed until zero liquid remains.
Keema Stage 2 (tempering / tarka)
- Bloom the whole spices:In a separate pan, heat 2 teaspoon oil over medium heat. Add cumin seeds and coriander seeds. Sizzle 10–15 seconds until cumin darkens slightly. Do not burn.
- Sauté the aromatics:Add finely chopped onion, julienned ginger, and chopped green chilies. Sauté 2–3 minutes on medium heat until onion softens and turns lightly golden.
- Combine and finish:Add the dried keema from Stage 1 to the tarka pan. Mix on medium heat for 2 minutes. Remove from heat. Add freshly chopped coriander, mix gently. Cover for 5 minutes on lowest heat. Taste and adjust salt. Spread onto a plate and cool completely — minimum 30 minutes. The filling must be cold before stuffing.
Naan Dough
- Activate yeast:Combine lukewarm water, sugar, and yeast. Stir, cover, rest 10 minutes. Must produce visible frothy foam. If no foam — yeast is dead, discard and start again with fresh yeast.
- Combine dough ingredients:To activated yeast, add baking soda, baking powder, salt, and oil. Sieve in flour. Add yogurt and milk. Mix until rough dough forms. Add salt to the flour, not directly onto the yeast.
- Knead 8–10 minutes:Knead by hand until smooth, soft, and slightly tacky. Should spring back slowly when pressed. Add warm water 1 teaspoon at a time if stiff. Brush thin layer of oil over dough ball.
- Rise 2 hours:Cover tightly with plastic wrap or damp cloth. Rest in warm draught-free spot 2 hours until doubled. After rising, punch down and knead 2 minutes until smooth. (Overnight in the fridge = the most flavourful version of this recipe).
Shape, Fill & Cook
- Divide and fill:Divide dough into 6 equal balls. Roll one ball to a 15cm circle. Place 2–3 tablespoon of fully cooled keema filling in the center — leave 3cm clean edge. Bring edges up, pinch firmly together at top to seal completely. Twist off excess dough. Place sealed-side down.
- Shape and top:Dust sealed ball lightly in flour. Flatten with hands then roll with a pin to 20–22cm oval. Apply gentle even pressure. Press dimple marks across surface with fingertips. Brush generously with milk. Sprinkle sesame seeds and press lightly with palm.
Naan Cooking - Oven Method (Priority 1)
- Preheat oven to 180–200°C (356–392°F) for 10 minutes minimum. Line tray with parchment paper. Grease generously with oil.
- Place naans with space between each. Bake 10–12 minutes until golden with toasted sesame seeds. Check at 10 minutes — press center gently, should feel firm. For tandoori char: broil/grill the final 90 seconds.
- Brush immediately with melted butter or ghee while steaming hot. Serve within 10 minutes.
Air Fryer Method (Priority 2)
- Preheat air fryer to 175°C (350°F) for 3 minutes. Lightly oil basket. Use 175°C — lower than plain naan (190°C). The lower temperature gives the meat filling time to heat through.
- Place one naan in basket. Check 3cm clearance above. Air fry at 175°C for 8–10 minutes. Do not open basket in first 5 minutes. Check at 8 minutes — puffed and golden. Add 1–2 more minutes if pale.
- Remove and brush with melted butter immediately. For softer surface: wrap in kitchen towel for 90 seconds after buttering.
Tawa Stovetop Method (Priority 3)
- Preheat cast iron tawa or heavy skillet on medium heat for 3–4 minutes. Medium only — not high. High heat browns the base before the filling heats through.
- Place naan on dry tawa. Cover immediately with lid. Cook on medium heat 2–3 minutes — the trapped steam heats the filling while the base cooks. Remove lid: base should show golden spots, surface puffed. Flip with tongs.
- Cook second side uncovered 2–3 minutes until golden spots appear. Apply butter to the top surface while it cooks. Remove and serve immediately.
Video
Notes
- Dry filling is the #1 rule. Any moisture in the keema turns to steam during baking and blows a hole through the naan top. Cook on high heat until the pan is completely dry — oil pooling at edges is your signal. You cannot over-dry keema for stuffing.
- Why the two-stage method matters. Stage 1 tenderises the meat and builds spice depth over 25 minutes. Stage 2 tarka adds a fresh aromatic layer that would burn if added from the beginning. Combining into one pan loses the layered flavour that makes Lahori keema naan distinctive.
- Cool filling completely — 30 minutes minimum. Hot filling weakens the dough on contact. Fridge for 15 minutes speeds this up.
- Air fryer temperature: always 175°C not 190°C. The lower temperature gives the meat filling time to heat through before the outside overbrowns. Add 2 extra minutes compared to plain naan timing.
- Tawa — always cover with a lid for the first 2 minutes. The trapped steam heats the filling through while the base cooks. Without the lid, the base browns before the filling is warm.
- Leftover keema makes the best filling. Leftover keema curry or keema fry — drain completely, cook dry on high heat, cool. The concentrated overnight flavor is better than freshly made. This is the version I make most at home.
- Meat choices. Mutton/lamb = deepest traditional flavour. Beef = most common in Lahori street food. Chicken = lighter version — add an extra ½ teaspoon garam masala. All three use exactly the same recipe.
- Raw keema option. Mix raw mince with all spices and aromatics, stuff and bake at 220°C (428°F) for 15 minutes. The pre-cooked method gives better flavour control and is recommended for beginners.
- Reheating. Microwave 90 seconds then 1 minute each side on a hot dry skillet with butter. Air fryer reheat at 160°C for 3–4 minutes gives the best result — surface crisps back up beautifully.

Shahzad J Jaffari
How to make qeemay wala nan with raw mutton Qeema, without pre preparing
Hinz
Great question, Shahzad! Yes, you can absolutely make keema naan with raw mutton keema — here's exactly how to do it:
For raw keema stuffing, mix together:
300g raw mutton mince (finely ground — ask your butcher for a fine grind)
1 tsp ginger garlic paste
1 medium onion, very finely chopped or grated
2 green chilies, finely chopped
2 tbsp fresh coriander, finely chopped
1 tsp coriander powder
1 tsp red chili powder
½ tsp garam masala
½ tsp salt
Julienned ginger (optional)
Mix everything together thoroughly until well combined. The raw stuffing is ready — no cooking needed.
Two important tips for raw keema:
First, make sure the onion is very finely chopped or grated — large onion pieces release water during baking which can make the naan soggy. Squeezing out any excess water from the grated onion before mixing is even better.
Second, bake at a higher temperature — 220°C (428°F) for 15 minutes rather than the usual 180°C for 10–12 minutes. The higher heat ensures the raw mutton cooks through completely inside the sealed naan. Always check that the filling is piping hot and fully cooked before serving.
The raw method gives a slightly juicier filling since the meat cooks inside the sealed dough and all the juices stay trapped inside. The pre-cooked method in the recipe above gives more control over the spicing and a drier filling that is less likely to make the naan soggy — which is why I recommend it for beginners. But both are delicious — try both and see which you prefer!
Let me know how it turns out! 😊
— Hina