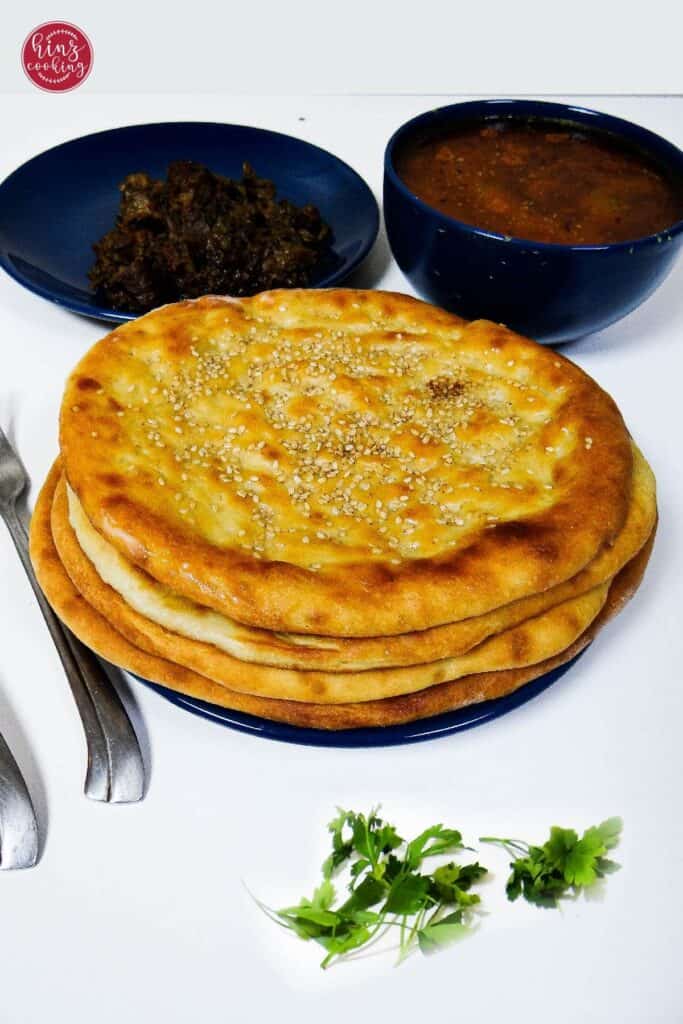
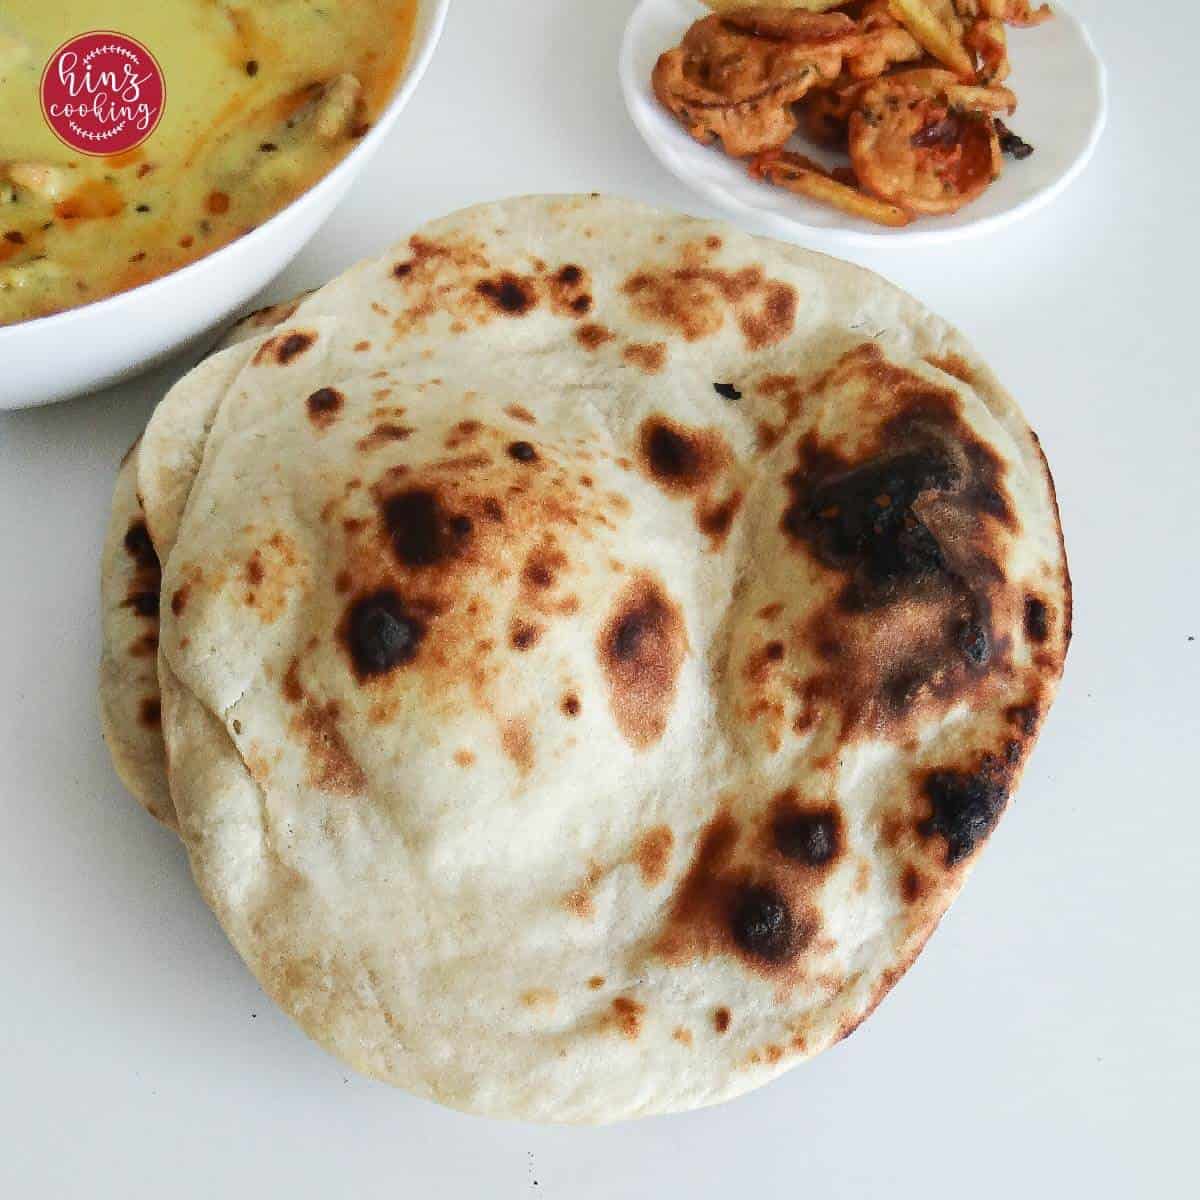
If you've ever pulled a piece of warm, pillowy naan from a basket at your favorite Pakistani or Indian restaurant and wondered how to make it at home — this is the recipe. Roghni naan is Pakistan's version of butter naan: a soft, leavened flatbread made rich with ghee, yogurt, and milk, topped with sesame seeds, and finished with a generous brush of melted butter the moment it comes out of the oven. It's the bread served at Pakistani weddings, Eid celebrations, and roadside dhabas — and it's far easier to make at home than most people expect. No tandoor needed. Your oven, stovetop, or grill all work beautifully.
I've been making this recipe for over 8 years, testing it dozens of times across my Dubai kitchen. The version below is the one I keep coming back to — and the one my family asks for every time.
Growing up, making naan at home was more than just cooking — it was a family tradition. I still remember my mother in the kitchen, rolling out different types of naan while the irresistible aroma of freshly baked bread filled every corner of our house. She learned this art from my grandmother, and now it feels like a generational bond passed down with love. Among all the varieties, this buttery, sesame-topped Roghni Naan was always the star — soft, pillowy, and the perfect companion to kebabs and rich curries. Today, every time I make it, I’m reminded of those comforting family moments that turned naan into so much more than just bread.
Watch Recipe — How Did I Make?
Jump to:
- Watch Recipe — How Did I Make?
- What Is Roghni Naan? (And How Is It Different From Regular Butter Naan?)
- Why This Recipe Works
- Main Ingredients
- How to Make Roghni Naan
- Select Cooking Method For Roghni Naan
- Pro Tips To Make Soft Naan
- Common Mistakes To Avoid
- How To Store Leftover Naan
- What to Serve With Roghni Naan
- FAQS
- Related Naan Recipes
- Roghni Naan (Pakistani Butter Naan)
In this guide, I’ll walk you through each step — from scratch to finish — so beginners can confidently make soft, fluffy Roghni Naan at home.
This Pakistani classic is loved around the world, with many restaurants in America and Canada serving their own versions. But nothing compares to homemade naan, baked fresh with love and care.
What Is Roghni Naan? (And How Is It Different From Regular Butter Naan?)
Roghni naan is the Pakistani name for what most Western diners know as butter naan — and if you've eaten at a Pakistani or Indian restaurant, you've almost certainly had a version of it.
The word roghni comes from roghan, meaning clarified butter or ghee in Urdu and Persian. Naan simply means bread. Put them together and you have exactly what this is: a rich, ghee-enriched, leavened flatbread that is softer, more flavourful, and more indulgent than everyday roti or plain naan.
What sets roghni naan apart from standard naan is the enrichment. Where plain naan uses just flour, yeast, and water, roghni naan adds yogurt (for tang and softness), milk (for colour and tenderness), ghee or butter (baked in and brushed on top), and a topping of white sesame seeds that toast lightly in the oven heat. The result is a bread with a slightly chewy, pillowy interior, a golden sesame-dotted crust, and a buttery finish that makes it the perfect companion for bold Pakistani curries and grilled kebabs.
Traditionally, roghni naan is baked in a clay tandoor at extreme heat — around 480–900°F — which gives it those characteristic bubbles and slight char marks. At home, a very hot oven set to broil in the final minutes, a cast iron skillet, or a grill all come remarkably close to the real thing.
Roghni Naan vs Garlic Naan vs Plain Naan vs Roti — What's the Difference?
| Roghni Naan | Garlic Naan | Plain Naan | Roti | |
|---|---|---|---|---|
| Flour | All-purpose + wheat | All-purpose | All-purpose | Whole wheat only |
| Leavened? | Yes (yeast) | Yes (yeast) | Yes (yeast) | No |
| Fat added | Ghee/butter in dough + on top | Butter on top | Minimal | None or minimal |
| Topping | Sesame seeds + ghee | Garlic + butter + herbs | Plain or nigella seeds | None |
| Texture | Rich, pillowy, chewy | Soft with garlicky crust | Light, slightly chewy | Thin, dry, everyday |
| Best with | Curries, kebabs, BBQ | Curries, dipping | Any dish | Dal, sabzi, everyday meals |
| Occasion | Celebratory, restaurants | Restaurants, dinner parties | Everyday | Everyday staple |
The short answer: if you love the soft, rich naan at Pakistani and Indian restaurants, you want roghni naan. Roti is the everyday bread; roghni naan is the celebration bread.
Why This Recipe Works
- Bridges restaurant and home cooking — the combination of yogurt, milk, and ghee is exactly what gives restaurant-style naan its richness. Most home recipes skip one or two of these. This one uses all three.
- Yogurt does two jobs — it adds a mild tang that balances the richness of the ghee, and its acidity slightly breaks down the gluten, giving you a more tender chew than naan made without it.
- Double leavening — yeast for the rise and flavor, baking powder for the final puff. Both matter. The yeast develops depth over the 2-hour rest; the baking powder gives you the last burst of lift in the oven.
- Three cooking methods included — oven, stovetop, and broiler/grill. Each gives slightly different results and all are tested. Pick the one that suits your kitchen.
- The sesame seed finish is not optional — it's what makes this roghni naan and not just plain naan. The seeds toast in the oven heat and give the surface a subtle nutty flavor against the soft interior.
Main Ingredients
- All Purpose Flour (Maida): Use the best quality all-purpose flour (maida) you have — it makes a real difference. In the US and Canada, standard unbleached all-purpose flour works perfectly. Avoid bread flour here; its higher protein content makes the naan too chewy and tough.
- Yeast + Warm Water + Sugar: Dissolving yeast in lukewarm water with a little sugar helps it activate and ensures your naan turns out light and airy.
- Yogurt: Full-fat plain yogurt gives the best result. Greek yogurt works but thin it slightly with a tablespoon of water first — it's too thick at full concentration and will make the dough stiff.
- Butter/Ghee (or Oil): Ghee is the traditional choice and gives the most authentic flavour — the nuttiness of clarified butter is part of what makes roghni naan taste like restaurant naan. If you don't have ghee, unsalted butter is a perfectly good substitute. I use ghee in the dough and melted butter for brushing at the end.
- Baking Soda + Baking Powder: A small amount of these leavening agents ensures extra puff and pillowy softness.
- Salt: A must for balancing flavors and enhancing the richness of the bread.
- Topping: White sesame seeds add crunch and nuttiness, while a milk wash gives the naan its signature golden sheen once baked.

How to Make Roghni Naan
Preparing a roghni naan involves three straightforward steps. Start by creating a soft dough, then shape it into a naan form, and finally, cook it using your chosen method.
Step 1: Preparation of Naan Dough
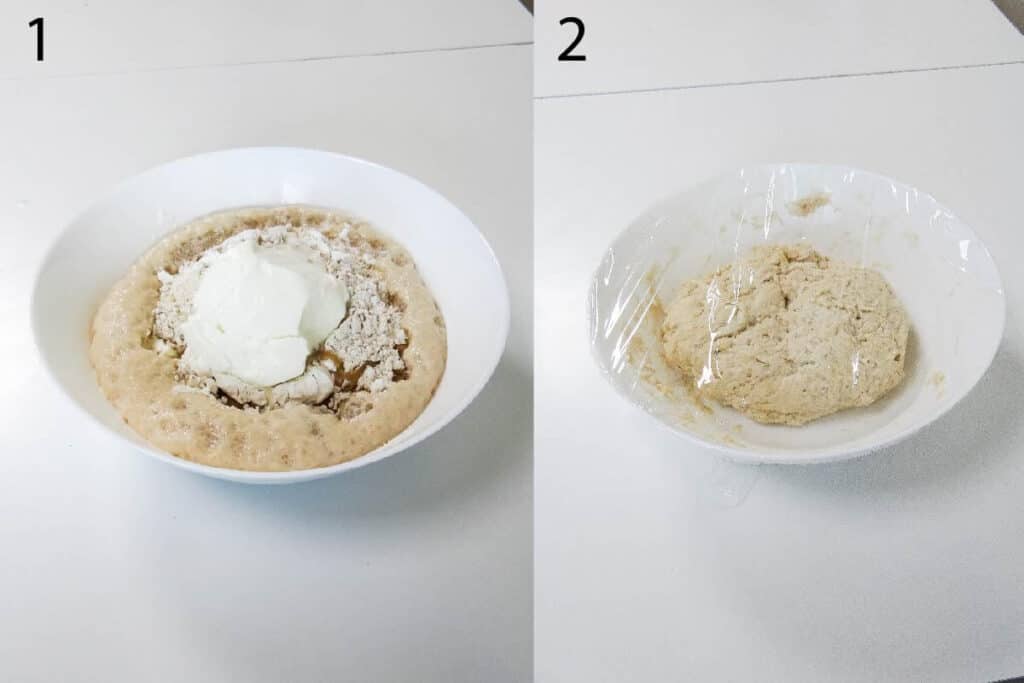
- In a large mixing bowl, combine instant yeast, sugar, and ⅓ cup of lukewarm water. Cover and let it sit for 10–15 minutes, until the yeast becomes frothy and bubbly. Once activated, add all-purpose flour, a little wheat flour, salt, baking powder, baking soda, oil or butter, and yogurt.
- Proofing: Use your hands to mix and crumble everything together until it starts to come together like dough. Gradually knead into a soft, smooth dough, adding milk as needed for moisture. Cover the bowl tightly and let the dough rest in a warm spot for about 2 hours, or until it doubles in size.
Step 2: Shaping The Naan bread
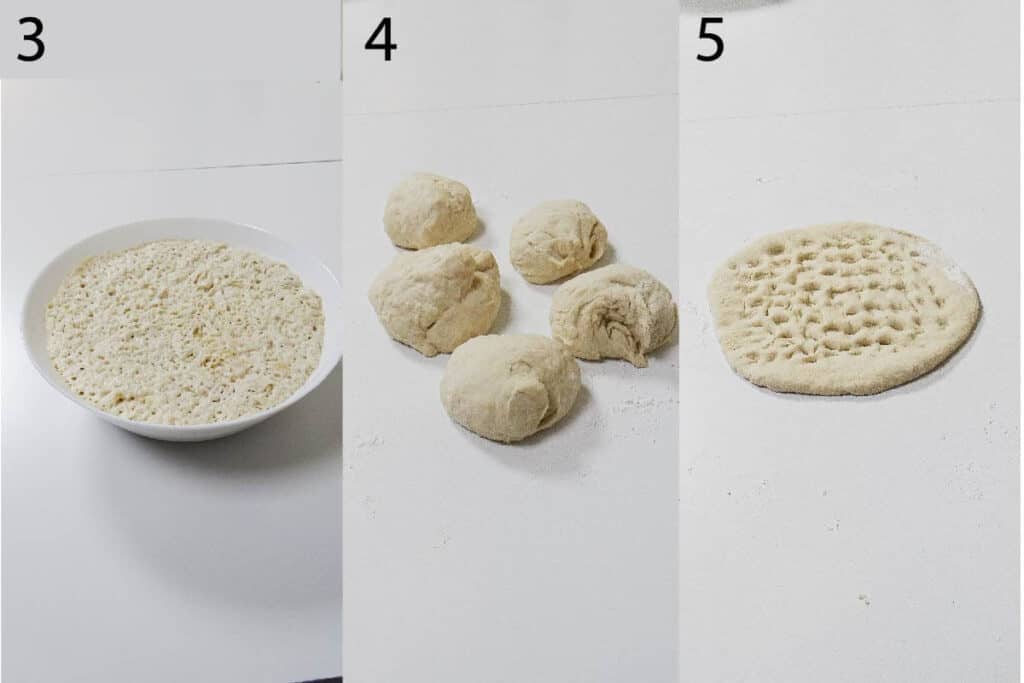
3. Once the dough has rested for 2 hours, knead it gently for 2–3 minutes until soft and springy. If it bounces back when pressed with a finger, it’s ready to shape.
4. Divide the dough into equal portions.
5. Using hands, flatten each portion into a naan on a board. (Check the video for a step-by-step visual guide).
Stretch and flatten the dough with your palms—this hand-stretching technique helps achieve that signature large, pillowy naan. A rolling pin can be used if preferred. Lightly dust with flour to prevent sticking.
Make the traditional grid pattern by pressing with your fingers or using a naan stamp.
- Tip: If using a naan stamp, press firmly but gently to avoid tearing the dough. I used to do this with finger tips so didn't use naan stamp. It's easy and time saving.
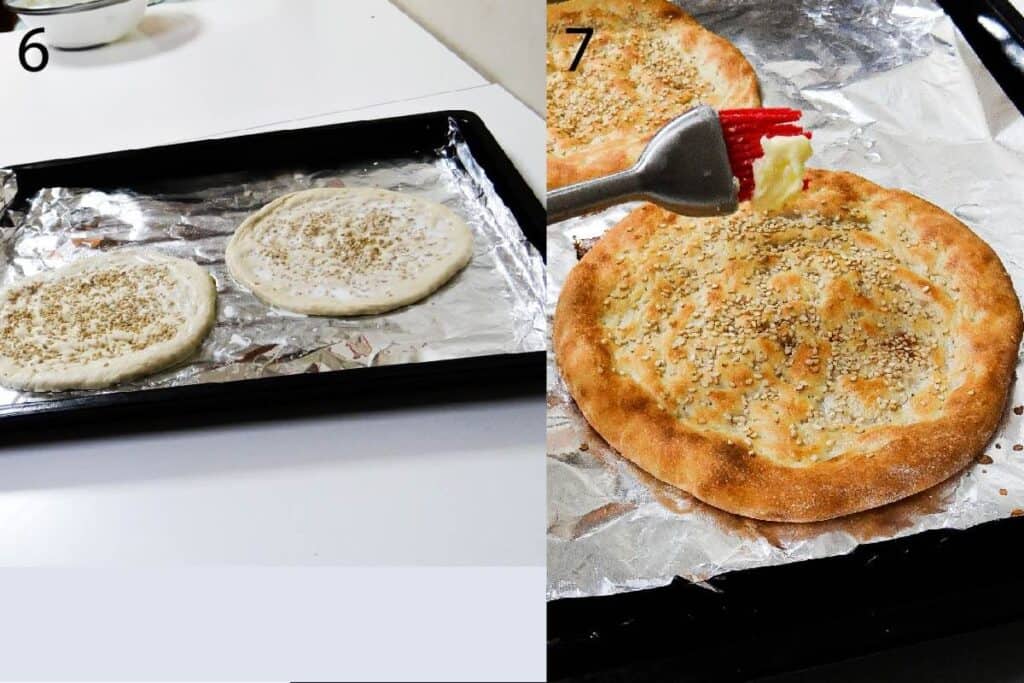
Brush the naan generously with milk and sprinkle sesame seeds on top for the authentic roghni finish. Now the naan is ready to go in preheated oven.
Step 3: Bake the Naan
- Preheat your oven to 220°C (428°F) for about 10 minutes.
- Line a baking tray with parchment paper or foil, then lightly grease it with oil.
- Place the naans on the tray, leaving enough space between each piece so they bake evenly.
- Bake at 220°C for 10–15 minutes. (In my oven, they turn out perfect at around 12 minutes).
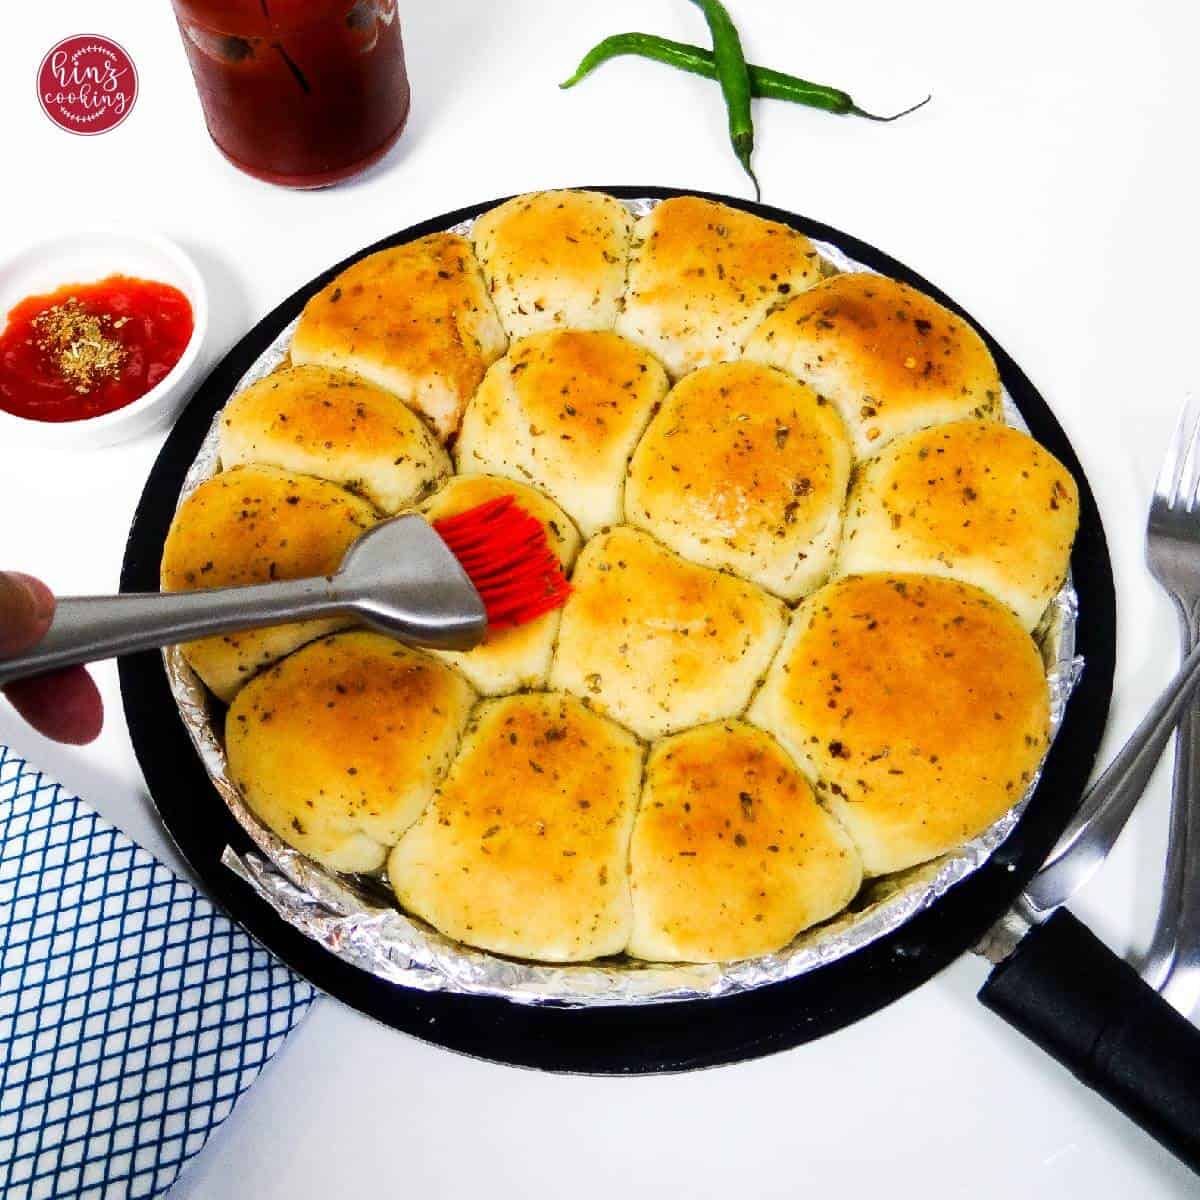
- Once baked, immediately brush the hot naan with melted butter for that irresistible shine and softness.
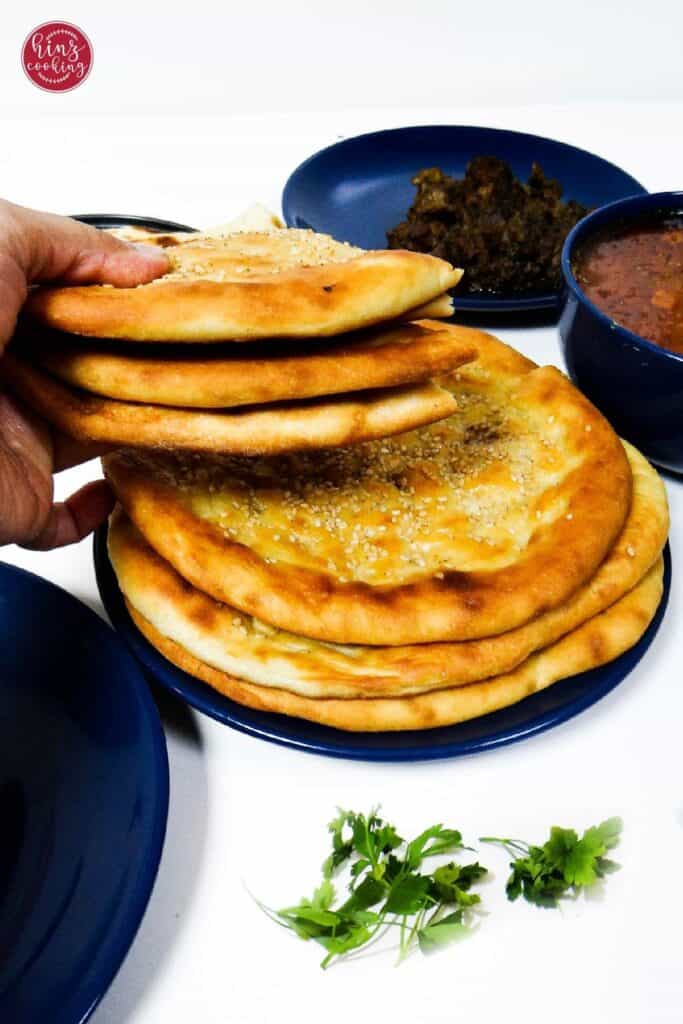
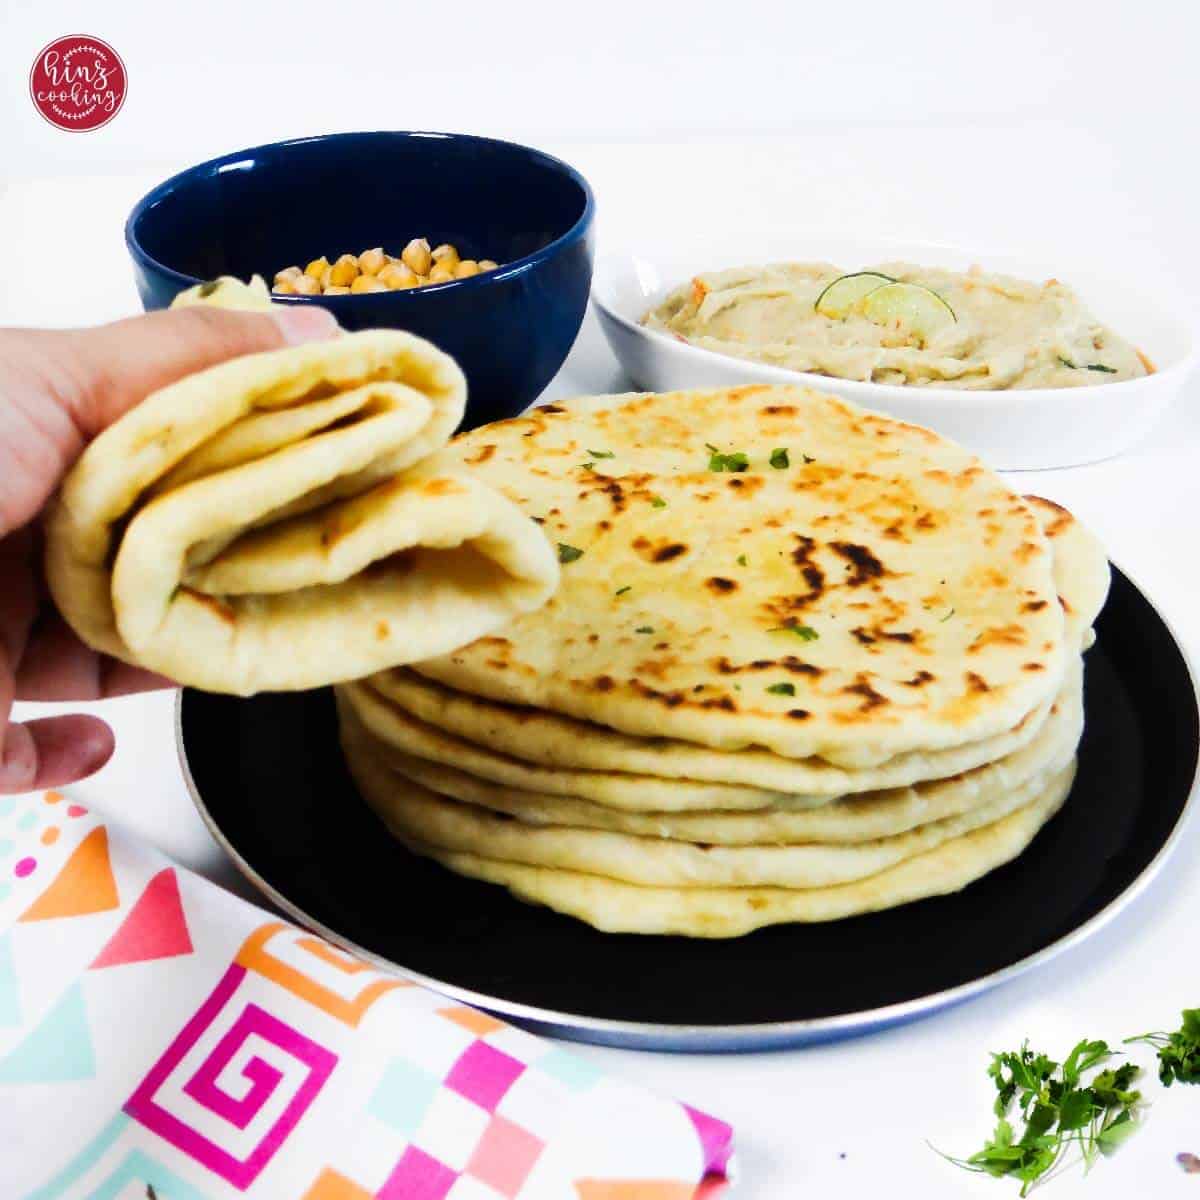
Your fluffy, golden Roghni Naans are ready! Serve them warm with your favorite curry, dal, or kebabs for a restaurant-style experience at home.
Cooking Roghni Naan on Stovetop
- Heat a heavy skillet or tawa on medium-high heat until hot.
- Place the shaped naan onto the pan and cook for 1–2 minutes, or until bubbles start to appear.
- Flip and cook the other side for another 1–2 minutes, pressing gently with a spatula to ensure even cooking.
- Once golden spots form on both sides, remove from the pan.
- Immediately brush with melted butter or ghee and sprinkle extra sesame seeds if you like.
Enjoy your stovetop Roghni Naan—soft, pillowy, and perfect with any curry or BBQ dish!
Tandoor-Style Roghni Naan (Using Grill or Broiler)
- Preheat your oven broiler or outdoor grill on high heat. Place a baking stone, heavy skillet, or pizza tray inside to heat up.
- Once hot, carefully place the rolled naan on the stone/tray.
- Cook under the broiler (or over direct grill heat) for 2–3 minutes, until the naan starts puffing and gets those classic charred spots.
- Flip and cook the other side for another 1–2 minutes, keeping a close eye to avoid burning.
- Remove from the heat, brush with melted butter or ghee, and top with sesame seeds for an authentic Roghni touch.
This method gives you the smoky, tandoor-style flavor just like naan from a desi restaurant.
Select Cooking Method For Roghni Naan
| Method | How to Cook | Time | Special Tips |
|---|---|---|---|
| Oven-Baked | Preheat oven to 220°C (428°F). Place naan on greased/parchment-lined tray. Bake until golden. | 10–15 min | Brush with butter immediately after baking for softness. |
| Stovetop (Skillet/Pan) | Heat skillet, place rolled naan, cook until bubbles form, flip and cook other side. | 5–7 min | Cover with lid for 1–2 minutes to get fluffy texture. |
| Tandoor-Style (Broiler/Grill) | Preheat broiler/grill on high. Cook naan until puffed and charred spots appear, flip and finish. | 3–5 min | For smoky flavor, add charcoal smoke at the end. |
Pro Tips To Make Soft Naan
- Check your yeast first – Good quality yeast is the foundation of fluffy naan. Test it in warm liquid; if it bubbles within 10 minutes, it’s ready. If not, replace it.
- Right temperature matters – Always use lukewarm milk or water to activate yeast. Too hot kills it, too cold slows it down.
- Knead with care – A soft, elastic dough ensures pillowy naan. Don’t rush this step.
- Give it time to rise – Place the dough in a warm, draft-free spot (like inside a switched-off microwave or oven). Resist the urge to peek while it’s resting.
- Skip excess flour – Adding too much while rolling can make naan tough or rubbery. Stick to light dusting only.
- Shape it traditionally – While tools exist, using your hands to create signature marks gives naan an authentic, rustic touch.
- Add toppings wisely – Roghni naan shines with simple finishes like a buttery glaze and sesame seeds. You can experiment with garlic, nigella seeds, or herbs—but keep it balanced.
How Roghni Naan Should Look, Feel & Taste (So You Know You've Got It Right)
This is the section most recipes leave out — but it's the most useful thing I can tell you.
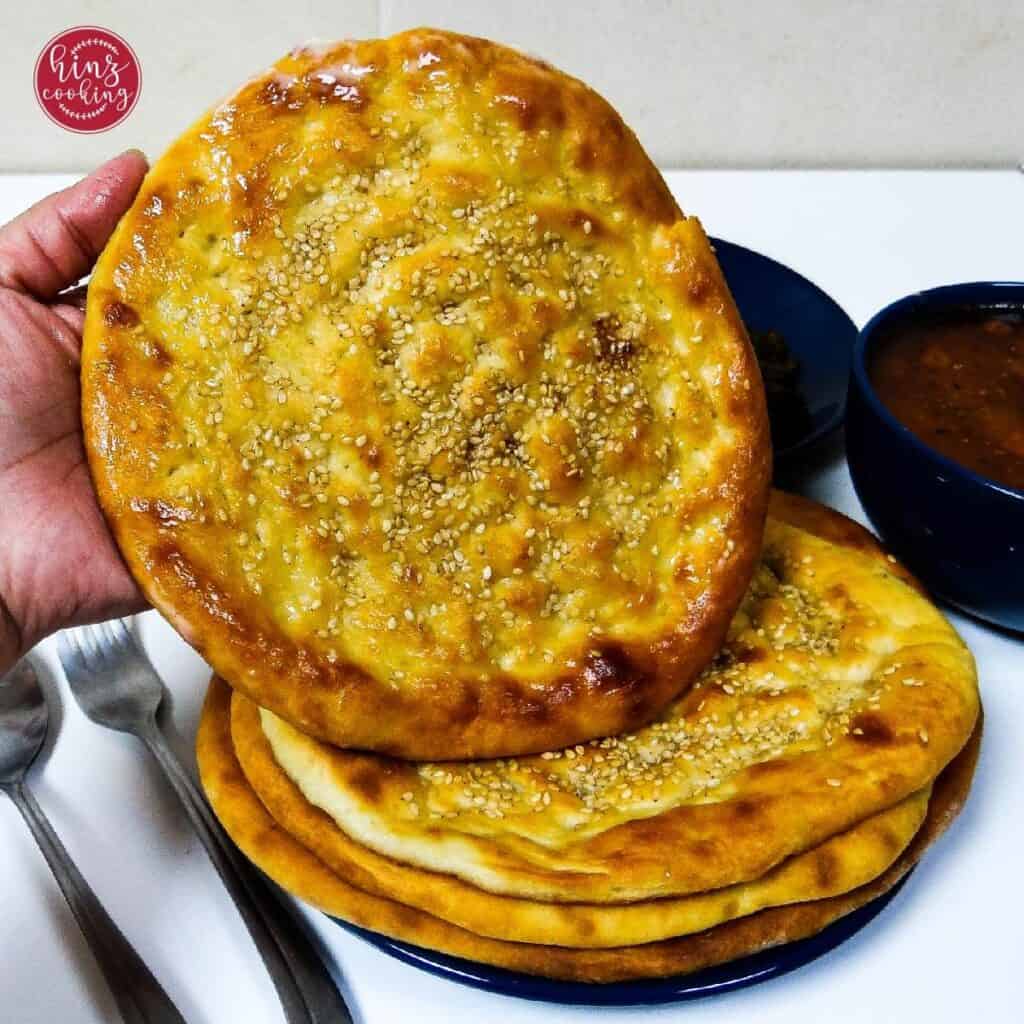
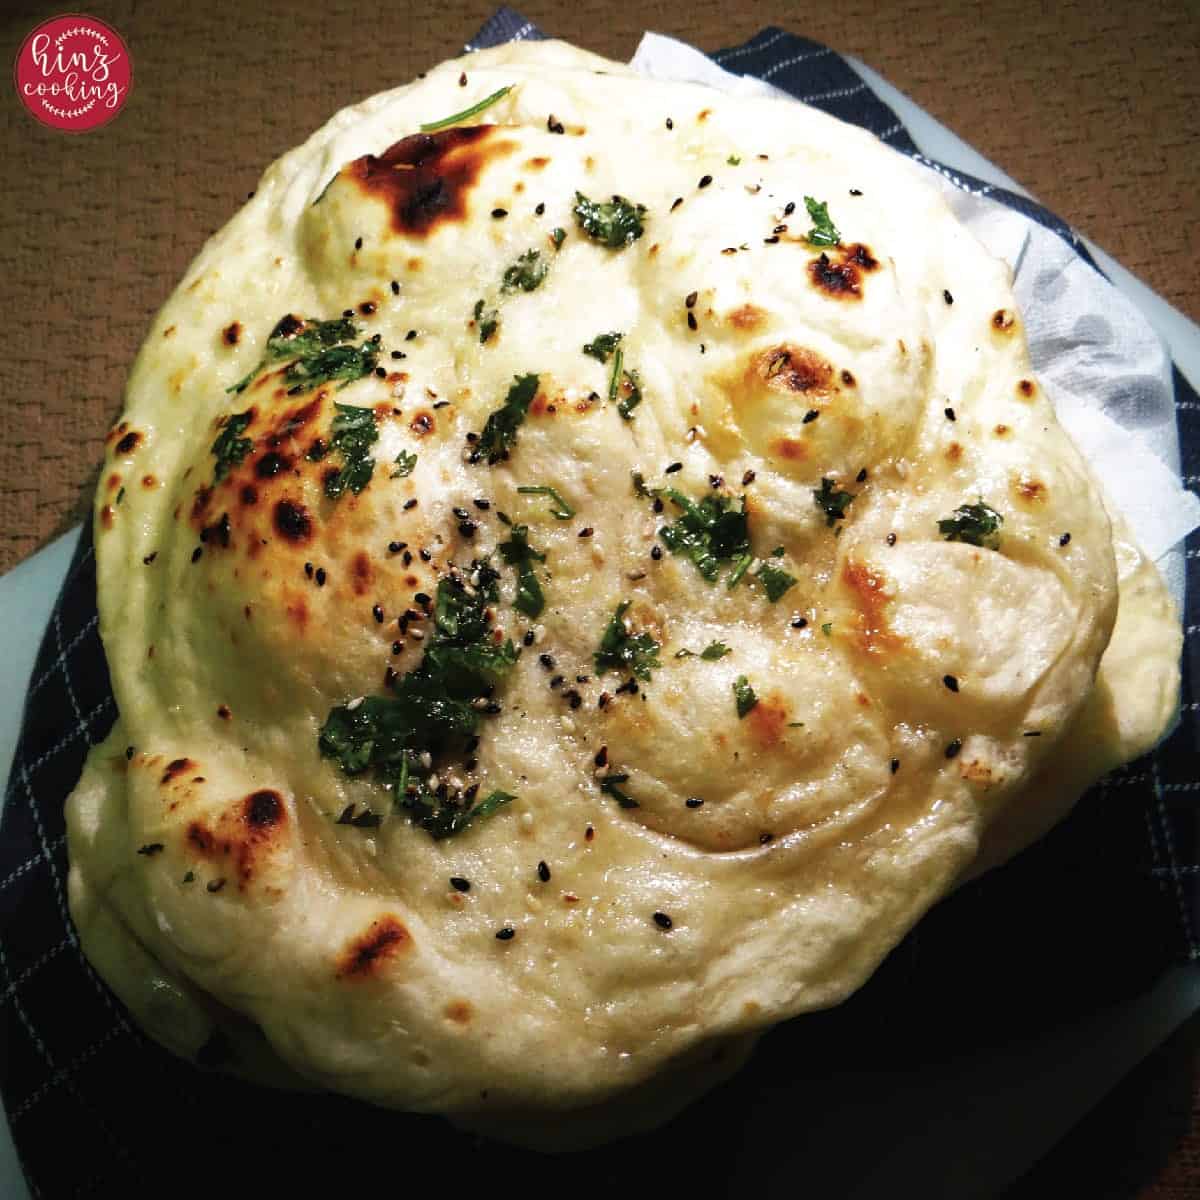
Look: Golden-brown base with pale golden sides. The sesame seeds on top should be lightly toasted — not white, not dark brown. You'll see irregular bubbles and puff marks across the surface, some areas domed higher than others. That's exactly right — perfectly uniform naan was made in a machine.
Feel: When you press the centre gently with your fingertip, it should spring back immediately. The outside should have the faintest resistance — a thin shell — before giving way to a completely soft interior. If the whole thing feels hard or dense, it was either underdone on rise time or overbaked.
Taste: Rich and slightly tangy from the yogurt. The ghee should come through as warmth and depth rather than greasiness — you taste it as richness, not as fat. The sesame seeds give a gentle nuttiness on the first bite. When you brush it with butter straight from the oven, the butter melts into the surface and the whole bread becomes glossy and fragrant. That's the moment. Serve it immediately.
Common Mistakes To Avoid
- Using inactive yeast → Always proof your yeast first. If it doesn’t foam, don’t use it.
- Overheating liquid → Hot milk or water can kill the yeast instantly. Stick to lukewarm.
- Not kneading enough → Under-kneaded dough leads to dense naan instead of soft and airy.
- Skipping the rise → Cutting short the proofing time will result in flat, chewy bread.
- Adding too much flour while rolling → Makes the naan dry and rubbery. Use minimal dusting.
- Overbaking → Even a few extra minutes can dry out naan. Watch closely for golden brown spots.
- Skipping the glaze → Brushing with butter or ghee while hot keeps naan soft, shiny, and flavorful.
How To Store Leftover Naan
- Room Temperature: Wrap naan in foil or an airtight container. It stays fresh for up to 1 day.
- Refrigerator: Store in an airtight bag for 2–3 days. Reheat on a skillet or in the oven before serving.
- Freezer: For longer storage, place naan between parchment sheets, wrap in foil, and keep in a freezer-safe bag. It lasts up to 2 months. Thaw at room temperature, then reheat.
Pro Tip: Always reheat naan with a little butter or sprinkle of water to bring back softness.
How to Freeze the Naan dough
- After kneading, let the dough rise once.
- Divide into individual portions (balls) for easy use later.
- Lightly coat each portion with oil, then wrap tightly in plastic wrap.
- Place the wrapped dough balls in a freezer bag or airtight container.
- Freeze for up to 2 months.
Pro Tip: To use, thaw overnight in the refrigerator, then let the dough rest at room temperature for 30–45 minutes before rolling and cooking.
How to Freeze the Naan?
- Let the naan cool completely after cooking.
- Place parchment paper between each piece so they don’t stick together.
- Store in an airtight freezer bag or container.
- Freeze for up to 2 months.
| Freezing Cooked Naan | Freezing Naan Dough |
| ✅ Best for quick meals | ✅ Keeps the naan softer and fresher when cooked later |
| ✅ Reheats easily in a skillet or oven | ✅ Lets you enjoy “just-made” naan anytime |
| ❌ Texture may become slightly drier after thawing | ❌ Requires thawing and proofing before cooking |
| 👉 If you love convenience, freeze cooked naan. | 👉 If you want freshly baked flavor, freeze the dough. |
How To Reheat the Naan
- On a Skillet (Best Method): Heat a pan, brush naan with butter or a few drops of water, and warm for 1–2 minutes until soft and fluffy.
- In the Oven: Wrap naan in foil and bake at 350°F (175°C) for 5–7 minutes.
- In the Microwave: Cover with a damp paper towel and heat for 20–30 seconds. Best for quick reheating but may dry out if overdone.
Pro Tip: Always brush with butter or ghee after reheating to restore flavor and softness.
What to Serve With Roghni Naan
Roghni naan is built to be paired with bold, saucy dishes — its rich, buttery flavour stands up to heavily spiced curries and smoky grilled meats in a way plain roti or rice simply can't. In Pakistani homes it's always served fresh off the tawa or out of the oven — never cold, never reheated if you can help it. Here's what it pairs best with:
- Popular → Chicken Karahi, Chicken Korma | Lamb Saag | Shahi Korma
- BBQ & Grilled → Bihari Kabab | Gola Kabab | Shami Kabab | Keema Kabab
- Curries → Lamb curry | Keema curry | Chickpea curry
- Soups & Stews → Chicken Corn Soup, or Haleem
- Dal/Veg → Toor Dal | Aloo ki Bhujia
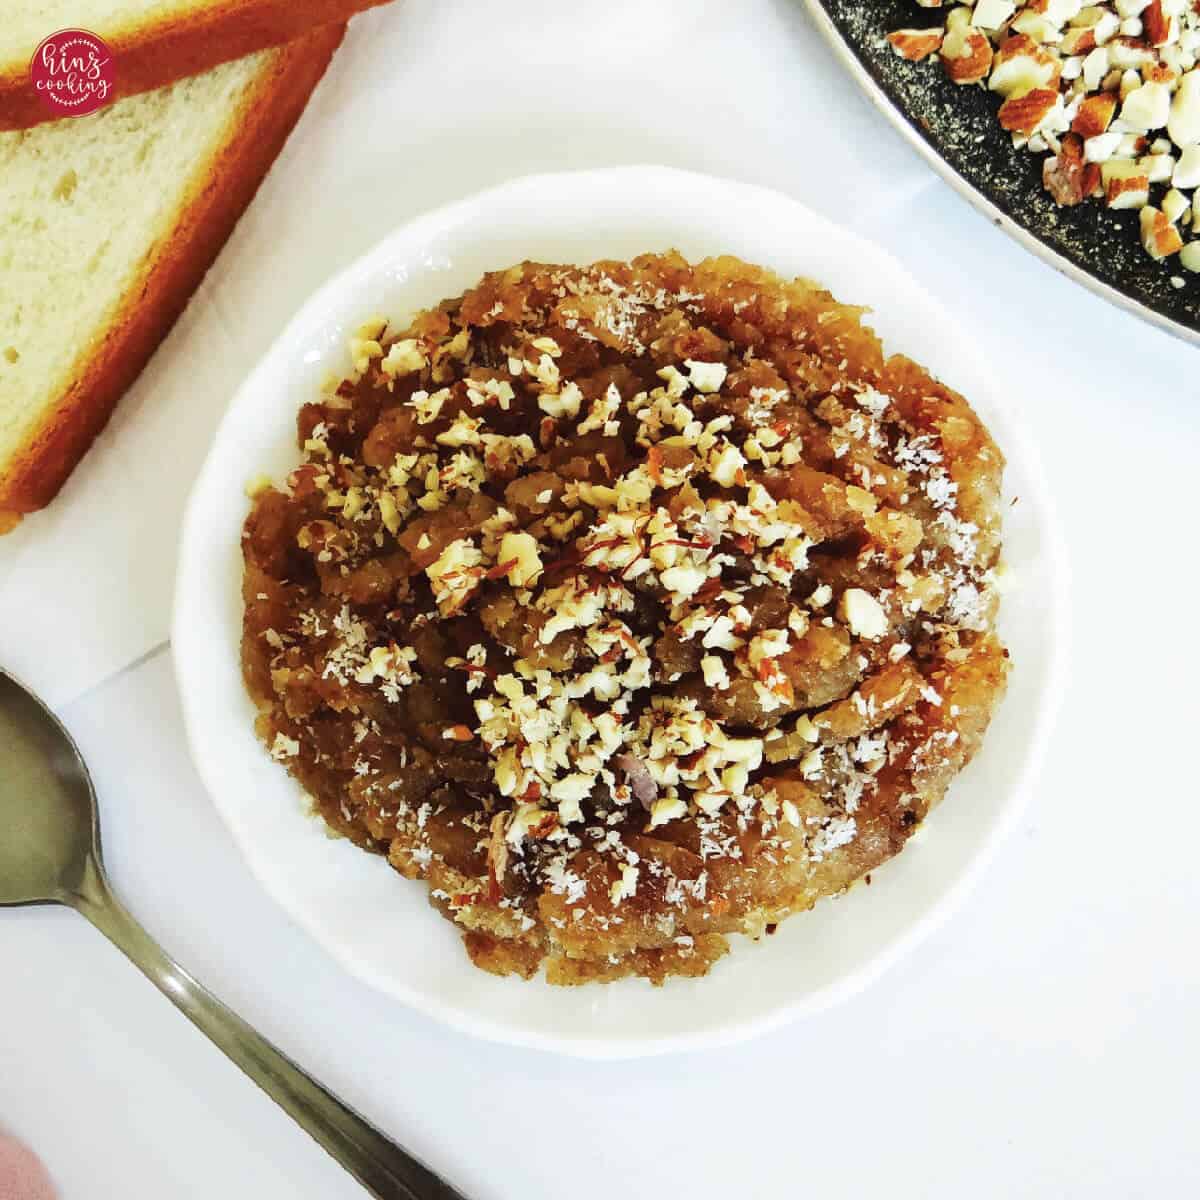
- Sweets → Phirni, Gajar ka halwa
FAQS
Roti is an unleavened flatbread, usually made with whole wheat flour (atta), water, and cooked on a skillet (tawa). It’s light, simple, and an everyday staple in South Asian households.
Naan is a leavened bread made with all-purpose flour, yeast (or baking soda), and dairy like yogurt or milk. It’s softer, richer, and traditionally baked in a tandoor.
Roghni Naan is a special variation of naan, enriched with ghee (clarified butter), milk, and topped with sesame seeds. It’s golden, buttery, and often served with kebabs, curries, or BBQ for festive meals.
Hard naan is almost always caused by one of five things:
1. The dough didn't rise long enough (give it the full 2 hours in a warm spot).
2. The yeast was inactive or dead (test it — it should foam within 10 minutes of mixing with warm water and sugar).
3. Added too much flour while rolling (use minimal dusting).
4. Overbaked it (check at 10 minutes — every oven runs slightly different).
5. Left it uncovered after baking (cover immediately with a clean kitchen towel to trap the steam and keep it soft).
Yogurt contributes to the softness and fluffiness of naan. If you're using baking powder and yeast, you can choose to leave it out.
Yes, Yeast aids in fermenting the dough, while baking powder adds a nice puffiness. Additionally, baking soda enhances the yeast's effect, ensuring your naan is soft, fluffy, and moist.
Yes! The texture might be a bit darker or slightly different, but the flavor will still be delicious. You can follow the same method for making naan with wheat flour. In this recipe, we combine wheat flour with all-purpose flour for the best results.
Apply some milk onto your hands and work the dough until it reaches your preferred softness. Before you cover the dough, make sure to brush it with oil.
In a preheated oven, at 220C, It will take 12 to 15 minutes to bake the naan. Check it with sample naan to know the standard temperature of your oven.
Yes! While yeast gives Roghni naan its soft, airy texture, you can make it without yeast by using baking powder and baking soda as leavening agents. The texture will be slightly different—more dense than the traditional version—but still soft and delicious. Adding a little yogurt helps improve the flavor and fluffiness.
The secret lies in three things:
Proper leavening – good quality yeast (or baking powder + soda in no-yeast versions) ensures a fluffy rise.
Well-kneaded dough – kneading develops gluten, giving naan its signature chewy yet soft texture.
High heat cooking – whether in a tandoor, oven, or skillet, naan needs strong heat to puff up and get those golden-brown spots.
Brushing with butter or ghee right after cooking adds the final touch of aroma and flavor.
Yes, essentially. Roghni naan is the Pakistani name for a buttery, enriched naan — the same bread that appears on Indian restaurant menus in the West as "butter naan." The key ingredients are the same: ghee or butter worked into the dough, a yogurt-milk base for softness, and butter brushed over the top after baking. The sesame seed topping is the most distinctive feature of roghni naan specifically — you won't always find that on a standard butter naan.
Absolutely — and honestly, hands are better here. Naan dough is relatively soft and only needs 8–10 minutes of hand kneading. You're looking for a smooth, slightly tacky dough that bounces back when you poke it. A stand mixer works if you have one (use the dough hook on medium for 6 minutes), but the hand-kneaded version has always come out softer in my testing. The warmth of your hands helps develop the dough in a way a metal hook can't replicate.
Related Naan Recipes
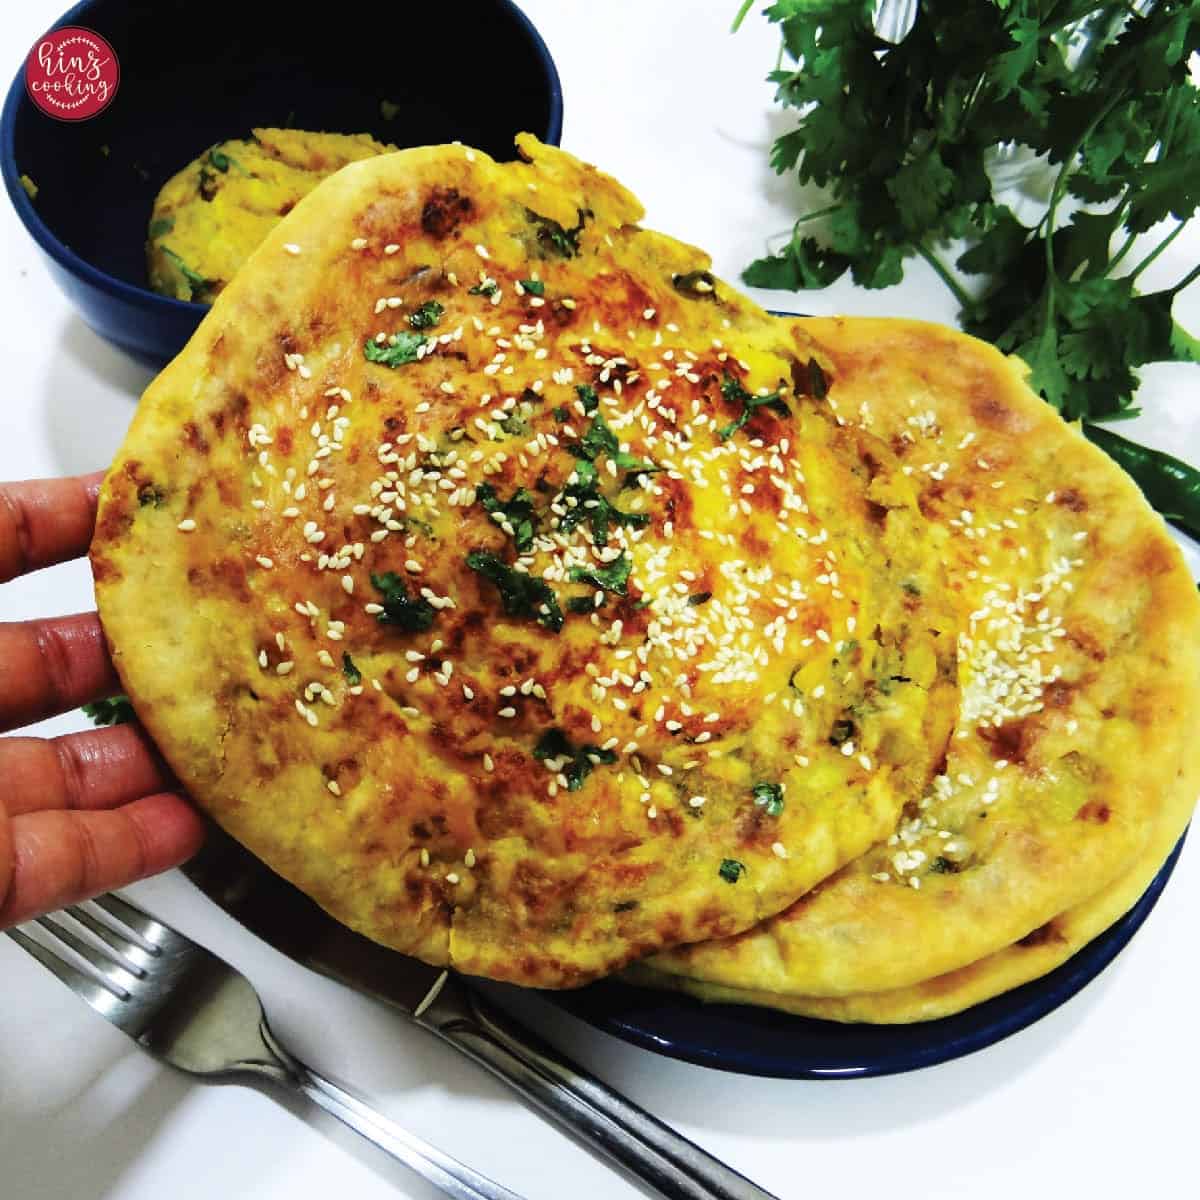
- Aloo Naan (Potato Stuffed Naan)
- Keema Naan
- Tawa Naan (Skillet version)
- Homemade Garlic Naan (Without yeast)
- Bazlama (Popular Turkish flatbread)
- Aloo Kulcha (easy stovetop version)

🥣 Love this Roghni Naan Recipe?
⭐ Rate this recipe below
💬 Drop your questions in the comments
📲 Follow along on Instagram for more recipes.

Roghni Naan (Pakistani Butter Naan)
Ingredients
Naan Dough
- 2.5 cups All Purpose Flour (Maida) Main structure of the naan. Use good quality unbleached APF — it makes a real difference to chew and color.
- 1 Cup Wheat Flour (Atta) Adds structure, slight earthy depth, and the traditional Pakistani naan color. Don't skip or substitute with more APF — the dough will be too soft to hold its shape with the high oil content.
- 11 g Instant Yeast Slightly more than a standard 7g packet — ensures a reliable rise even in cooler kitchens or with older flour. Always proof it first in the warm water before mixing.
- ½ cup Lukewarm Water (for yeast activation) Used only to activate the yeast — not as the main hydration for the dough. Temperature matters: 40–43°C (105–110°F). Too hot kills the yeast instantly.
- 1 tablespoon Sugar Feeds the yeast during activation (speeds up the froth) and adds the faintest hint of sweetness that balances the salt and richness of the ghee finish.
- 1 teaspoon Salt Controls yeast activity and balances the richness. Add it to the flour — never directly onto the yeast as it can inhibit activation.
- ½ teaspoon Baking Powder Works alongside the yeast for the final puff in the oven. Gives the naan that last burst of rise that creates the airy interior pockets.
- ⅓ teaspoon Baking Soda Reacts with the yogurt (even just 1 tablespoon of it) to create additional lift and a slightly more tender crumb. The small amount is intentional — too much makes naan taste soapy.
- 1 tablespoon Plain Yogurt (Full-Fat) Minimal compared to most naan recipes — and deliberately so. The oil (below) is handling the softness. The yogurt's job here is purely to provide mild tang and activate the baking soda.
- ⅓ cup Oil (or Melted ghee / Butter) This is the highest fat ratio of any ingredient — and intentionally so. This is what makes roghni naan richer than plain naan. Oil coats the gluten strands, keeping the naan tender and preventing it from becoming chewy or tough. Do not reduce this amount.
- warm milk (for kneading) Optional (As needed) - Add gradually while kneading until the dough is soft and slightly tacky. Milk adds colour, tenderness, and flavour that water alone cannot. Add a tablespoon at a time — the exact amount varies by flour brand and humidity.
Topping
- 2 pinches White Sesame Seeds The signature of roghni naan. They toast lightly during baking, adding a subtle nuttiness to every bite. Press them gently into the milk-washed surface so they don't fall off during cooking.
- 1 teaspoon Milk (for brushing before baking) Gives the naan its golden colour and helps sesame seeds adhere. Brush generously just before going in the oven.
Finishing
- 1 teaspoon Butter (melted, for brushing after baking) Brush immediately while the naan is still hot — the heat melts the butter into the surface, making it glossy and soft. This is non-negotiable for the roghni finish.
Instructions
Dough preparation
- Activate The Yeast: In a mixing bowl, combine ½ cup lukewarm water, 1 tablespoon sugar, and 11g instant yeast. Stir briefly, cover with a plate, and leave for 10–15 minutes. The mixture must become frothy and bubbling — this confirms your yeast is alive and active.[Note]: If nothing happens after 15 minutes, the yeast is dead. Don't continue — your naan will be flat. Start fresh with new yeast.
- Combine Dry Ingredients:To the activated yeast, add the all-purpose flour, wheat flour, salt, baking powder, and baking soda. Mix briefly with your hand to distribute the leavening agents evenly through the flour before adding the wet ingredients.
- Add wet ingredients and bring dough together:Add oil and yogurt to the flour mixture. Using your hands, crumble and mix everything together until it starts to combine. Add warm milk gradually — a tablespoon at a time — kneading as you go, until a soft dough forms. Knead for 8–10 minutes until smooth, soft, and slightly tacky. It should spring back when you press it.[Note]: The dough should feel softer than you expect — almost a little sticky. That softness is the oil working. Resist adding extra flour.
- Proofing — Rise for 2 hours:Lightly brush the dough with oil, cover the bowl tightly with plastic wrap or a damp cloth, and place in a warm draft-free spot for 2 hours until doubled in size. A switched-off oven with just the light on is ideal. Do not open or disturb the dough during this time.[Note]: Don't rush this step. The 2-hour rise isn't just about size — it's building flavor. Fast-proofed naan tastes flat even if it puffs up.
Naan Shaping
- Knock back and divide:After 2 hours, turn the risen dough onto a lightly floured surface. Knead gently for 2–3 minutes until soft and springy. Divide into equal portions — from 3.5 cups of flour you'll get approximately 6 medium naans or 4 large ones.
- Roll each ball with the help of rolling pin or hands to create flat naan.
- Shape each naan: Using your hands or a rolling pin, flatten each ball into an oval or teardrop shape, roughly 8–9 inches long and ¼ inch thick. Use minimal flour for dusting — just enough to prevent sticking. Hand-stretching gives the most authentic, uneven surface.[Note]: Irregular shapes are traditional — uniform naan was made by a machine. Don't worry about perfect edges.
- Mark, brush and top:Press the traditional dimple pattern across the surface using the fingertips of both hands — press firmly but not through the dough. Watch the video for the exact finger technique. Alternatively, use a naan stamp for uniform marks. Brush generously with milk and immediately sprinkle sesame seeds across the surface, pressing in lightly with your palm.
Cook (Choose Method)
Oven (Recommended)
- Bake at 220°C (428°F)Preheat oven to 220°C (428°F) for at least 10 minutes. Line a baking tray with parchment paper and grease lightly. Place naans with space between each. Bake for 10–15 minutes — in my oven they are perfect at 12 minutes. Watch for golden-brown tops and lightly toasted sesame seeds.[Note]: Check your first naan at 10 minutes. That becomes your benchmark — every oven runs slightly different.
- Butter finish immediately:The moment naans come out of the oven, brush generously with melted butter. Stack and cover with a clean kitchen towel to keep warm and soft while you bake the remaining naans.
- As soon as you take them out of the oven, brush with butter.
- Roghni naan is ready to serve.
Stovetop / Tawa / Griddle / Skillet
- Cook on a hot tawa or cast iron skillet:Heat a heavy skillet or tawa on medium-high for 3–4 minutes until very hot. Place naan sesame-side up on the dry pan (no oil). Cook 1–2 minutes until bubbles form across the surface. Flip and cook the other side 1–2 minutes until golden spots appear. Cover with a lid for the last 30 seconds for extra puff.[Note]: The pan must be properly hot before the naan goes in — a lukewarm pan gives you steamed, pale naan instead of the golden spotted finish.
- Butter finish immediately:Brush with melted butter or ghee straight off the pan. Sprinkle extra sesame seeds if desired. Serve immediately.
Broiler / Griller
- Preheat broiler and stone/tray:Place oven rack on the highest position. Preheat broiler/grill on full high heat with a heavy baking tray or pizza stone inside for 10 minutes. Carefully place naans on the hot surface. Broil 2–3 minutes until puffed with char spots. Flip and broil 1–2 minutes more.[Note]: Watch constantly under the broiler — it goes from perfect to burnt in under a minute.
- Butter finish immediately:Brush with melted butter or ghee immediately. This method gives the closest result to tandoor naan — slight char, smoky edge, soft interior.
Video
Notes
- Why this recipe uses ⅓ cup oil: this is higher than most naan recipes — and intentionally so. The oil coats the gluten strands, keeping each naan tender and soft for hours. Reducing it will make your naan tougher. Don't substitute with less.
- Wheat flour is not optional: the 1 cup of atta (whole wheat flour) gives the dough structure to hold the high oil content without becoming too delicate. Replacing all of it with APF produces a naan that tears too easily when shaped.
- Yeast test is non-negotiable: always proof your yeast in warm water + sugar for 10–15 minutes before adding to flour. If it doesn't foam, your yeast is inactive — using it will give you flat, dense bread. Start fresh.
- Milk for kneading — add gradually: the exact amount varies by flour brand, humidity, and temperature. Add warm milk one tablespoon at a time until the dough is soft and slightly tacky. You may need anywhere from 2 tablespoons to ¼ cup depending on your flour.
- Why my naan turned out hard: most likely cause is under-proofing (didn't rise fully for 2 hours), too much flour added while rolling, overbaking, or leaving naan uncovered after cooking. Always cover finished naan immediately with a kitchen towel.
- Make-ahead dough: after the first rise, divide into balls, coat lightly with oil, wrap each in plastic wrap, and freeze up to 2 months. To use: thaw overnight in the fridge, then rest at room temperature 30–45 minutes before shaping. Frozen dough naan tastes just as fresh as same-day.
- Storage: wrap in foil or cover with a cloth. Room temperature: 1 day. Refrigerator: up to 3 days. Freezer (baked): up to 2 months with parchment between each. Reheat on a dry skillet with a small knob of butter for 1–2 minutes.

Hinz
Here I prepared Pakistani roghni naan at home.. It was so easy and fun to make! I'll be happy if you try this recipe!