Cooking is an art — and every dish you make comes to life through the method you choose. Whether you're making a Pakistani chicken karahi, a slow-cooked Arabic mandi, or a quick weeknight pasta, the technique behind the recipe matters just as much as the ingredients.
In this complete 2026 guide, I've expanded our original list to cover all 27 essential cooking methods — including four South Asian and Middle Eastern techniques that most cooking guides completely ignore, but that you'll use every single time you cook from this blog.

As technology advances, we are witnessing the emergence of new and advanced cooking techniques that significantly aid our fast-paced lives. The instant pot, air fryer, and the latest smart cooking innovations are giving a new dimension to enhance our cooking experiences.
Jump to:
- What Are Cooking Methods?
- Categories of Cooking Methods (Dry, Moist, Combination, Specialty)
- Dry-Heat Methods
- Moist-Heat Methods
- Combination Cooking Methods
- Specialty & Modern Cooking Methods Used In 2026
- South Asian & Middle Eastern Cooking Methods
- Tips for Choosing the Right Method
- Common Mistakes & How to Avoid Them
- Pre-Cooking Techniques: Marination & Tenderizing
- Frequently Asked Questions
- Related Topics
- Final Thoughts / Cooking Experiment Ideas
What Are Cooking Methods?
A cooking method is the process or technique used to transfer heat to food — changing its texture, flavor, and appearance. Each method affects your dish differently:
- Dry-heat cooking uses air or fat to create crispness and browning.
- Moist-heat cooking uses water or steam to make food tender and juicy.
- Combination cooking blends both for deep flavor and perfect texture.
Knowing which technique to use is the key to mastering your favorite recipes — from curry to pasta, grilled meats, or roasted veggies.
Categories of Cooking Methods (Dry, Moist, Combination, Specialty)
Cooking methods can be grouped into three key categories on the basis of different techniques: dry heat, moist heat, and combination. A fourth category, known as specialty or modern cooking methods, includes techniques that utilize particular equipment or cutting-edge approaches.
Dry-Heat Methods
Dry-heat cooking methods involve the use of hot air, direct heat, or fat to cook food. They enhance the flavor through caramelization and browning, resulting in crisp and aromatic ingredients.
1. Sautéing
Sautéing is one of the most fundamental techniques in the professional and home kitchen — and one of the most misunderstood. The word comes from the French sauter, meaning "to jump," which describes exactly what happens when food hits a hot pan with a little fat: it moves, it sizzles, it colours quickly, and it's done before it has time to dry out or become tough. It is speed cooking — high heat, small amount of fat, continuous movement, short time.
How sautéing works:
The pan is preheated over medium-high to high heat before anything goes in. A small amount of fat — oil, butter, ghee, or a combination — is added and allowed to heat until it shimmers. The food then goes in and is kept moving — either by tossing the pan or stirring — so that every surface makes contact with the hot fat and the hot pan in turn. The result is food that is lightly coloured on the outside, cooked through on the inside, and done in minutes.
The key mechanism is the Maillard reaction — the chemical process that happens when proteins and natural sugars in food are exposed to temperatures above 300°F (150°C). This reaction creates hundreds of new flavour compounds simultaneously, producing that characteristic golden-brown colour and deeply savoury aroma. Sautéing, because it uses high heat and direct pan contact, triggers the Maillard reaction efficiently. This is why sautéed onions smell completely different from boiled onions — the chemistry of what happened to their surface is entirely different.
The difference between sautéing and stir-frying:
Both use high heat and a small amount of fat with continuous movement. The distinction is in the pan and the technique. Sautéing typically uses a wide, shallow sauté pan or skillet — the low sides allow moisture to escape as steam rather than condensing back onto the food. Stir-frying uses a wok with high curved sides and the food is tossed constantly at extreme heat. Sautéing is more European in tradition; stir-frying is Asian. Both achieve rapid cooking through high heat and movement, but the texture and flavour profiles differ.
What to sauté:
- Onions and aromatics — sautéing onions is the opening step of most curries, stews, pasta sauces, and soups. Golden, softened onions are the flavour base that everything else builds on. The degree of caramelisation you achieve in the onion sauté stage determines the depth of the entire dish.
- Vegetables — courgette, capsicum, mushrooms, spinach, green beans, and corn all sauté beautifully. High heat cooks them quickly while keeping texture — none of the mushiness that comes from boiling.
- Small cuts of meat — diced chicken, strips of beef, or minced meat all cook through quickly in a hot pan. Cubed paneer sautéed in ghee until golden is a classic South Asian example.
- Seafood — prawns and scallops sauté in under 3 minutes total. Overcooked prawns become rubbery — the speed of sautéing, when done correctly, is actually their protection.
- Spices and masala — in Pakistani and Indian cooking, the sautéing of whole spices in hot oil (tarka) and the sautéing of onions with ginger-garlic paste are the foundational steps of nearly every recipe on this site.
Sautéing in South Asian cooking:
The opening of almost every Pakistani and Indian recipe is a sauté. Heating oil, adding whole spices to bloom, then sautéing onions until golden — this is the base structure of karahi, biryani, dal, and dozens more. The quality of this initial sauté stage — how long the onions are cooked, how golden they become before the next ingredient is added — determines the depth of flavour of the entire dish. Rushing the sauté is the most common reason homemade curries taste shallow.
Pro tip: Never overcrowd the pan when sautéing. Too much food at once lowers the pan temperature dramatically, and the food releases steam rather than frying. Everything becomes pale and soft instead of golden and caramelised. Cook in batches if needed — the extra few minutes are always worth it.
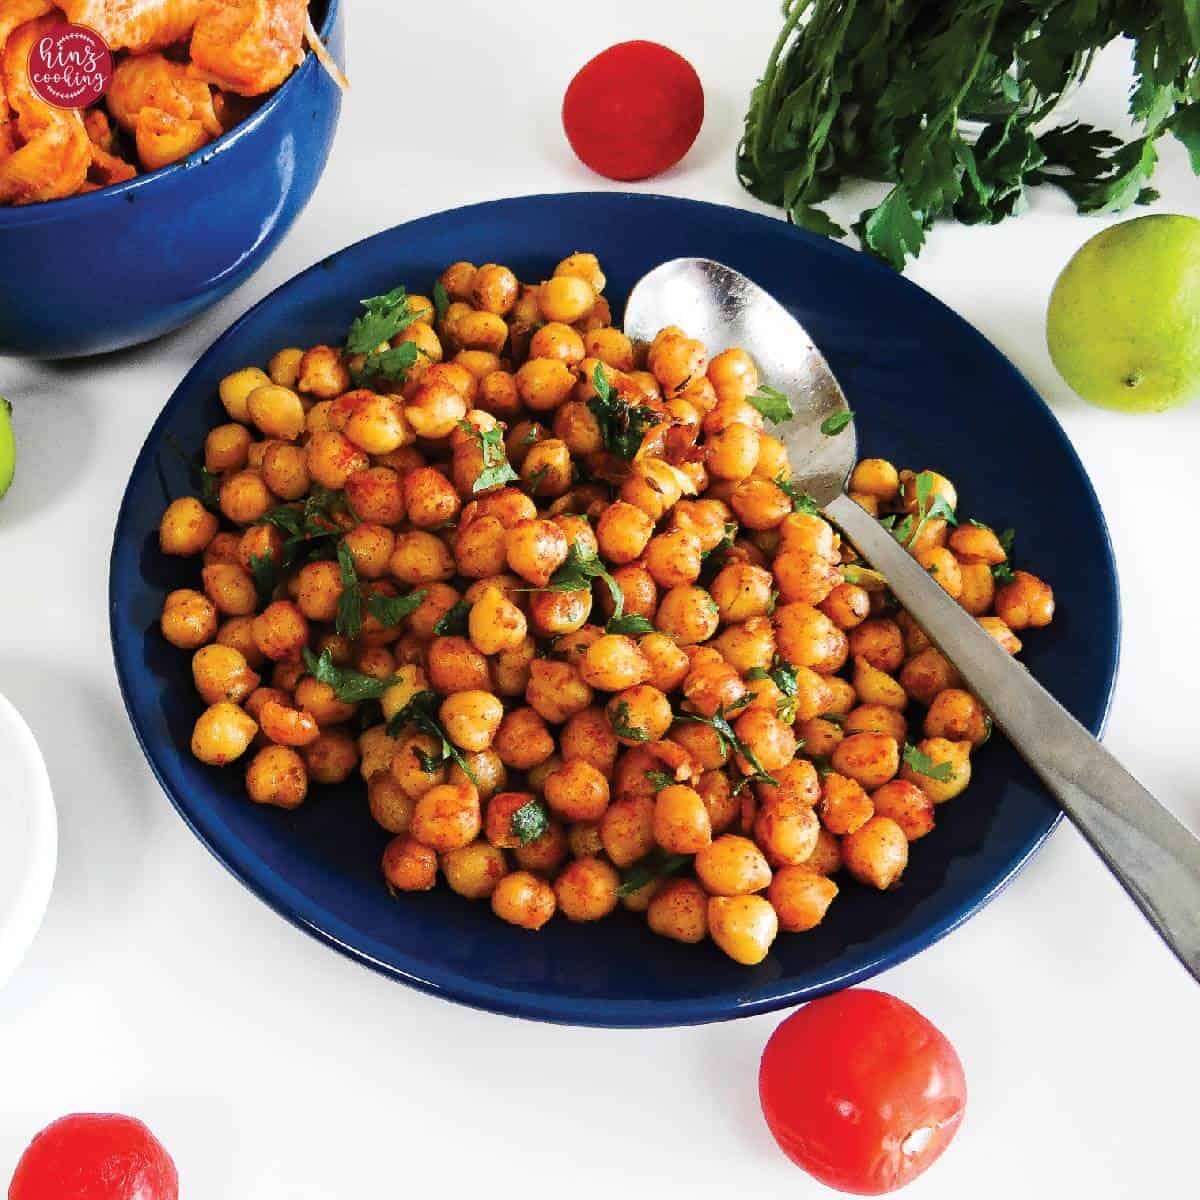
→ See sautéing in action in my Sautéed Chickpeas, Garlic Mushrooms, and Scrambled Egg Whites.

2. Pan-Frying / Shallow Frying
Pan-frying sits between sautéing and deep frying in both technique and result. It uses significantly more fat than sautéing — enough to come at least halfway up the side of the food — but the food is not fully submerged as it would be in deep frying. The result is a method that delivers the crispy, golden exterior of deep frying with considerably less oil, more control, and easier cleanup.
How pan-frying works:
Oil is added to a heavy pan to a depth of roughly 1–2cm and heated to 325–375°F (165–190°C) before the food goes in. The food is placed into the hot oil and cooked on one side until a crust forms and the colour is deep golden, then flipped once to cook the other side. The oil conducts heat far more efficiently than air — it surrounds the submerged portion of the food on all sides, cooking it evenly and crisping the surface rapidly through the same Maillard reaction as sautéing, but more aggressively because more of the food surface is in contact with hot fat simultaneously.
The critical role of oil temperature:
Oil temperature is the single most important variable in pan-frying — more important than timing, more important than the food itself. Oil that is too cold (below 325°F) is absorbed into the food before a crust can form, resulting in greasy, heavy food. Oil that is too hot (above 400°F) burns the exterior before the interior has cooked through. The correct temperature — 350–375°F for most foods — creates an immediate crust that seals the surface, preventing oil absorption and locking moisture inside while the exterior crisps.
Test oil temperature before adding food: drop a small piece of bread or a pinch of flour into the oil. If it sizzles immediately and floats to the surface with small, steady bubbles, the oil is ready. If it sinks and nothing happens, the oil is too cold. If it browns in under 5 seconds, it is too hot.
Shallow frying vs pan-frying — is there a difference?
The terms are often used interchangeably, and in practice most home cooks use them to mean the same thing. The subtle distinction some culinary traditions make: pan-frying uses less oil (just enough to coat the base of the pan plus a little) while shallow frying uses more oil (enough to submerge the food halfway). For practical home cooking purposes, the technique, temperatures, and results are essentially identical.
What to pan-fry:
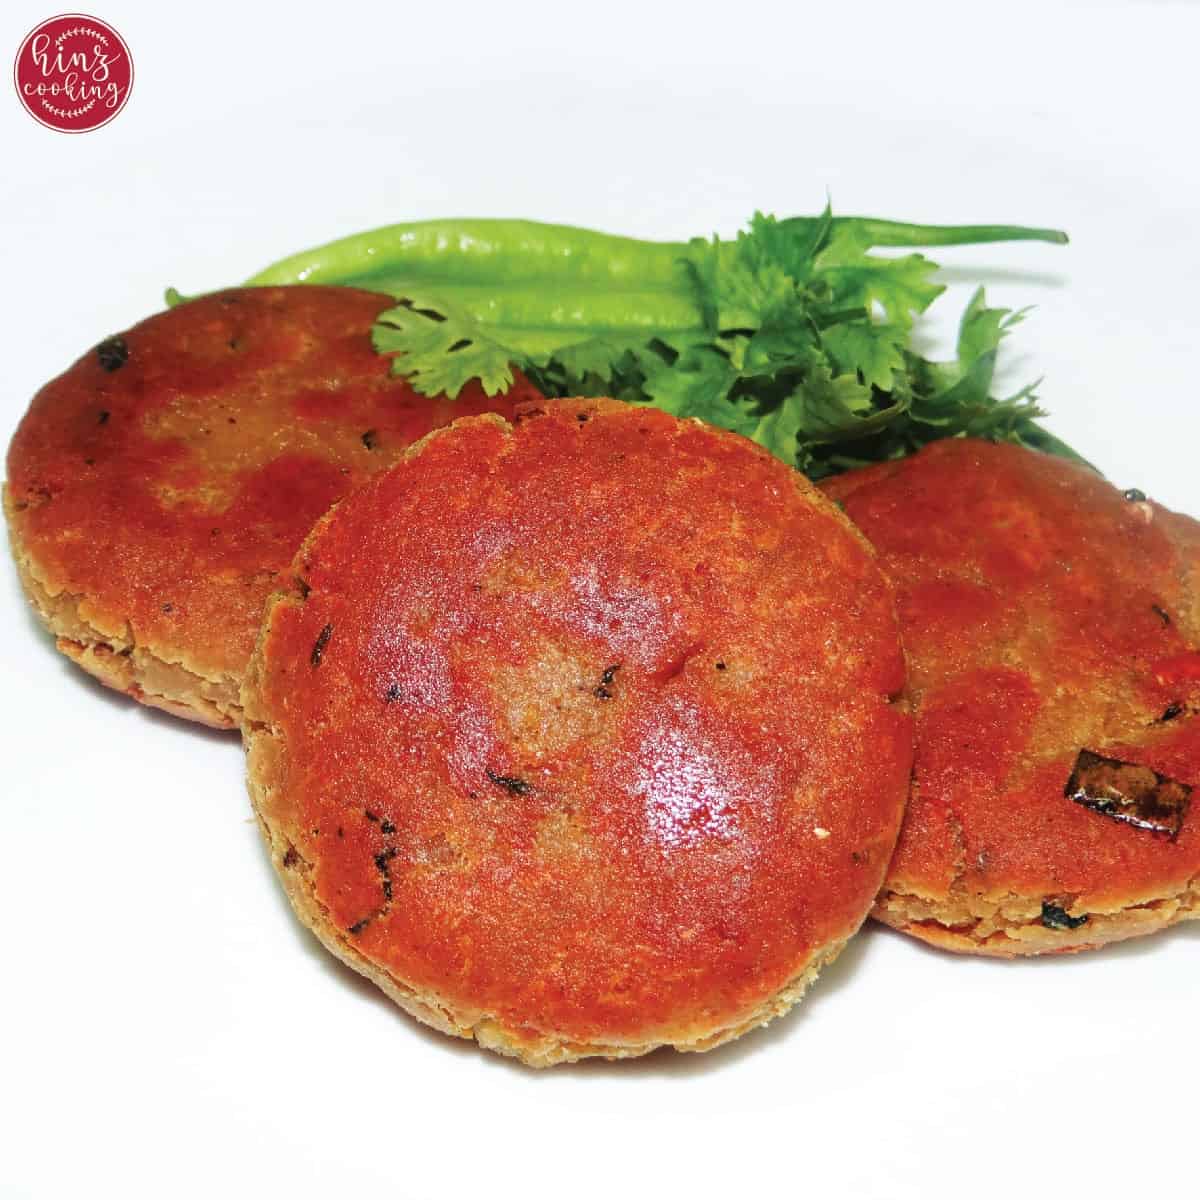
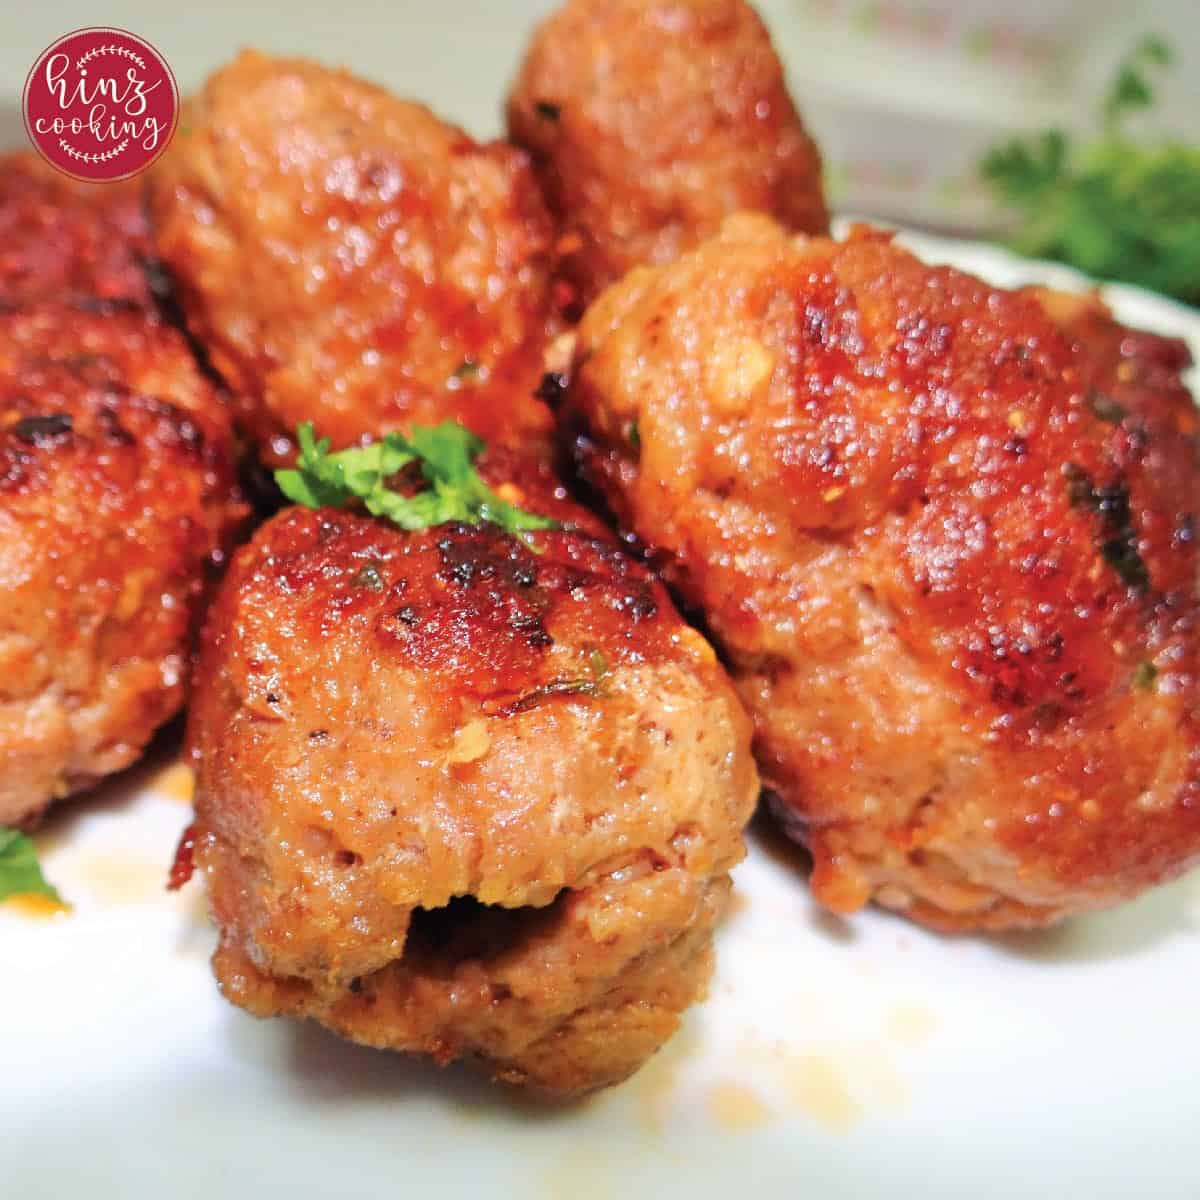
- Kababs and patties — shami kabab, chapli kabab, and all minced meat patties are classic pan-frying candidates. The outer crust forms quickly and seals in the spiced filling while the inside finishes cooking in the residual heat. A medium flame after the initial sear ensures the centre cooks through without burning the exterior.
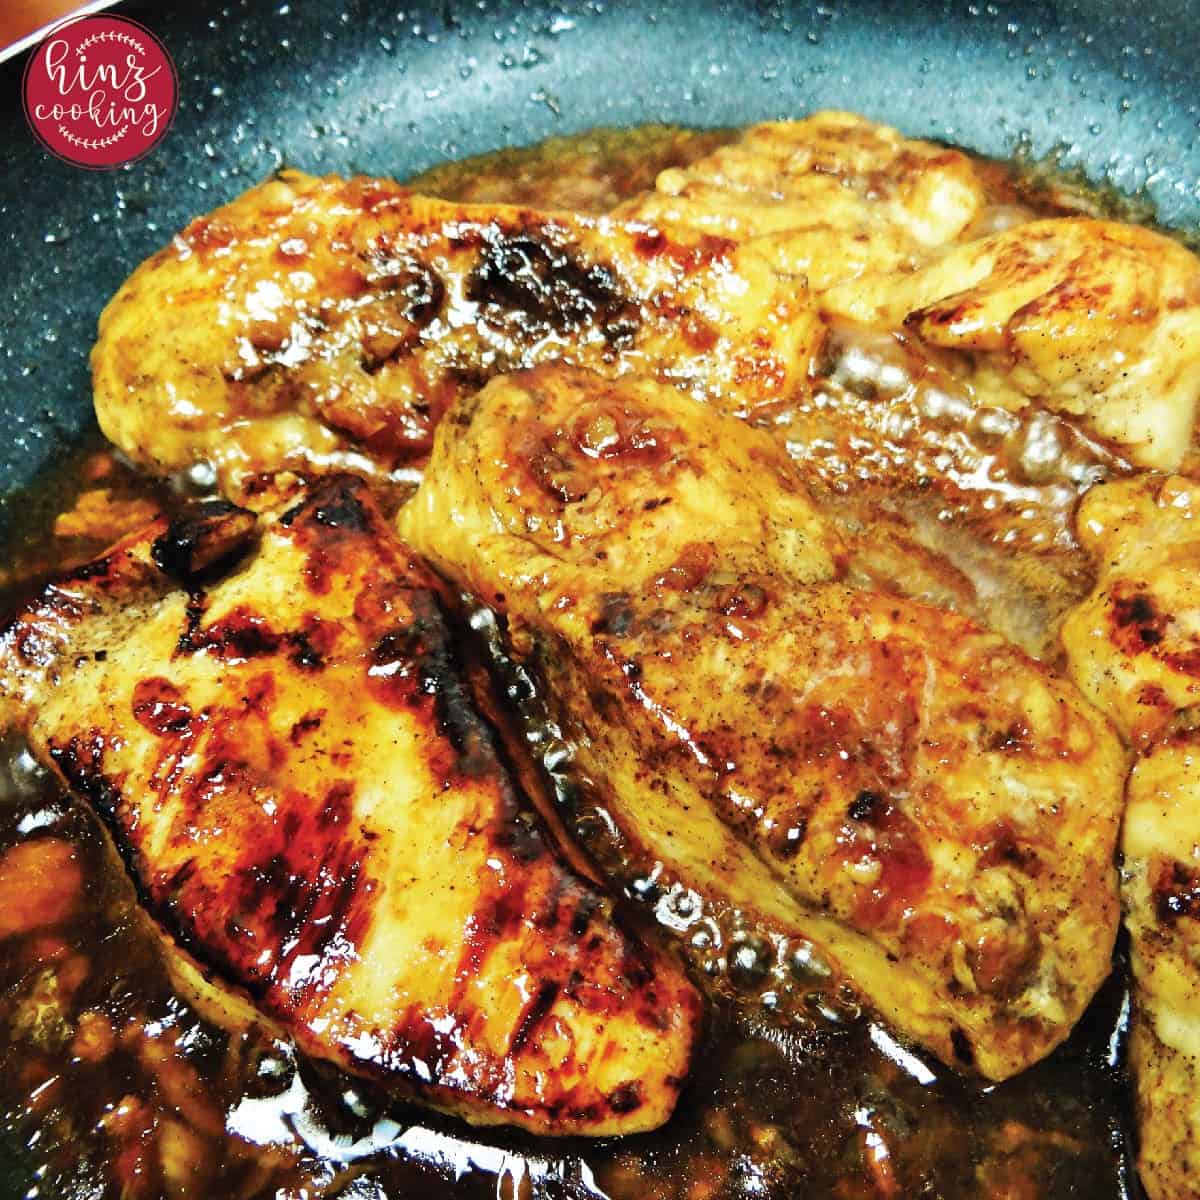
- Chicken pieces — bone-in chicken pieces, marinated chicken thighs, and chicken cutlets all pan-fry beautifully. The skin or coated surface becomes golden and crisp while the chicken cooks through in the surrounding heat.
- Breaded or coated foods — anything with a breadcrumb, egg wash, or cornstarch coating is a natural candidate for pan-frying. The coating acts as a barrier, crisping in the hot oil while protecting the food inside. Fish cutlets, chicken Kiev, and crumbed eggplant all benefit from this approach.
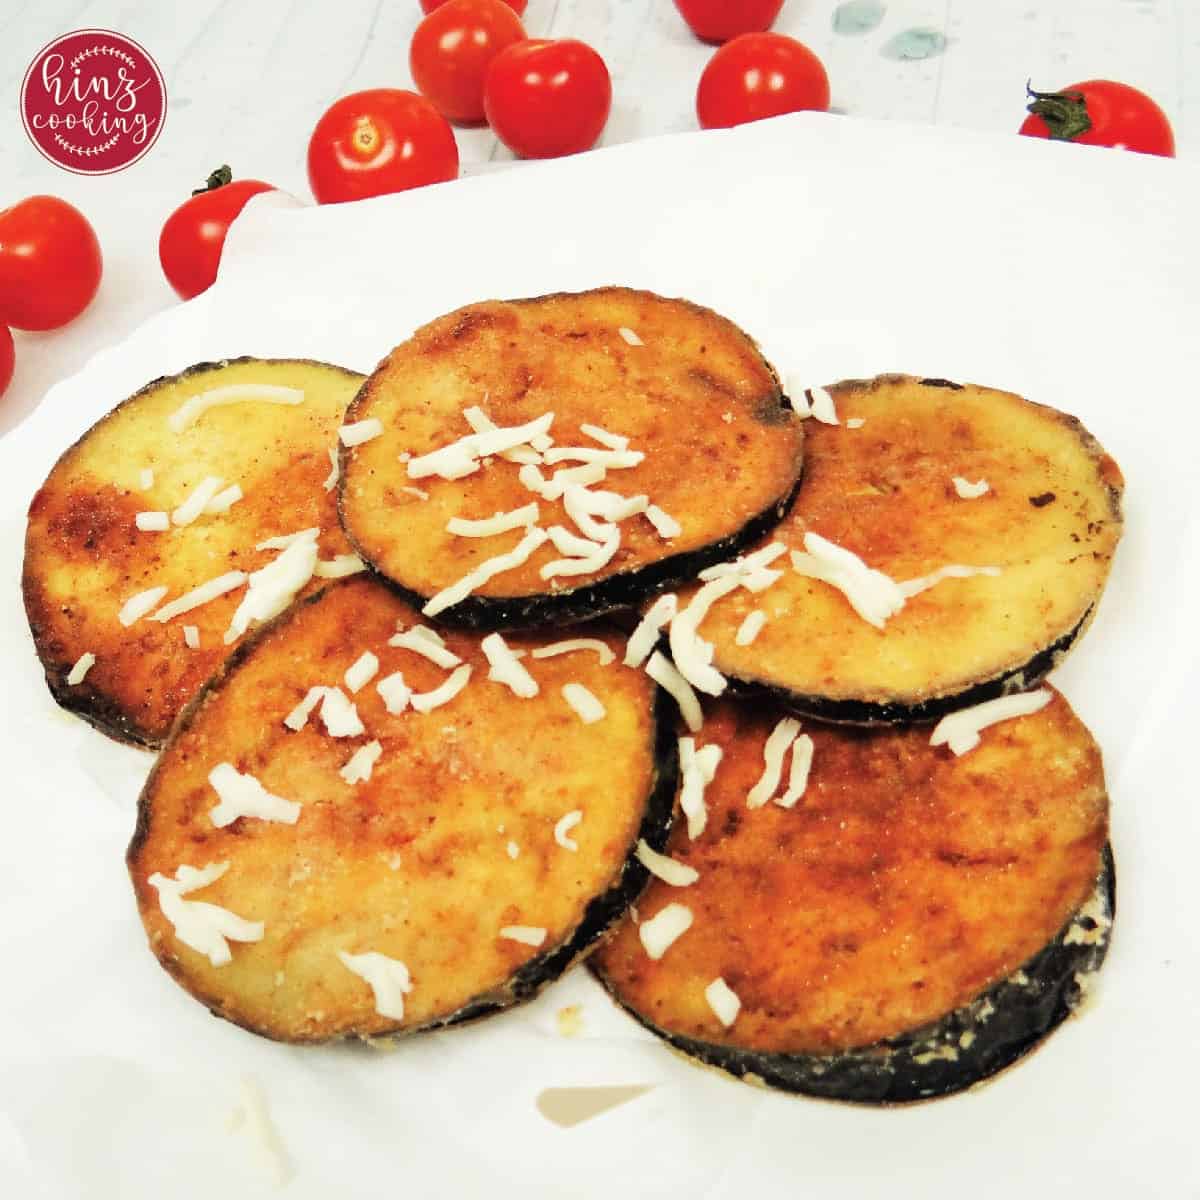
- Eggplant (aubergine) — pan-fried eggplant rounds are a staple in Pakistani cooking. The flesh absorbs a moderate amount of oil, becomes silky and tender inside, and develops a golden, slightly caramelised crust that gives dishes like baingan bharta their depth.
- Eggs — pan-fried eggs in a moderate amount of oil or ghee, basted with the hot fat as they cook, are the classic desi fried egg — the white is set and slightly lacy at the edges, the yolk still runny.
- Paneer and cheese — cubed or sliced paneer pan-fried in ghee until golden on all sides is one of the great simple preparations in South Asian cooking. The exterior crisps and develops a light crust while the inside softens and becomes creamy.
Pan-frying in South Asian cooking:
Pan-frying is at the heart of Pakistani street food and home cooking. Every kabab recipe on this site uses shallow frying as its primary cooking method — the high heat creates the characteristic crust that makes a shami kabab or seekh kabab distinctly different from a boiled or steamed version of the same recipe. The technique also appears in the preparation of many curry bases where the onion and spice masala is essentially pan-fried in oil to achieve the bhuna stage — the oil separation that signals proper caramelisation.
Pro tip: Always pat food completely dry before it goes into hot oil. Any surface moisture will cause the oil to spit aggressively — the water turns instantly to steam and displaces the oil violently. A dry surface also ensures the crust forms immediately rather than steaming first. Pat with paper towels, especially for marinated meats and vegetables that have released moisture.
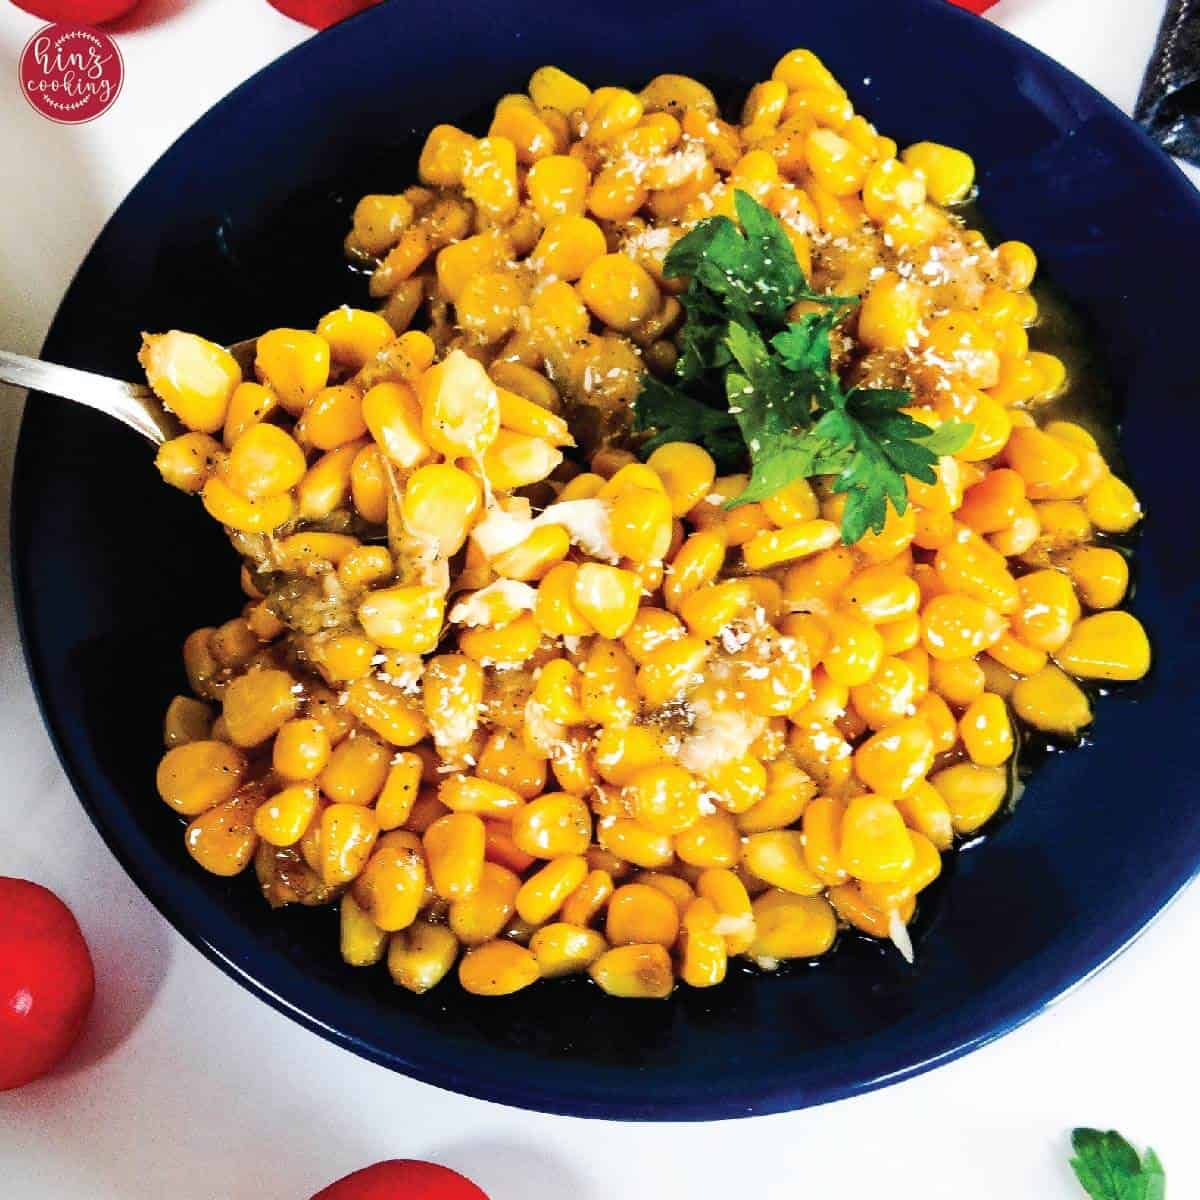
→ Try pan-frying in my Shami Kabab, Pan-Fried Eggplant, Gola Kabab, and Honey Butter Skillet Corn.
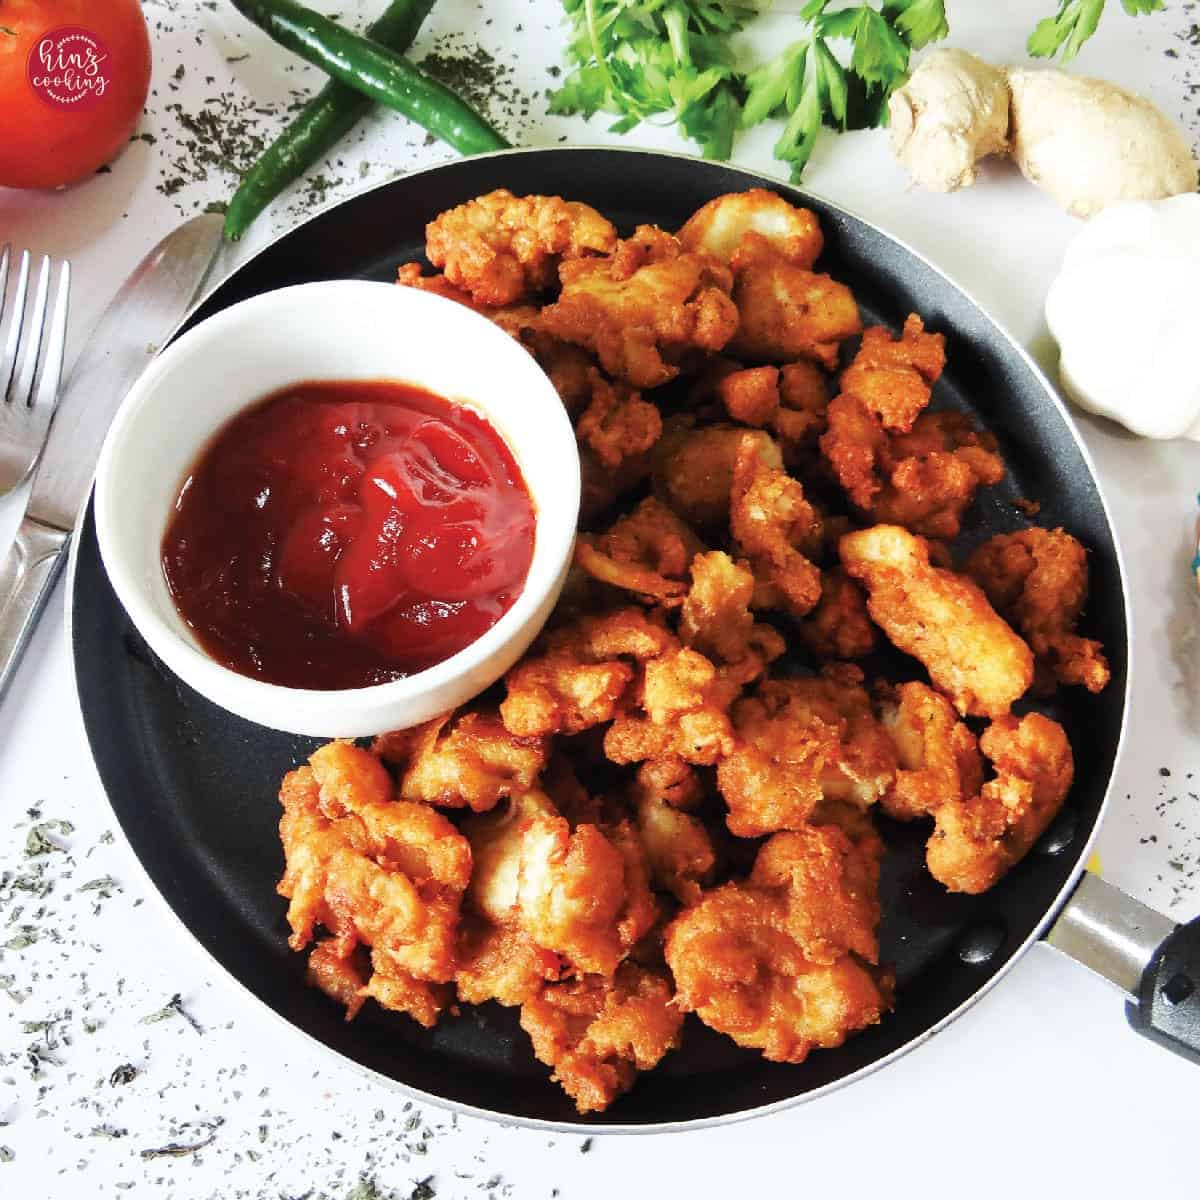
3. Deep Frying
Deep frying is the most dramatic of all cooking methods — food is completely submerged in oil heated to high temperature, and the transformation happens fast. Within minutes, a piece of raw marinated chicken or a spoonful of batter becomes golden, crispy, and cooked through simultaneously. No other method produces the combination of shatteringly crisp exterior and perfectly moist interior that deep frying achieves when done correctly.
How deep frying works:
Oil heated to 350–375°F (175–190°C) transfers heat to food far more efficiently than any other cooking medium. Water boils at 212°F — but oil can reach 400°F and beyond without turning to steam. When cold food enters hot oil, the moisture on and just inside the food's surface instantly vaporises, creating a barrier of steam that pushes outward. This outward pressure of steam is what prevents the oil from being absorbed into the food — as long as the oil temperature is maintained. The steam escaping outward and the hot oil surrounding the food work simultaneously: the steam prevents greasiness, the oil creates the crust.
The moment the food is done and removed from the oil, that steam barrier disappears. This is why deep-fried food must be served immediately — as it cools, the steam condenses back into moisture inside the crust, making it soggy. No amount of reheating fully restores a proper deep-fried crust.
Oil temperature is everything:
350–375°F (175–190°C) is the correct range for most deep frying. Below 325°F, the steam barrier does not form strongly enough and oil penetrates the food — producing the greasy, heavy result everyone recognises as bad frying. Above 400°F, the exterior burns before the interior cooks through. A kitchen thermometer is the most useful single tool for deep frying — temperature cannot be reliably judged by eye.
If you don't have a thermometer, use the wooden chopstick test: submerge the tip of a wooden chopstick or spoon in the oil. If steady, small bubbles form immediately around the wood, the oil is ready. Vigorous bubbling means too hot. No bubbling means too cold.
What to deep fry:
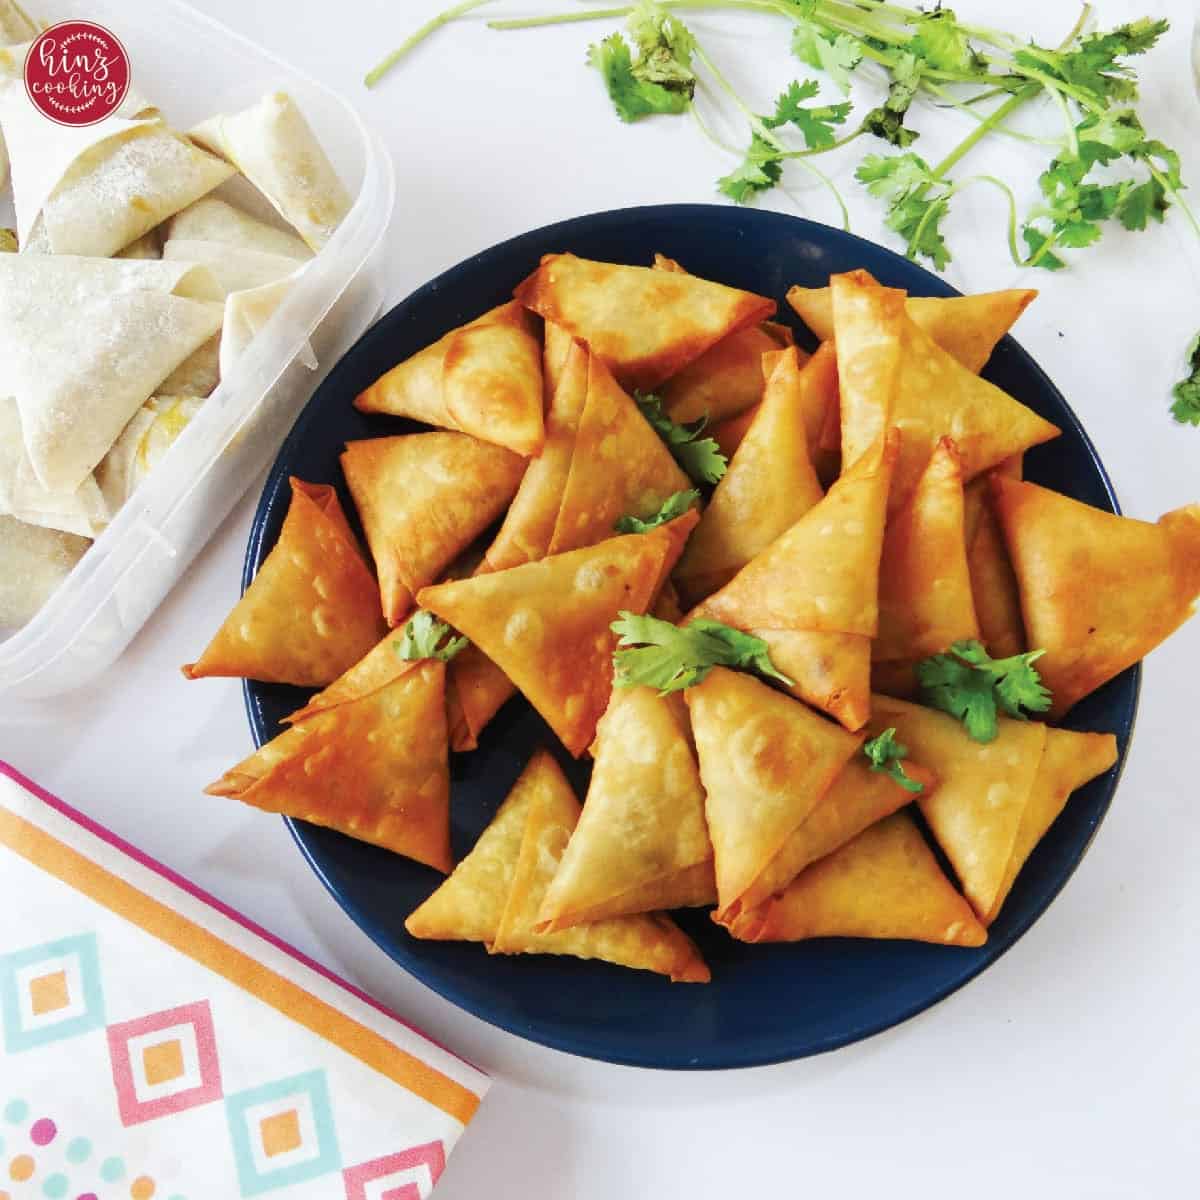
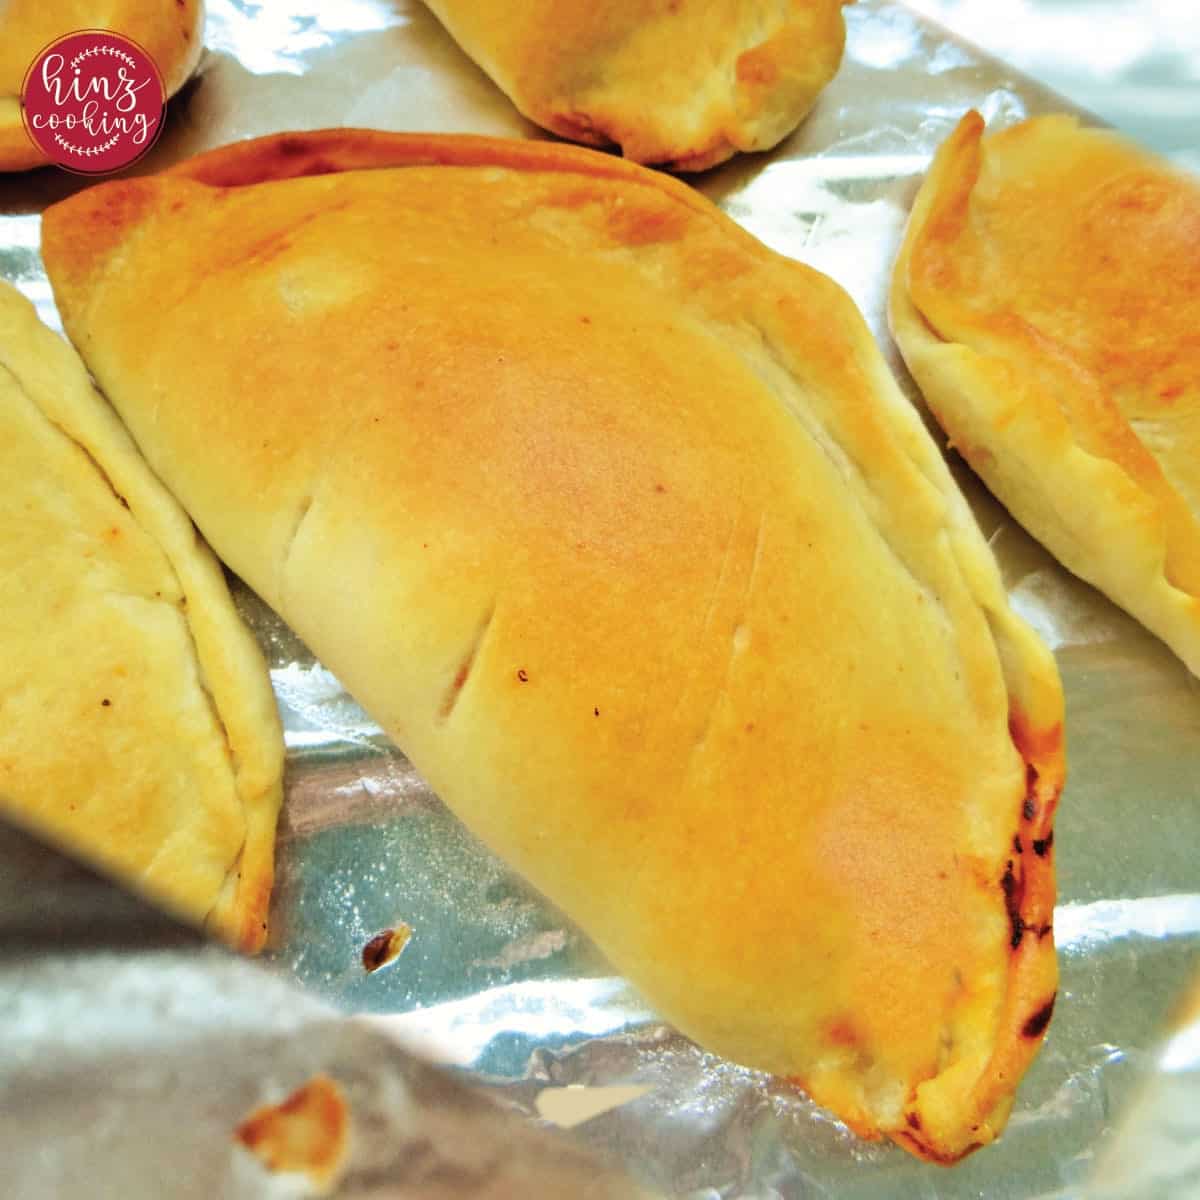
- Samosas, pakoras, and kachori — the holy trinity of Pakistani deep-fried street food. The outer pastry or batter crisps in seconds while the filling heats through. The trick is medium-high rather than screaming-high heat — too hot and the exterior browns before the pastry has fully cooked.
- Chicken — bone-in fried chicken needs oil at 325–350°F and a longer fry time (12–15 minutes) to ensure the interior is cooked through. A double-fry technique — first fry at 325°F to cook through, rest, then second fry at 375°F for the crust — gives restaurant-quality results.
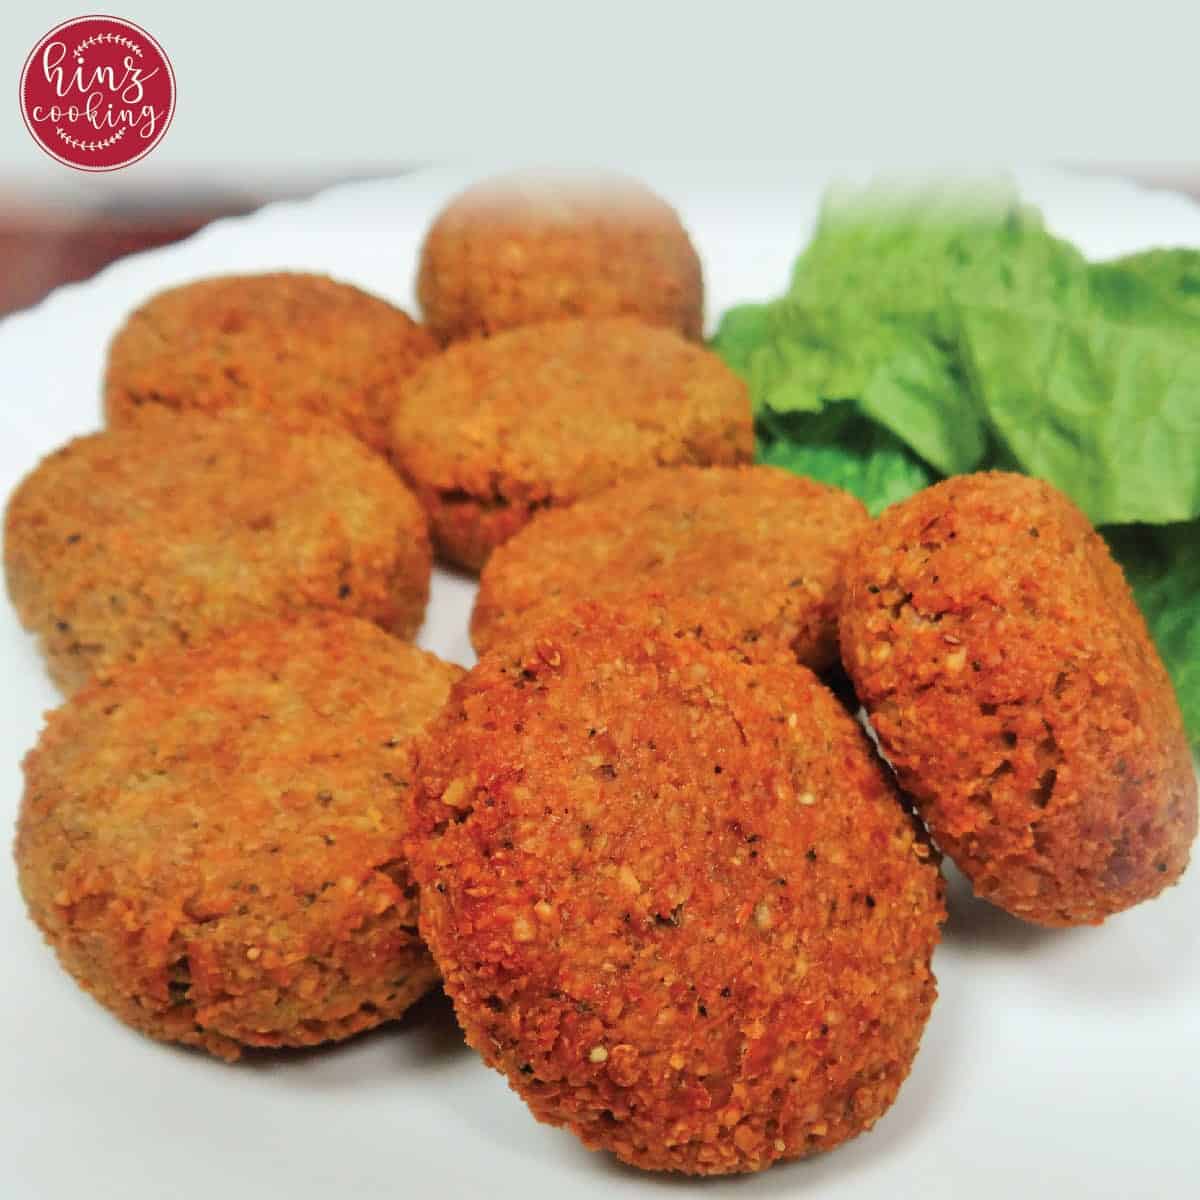
- Falafel — formed chickpea patties deep-fried at 375°F for 3–4 minutes until deep golden. The high heat creates a crust that holds the falafel together while keeping the interior moist and slightly soft.
- Fish — battered or coated fish fillets deep-fried at 375°F for 4–5 minutes. The batter puffs and crisps while the fish inside remains delicate and flaky.
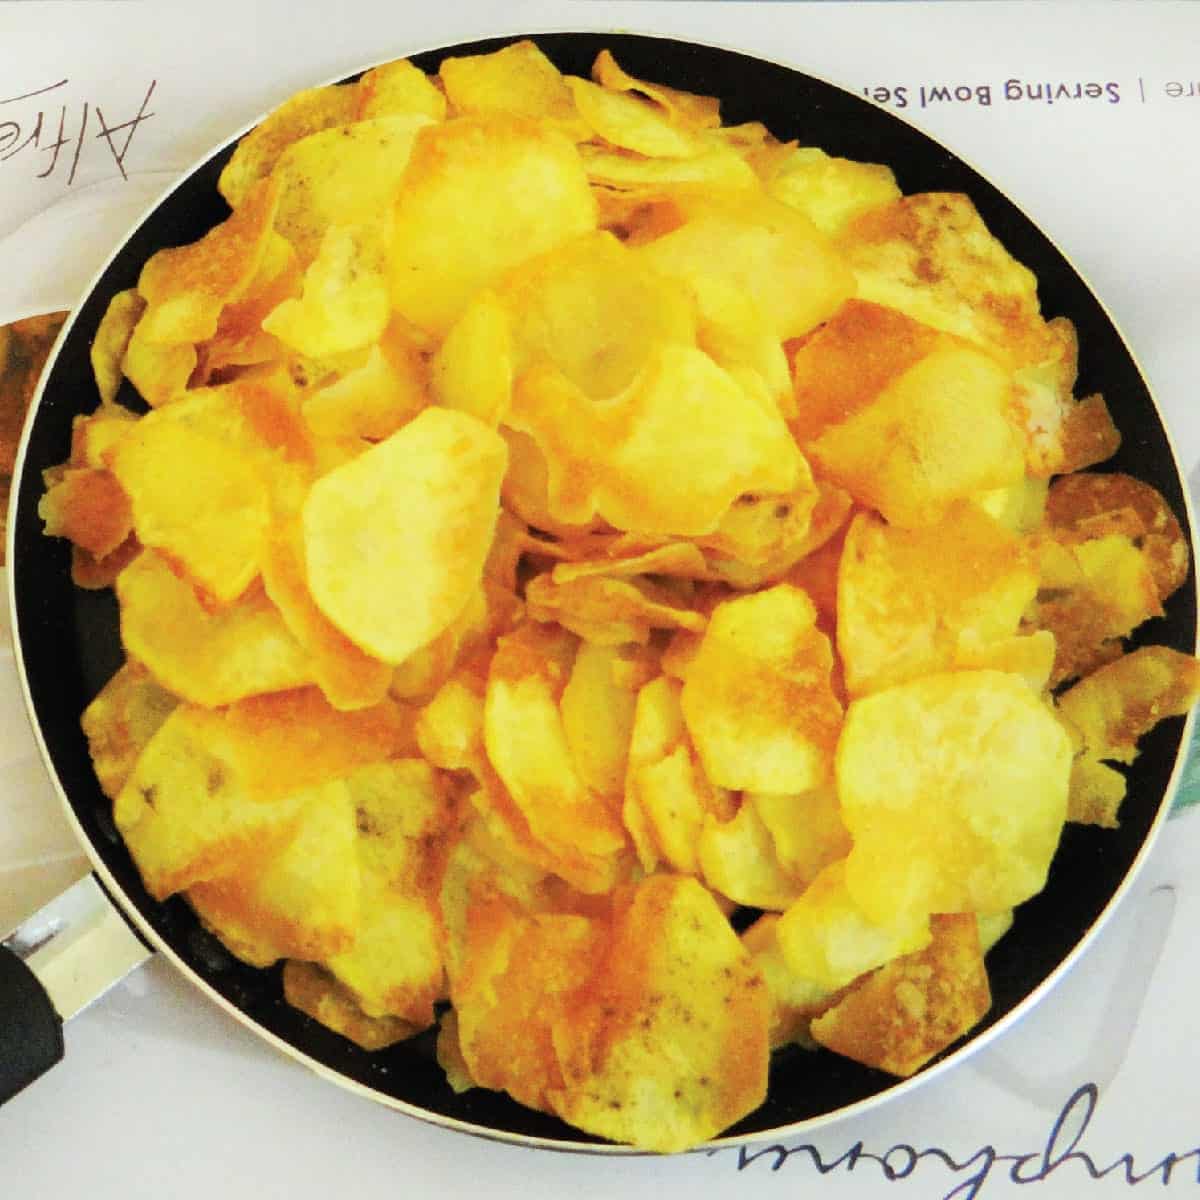
- Chips and crisps — potatoes require the double-fry method for the best results: first at 325°F to cook through, then at 375°F for the golden crunch.
Deep frying in South Asian cooking:
Deep frying is central to Pakistani and Indian street food culture. Samosas, pakoras, jalebi, gulab jamun, puri bread, fish pakora — all are deep-fried and all are defined by their crust. The technique appears at every level of South Asian cooking from daily snacks to celebration sweets. One uniquely South Asian deep-frying technique is the tempering of whole spices (tarka) in very hot oil or ghee — a small-scale version of deep frying where the spices are submerged in hot fat for seconds to release their essential oils before being poured over a finished dal or curry.
Pro tip: Always fry in small batches. Adding too much food at once drops the oil temperature sharply and the food absorbs oil rather than crisping. Restore temperature between each batch before the next one goes in.
→ Try deep frying in my Cheese Samosa, Fish Pakora, Falafel, and Homemade Potato Chips.
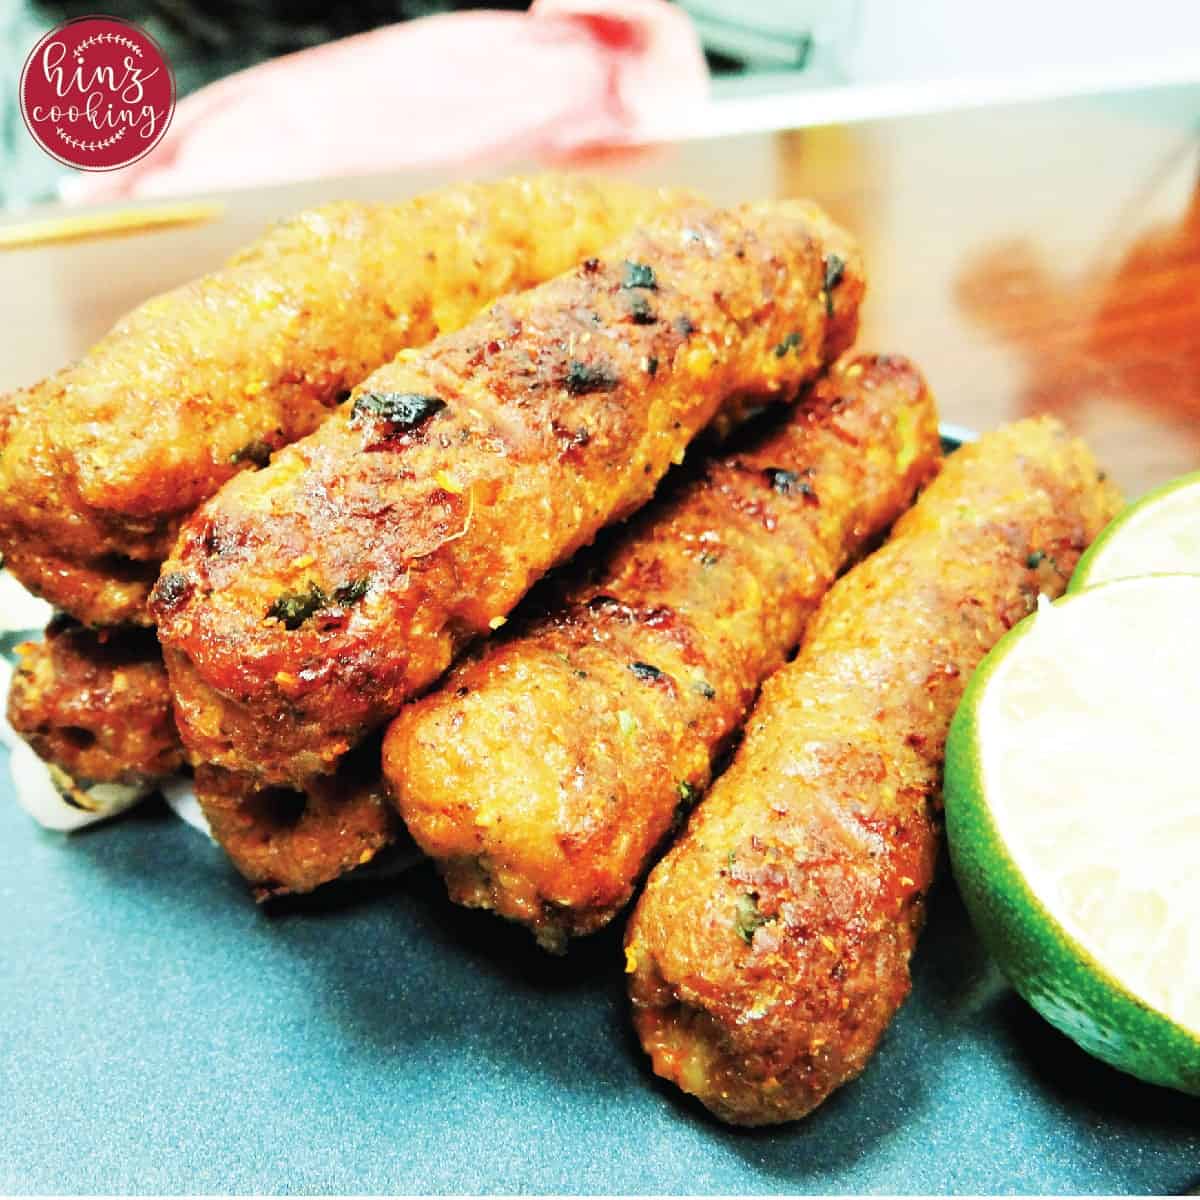
4. Grilling
Grilling is cooking by direct radiant heat from below — over charcoal, wood, gas, or an electric element. It is one of the oldest cooking methods in human history and one of the most instinctively satisfying: the high heat, the char marks, the smoke, the caramelised crust on meat that has been cooked over fire. No other home cooking method produces quite the same combination of flavour complexity, visual drama, and primal satisfaction.
How grilling works:
The heat source below radiates intense, direct heat upward onto the food's surface. Temperatures at the grill grate can reach 500–700°F (260–370°C) — significantly hotter than any home oven. At these temperatures the Maillard reaction happens rapidly and aggressively, creating the deeply caramelised, slightly charred crust that defines grilled food. The high heat simultaneously sears the surface and begins to render fat, which drips onto the heat source, vaporises, and rises back up to coat the food with smoke. This is the origin of the smoky, complex flavour that distinguishes grilled food from any oven-cooked equivalent.
The characteristic dark grill marks are not just visual — they represent concentrated Maillard browning at those specific contact points, producing the most intensely flavoured parts of the grilled surface.
Charcoal vs gas vs electric:
Charcoal grilling produces the most complex flavour — the wood combustion creates hundreds of aromatic compounds that coat the food as it cooks. The temperature is less controllable but the result is unmatched. Gas grilling offers precise temperature control and convenience with a slightly less complex flavour. Electric grilling brings the technique indoors for apartment kitchens — temperature control is good but the flavour profile is the mildest of the three. For Pakistani cooking specifically, charcoal grilling (often called barbeque or BBQ in Pakistan) is the gold standard for tikka, seekh kabab, and boti — the charcoal smoke is considered an essential flavour component, not optional.
What to grill:
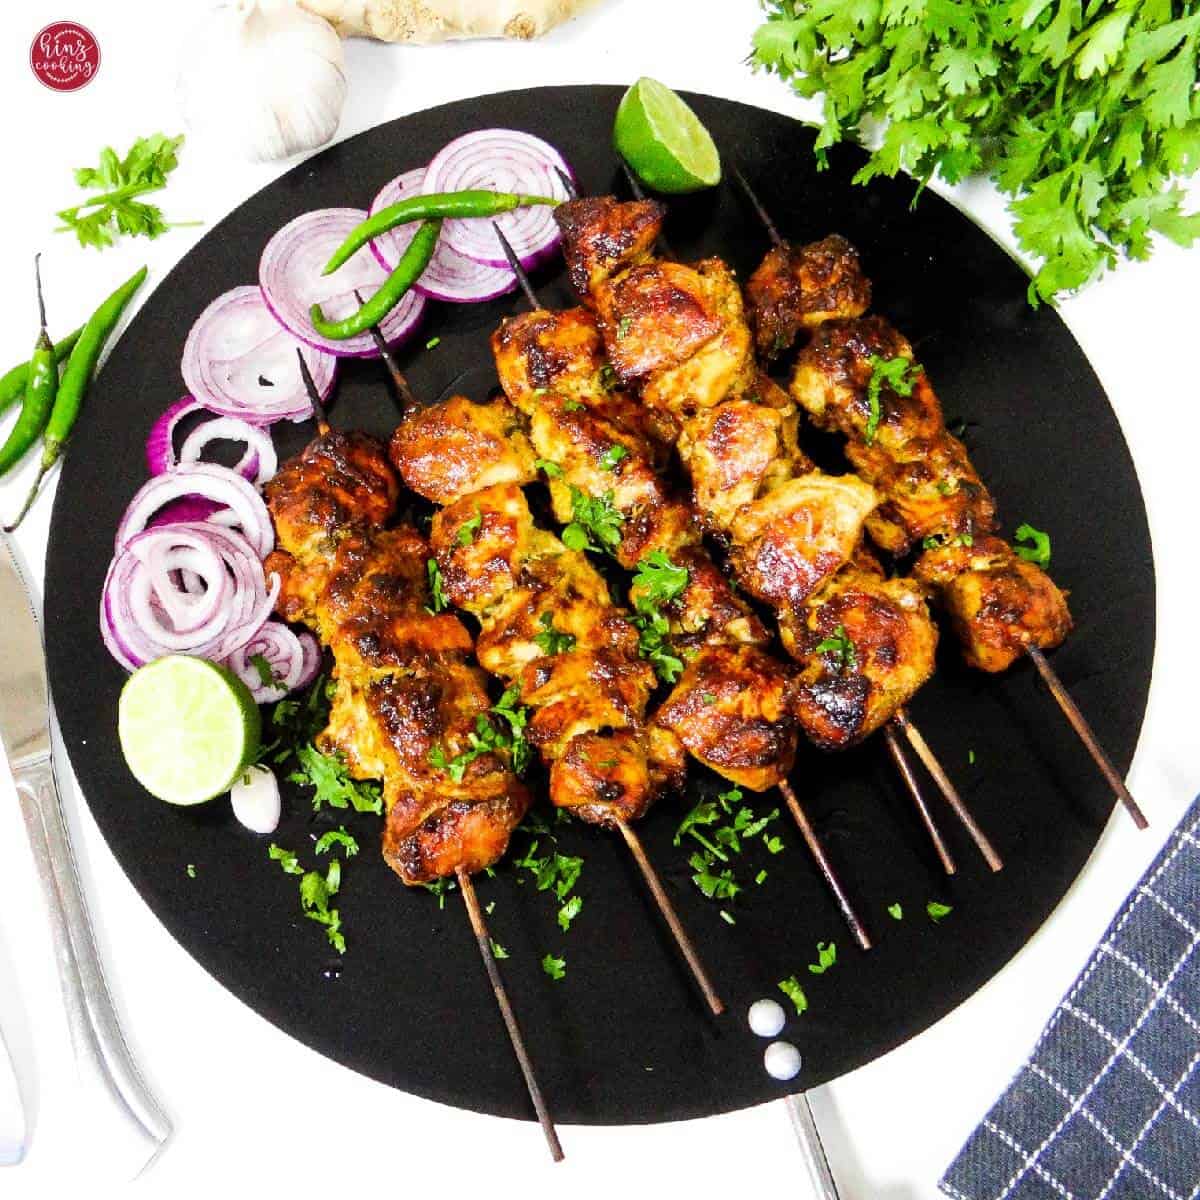
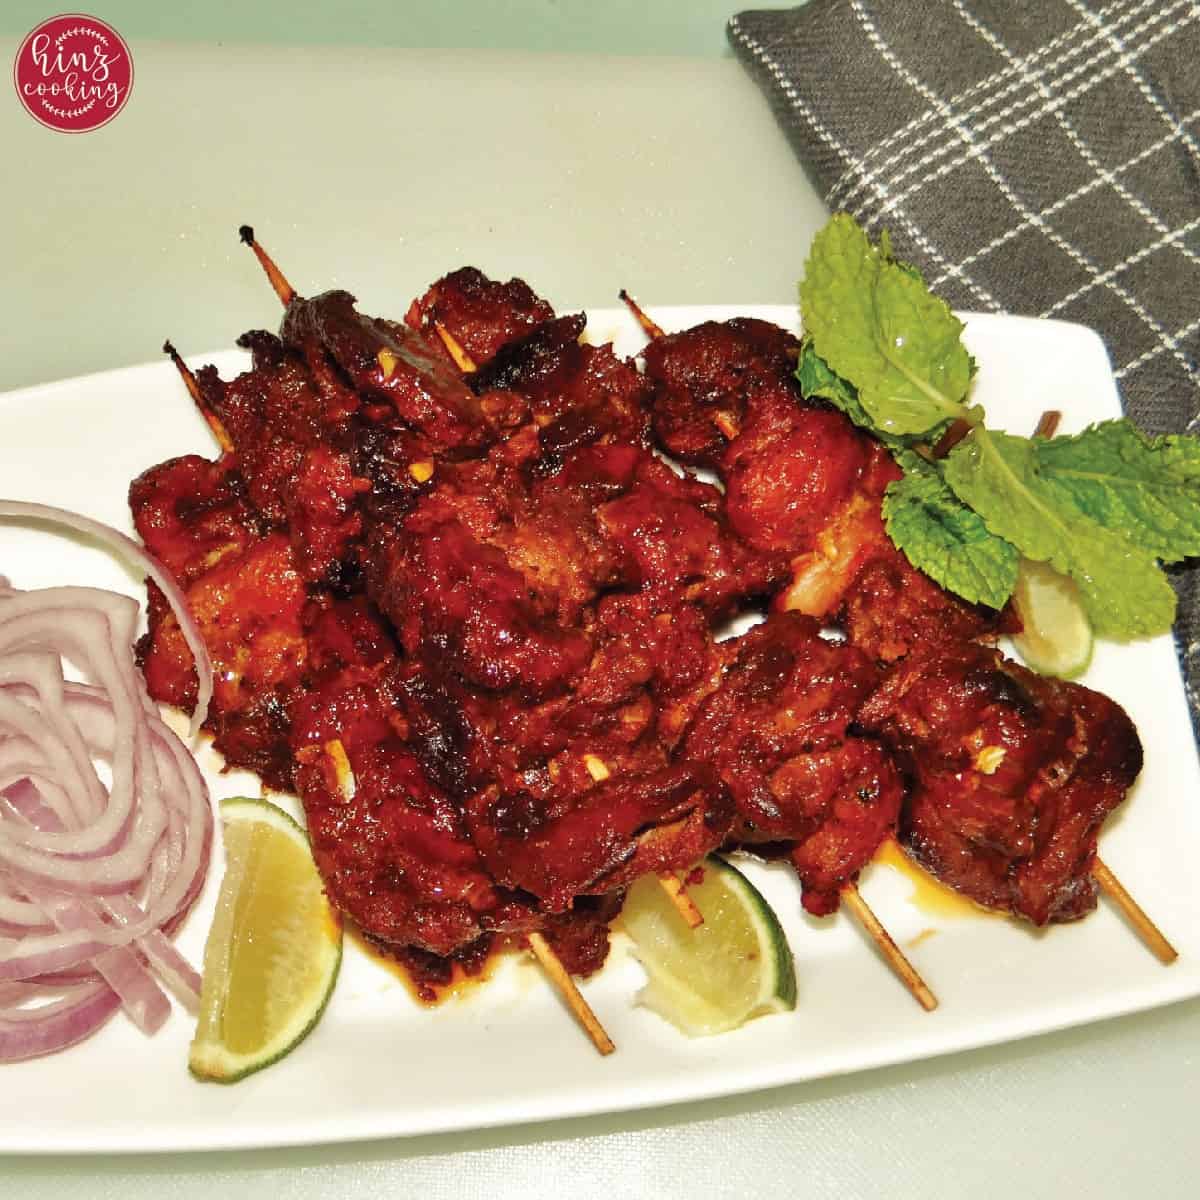
- Kebabs — seekh kabab, boti kabab, shish tawook, and tikka are all designed for the grill. Marinated in spiced yogurt, threaded on skewers, and cooked over high direct heat for 8–12 minutes, turning regularly. The grill chars the exterior while the interior remains juicy.
- Chicken pieces — marinated bone-in chicken grills beautifully. The fat renders as it cooks, self-basting the meat and preventing dryness.
- Vegetables — capsicum, zucchini, corn, eggplant, and whole tomatoes all grill magnificently. The direct heat caramelises natural sugars and adds smokiness that transforms vegetables from ordinary to extraordinary.
- Flatbreads — naan and pita placed directly on a hot grill grate blister and char in under 2 minutes. This is the closest home cooking comes to a tandoor result.
Grilling in South Asian cooking:
Grilling is the foundation of Pakistani BBQ culture — one of the most vibrant food traditions in the world. The food streets of Lahore, Karachi, and Peshawar are defined by the sight and smell of meat on open charcoal grills. Seekh kabab, chicken tikka, boti, and malai tikka are all grill preparations. The yogurt-and-spice marinades used across Pakistani grilled dishes serve a dual purpose: the yogurt tenderises the meat's surface through mild acid activity, and the spices caramelise against the grill heat to create the characteristic charred exterior that defines authentic Pakistani BBQ.
Pro tip: Oil the grill grate before use — not the food. Brush the grate with oil using a folded paper towel and tongs just before placing food on it. Oiling cold food placed on a hot dry grate still leads to sticking. A well-oiled hot grate releases food cleanly every time.
→ Try grilling in my Shish Tawook and Mutton Seekh Kabab.

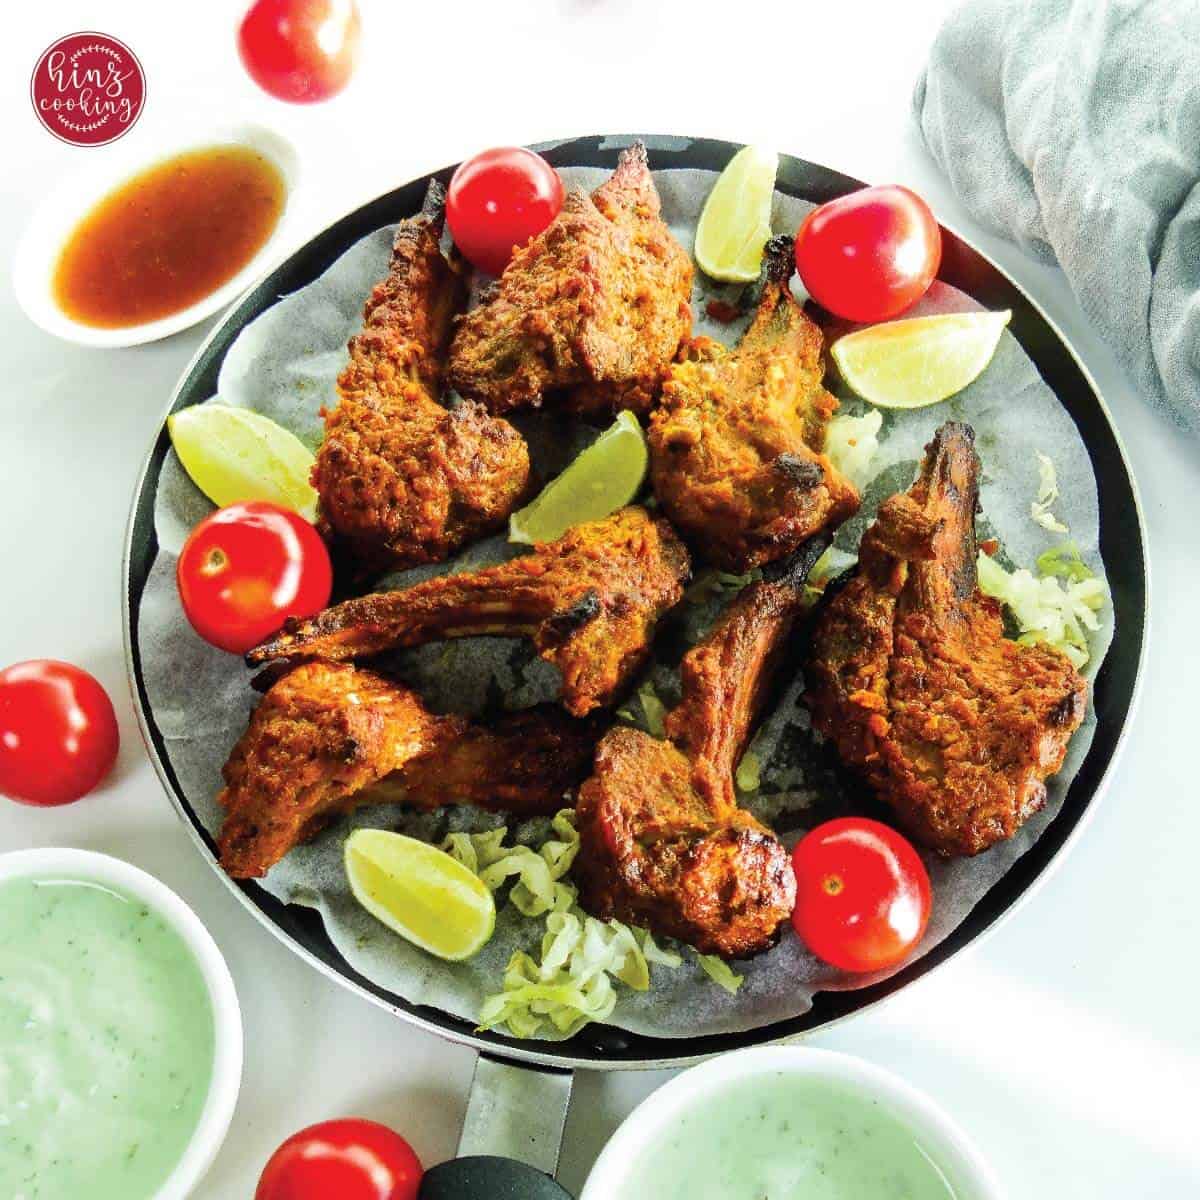
5. Broiling
Broiling is grilling's indoor counterpart — the heat source is above the food rather than below, and the cooking happens inside the oven under the grill element. The principle is identical to grilling: intense, direct radiant heat applied to the food's surface at high temperature. The Maillard reaction happens rapidly. Surfaces brown, crisp, and char. The difference is direction — broiling cooks from the top down.
How broiling works:
The broiler element (called the grill in the UK and Australia, broiler in the US) heats to 500–550°F (260–290°C) and radiates heat downward. Food placed on the highest oven rack, just 3–5 inches below the element, receives the most intense heat and browns fastest. Moving the rack lower reduces the heat intensity and slows the browning, giving the food more time to cook through before the surface colours.
Because broiling only heats from one direction, it is most effective for relatively thin or already partially-cooked food. Thick cuts of raw meat placed under a broiler will char on the surface long before the interior reaches the correct temperature. The best use of broiling is either for thin foods that cook through quickly, or as a finishing step for foods that are already cooked through and need surface colour and crust.
Broiling as a finishing technique:
This is where broiling earns its place in the serious home kitchen. Use it to finish dishes that are already cooked but need a final hit of high heat: melting and browning a cheese topping, charring the surface of an already-cooked biryani for the dam finish, blistering the skin of tandoori chicken for those char marks, caramelising the surface of a gratinated pasta dish, or giving the top of a fish fillet the golden colour that only direct radiant heat can produce.
What to broil:
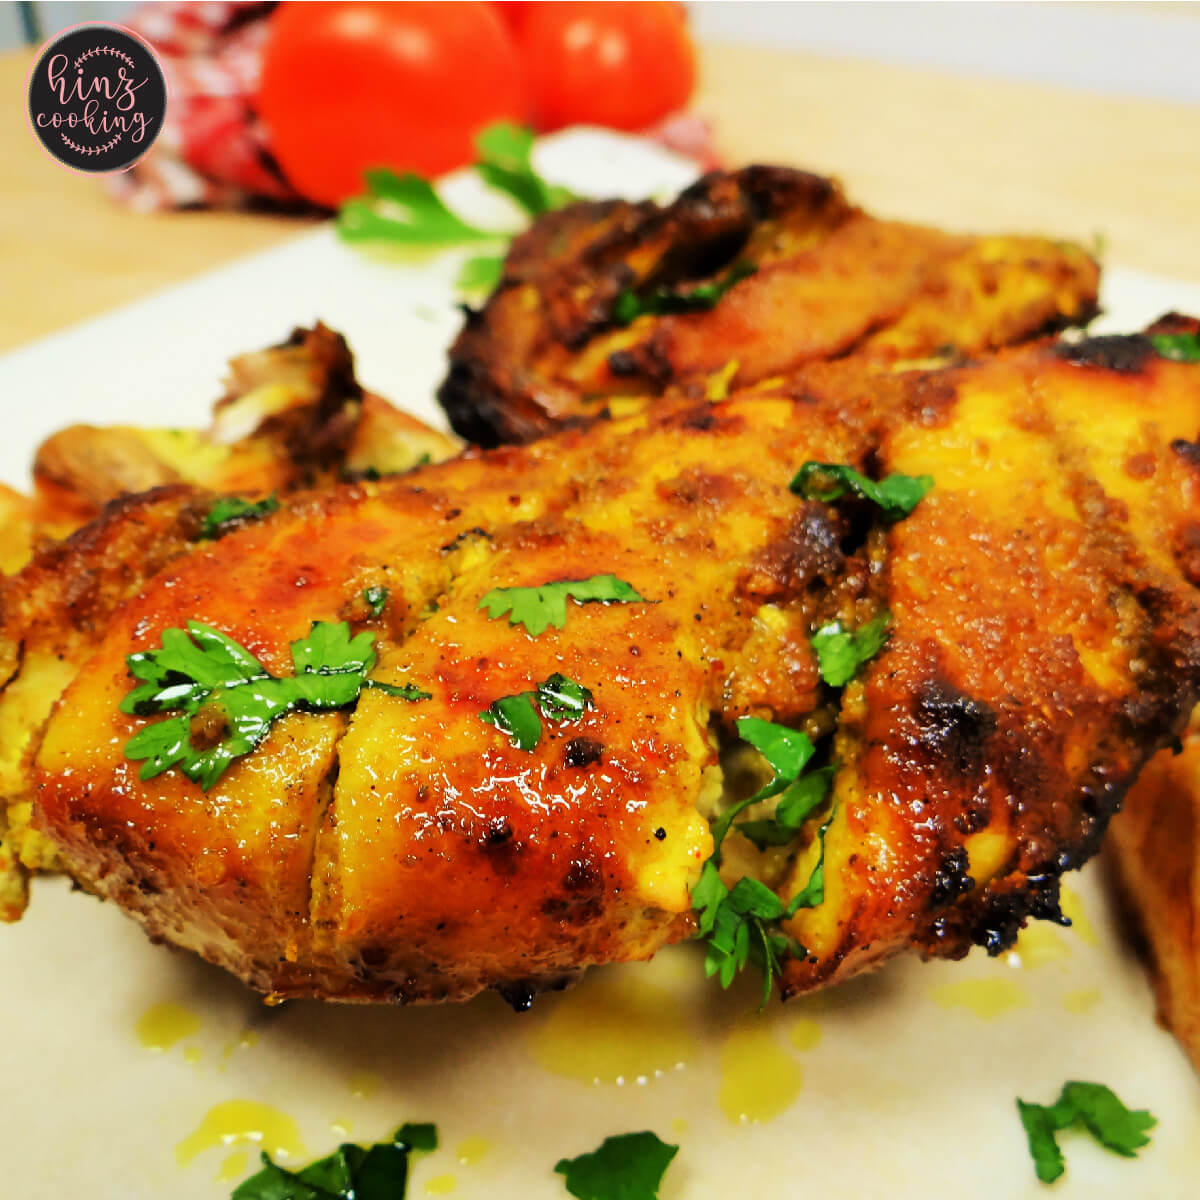
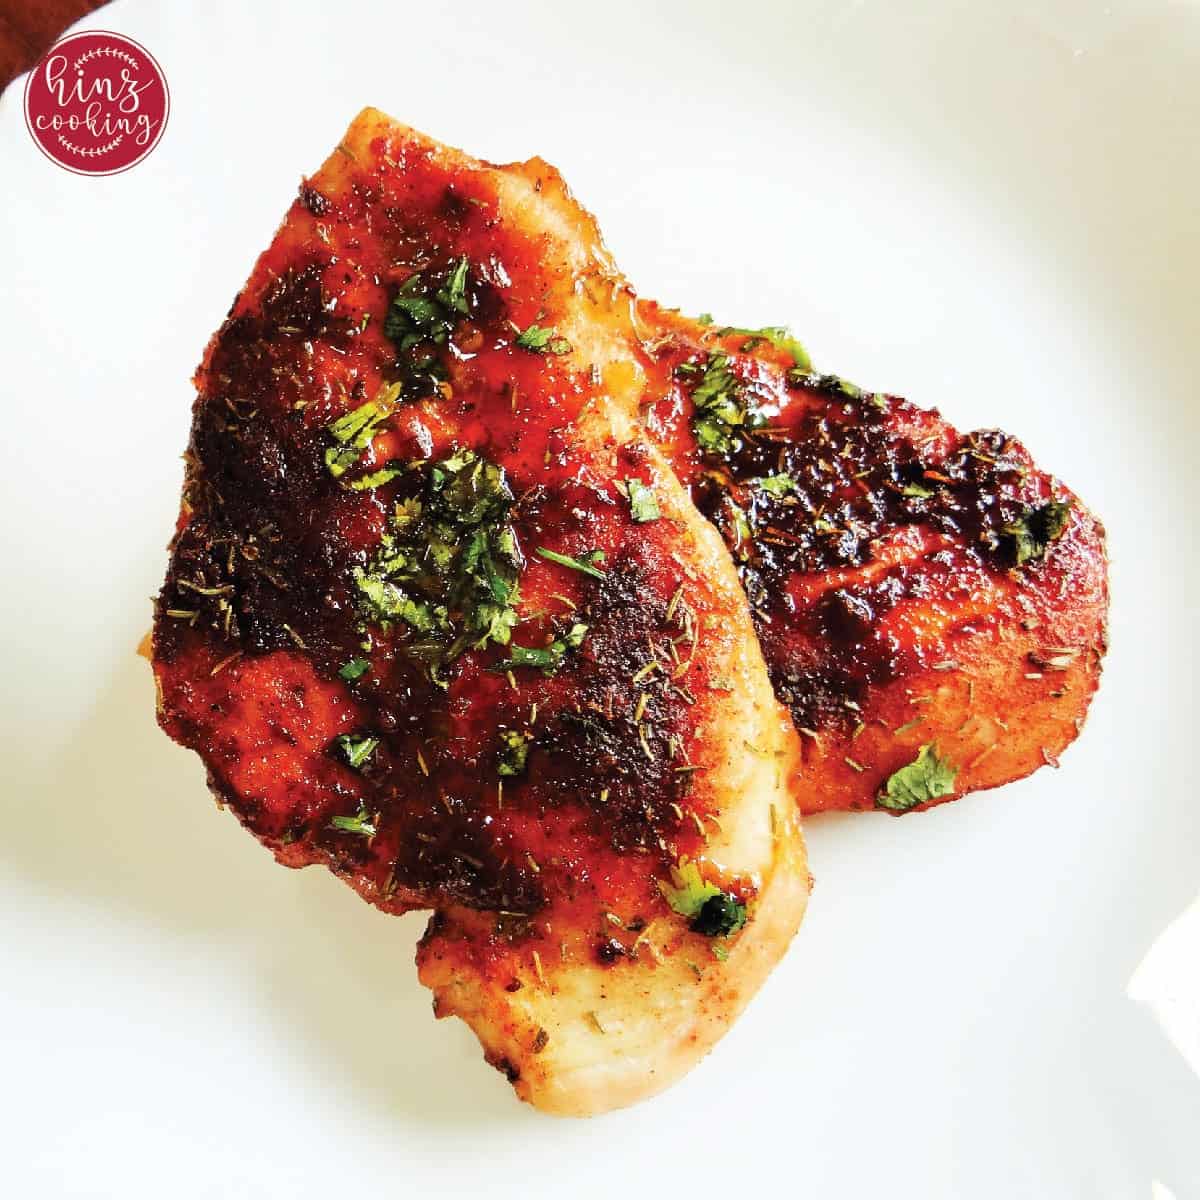
- Tandoori chicken and tikka — the broil step is essential for replicating tandoor results at home. Marinated chicken baked in the oven at 200°C until cooked through, then placed under the broiler for 5–7 minutes on the highest rack, produces genuine char marks and the slight smoke of caramelised marinade that makes tandoori chicken recognisable.
- Mutton chops and lamb — chops placed under a hot broiler for 4–5 minutes per side cook through quickly due to their thinness and develop a beautifully charred surface.
- Fish fillets — thin fish fillets broil in 5–7 minutes total. The surface browns and crisps while the flesh below remains moist.
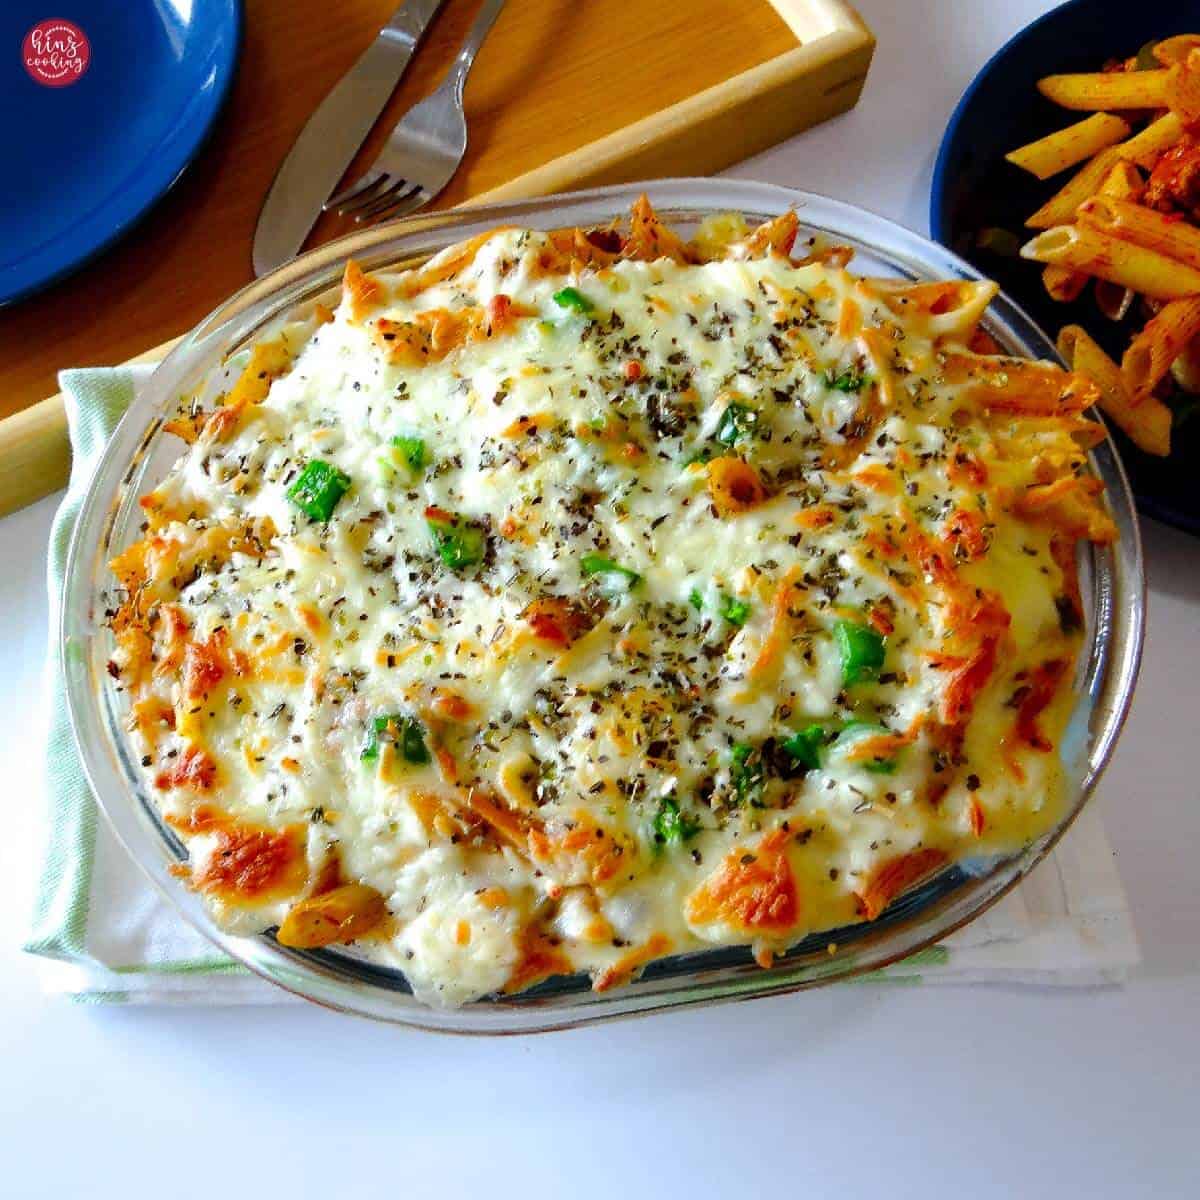
- Cheesy toppings — macaroni bechamel, pizza, and any dish with a cheese topping benefits from 2–3 minutes under the broiler. The cheese bubbles, browns, and develops blisters — the visual and textural finish that makes these dishes irresistible.
- Peppers and tomatoes — placed directly under the broiler until blackened all over, then peeled, these vegetables develop a deep smoky sweetness that cannot be replicated by any other method.
Pro tip: Never walk away from the broiler. The difference between perfectly charred and completely burnt is often under 60 seconds. Stay at the oven, watch through the glass, and remove the food the moment the surface reaches the colour you want.
→ Try broiling in my Tandoori Chicken in Oven, Mutton Chops, Chicken Boti, and Macarona Bechamel.
6. Roasting
Roasting is dry-heat cooking in an oven — food is exposed to surrounding hot air that circulates and heats it from all sides simultaneously. Unlike sautéing or grilling, which apply intense heat rapidly from one direction, roasting applies moderate-to-high heat gently and evenly over a longer period. The result is food with a caramelised, golden exterior and a thoroughly cooked, evenly done interior — from a whole roasted chicken to a tray of root vegetables to a rack of lamb.
How roasting works:
Hot air in the oven transfers heat to the food's surface through convection. As the surface dries and heats, the Maillard reaction begins — proteins and sugars caramelise, producing the golden-brown colour and deeply savoury flavour that makes roasted food so appealing. Below the surface, the heat conducts slowly inward through the food's structure over time, cooking the interior without burning the exterior. This balance — enough surface heat for caramelisation, enough time for the interior to cook through — is what good roasting achieves.
Convection ovens (fan ovens) circulate the hot air actively, speeding up this process by 15–20% and producing more even browning. Conventional ovens without a fan are slightly less efficient but work perfectly well with slightly longer cooking times.
Temperature zones in roasting:
Different roasting temperatures produce different results and suit different foods.
- High heat (200–230°C / 400–450°F): Rapid browning, crispy exterior, shorter cooking time. Best for chicken pieces, vegetables, potatoes, and anything that benefits from a caramelised crust forming quickly.
- Medium-high heat (175–200°C / 350–400°F): The standard roasting zone. Even browning with enough time for larger cuts to cook through. Ideal for whole chicken, leg of lamb, and most oven-baked protein dishes.
- Low and slow (120–150°C / 250–300°F): Very gentle roasting for large, tough cuts that need hours of heat to break down collagen. Less browning, more tenderness. Best for pork shoulder, whole lamb shoulder, and very large joints.
What to roast:
- Whole chicken and poultry — the quintessential roast. High starting heat (220°C for 20 minutes) browns and crisps the skin, then reducing to 180°C for the remaining time cooks the interior through without drying out the breast meat.
- Root vegetables — potatoes, carrots, parsnips, sweet potatoes, and turnips all roast magnificently. Tossed in oil and spread in a single layer at 200°C for 35–45 minutes, they caramelise on the outside and become fluffy within.
- Bone-in chicken and lamb pieces — Pakistani-style baked chicken and chops roasted in spiced yogurt marinade at 200°C produce charred, caramelised results similar to a tandoor without one.
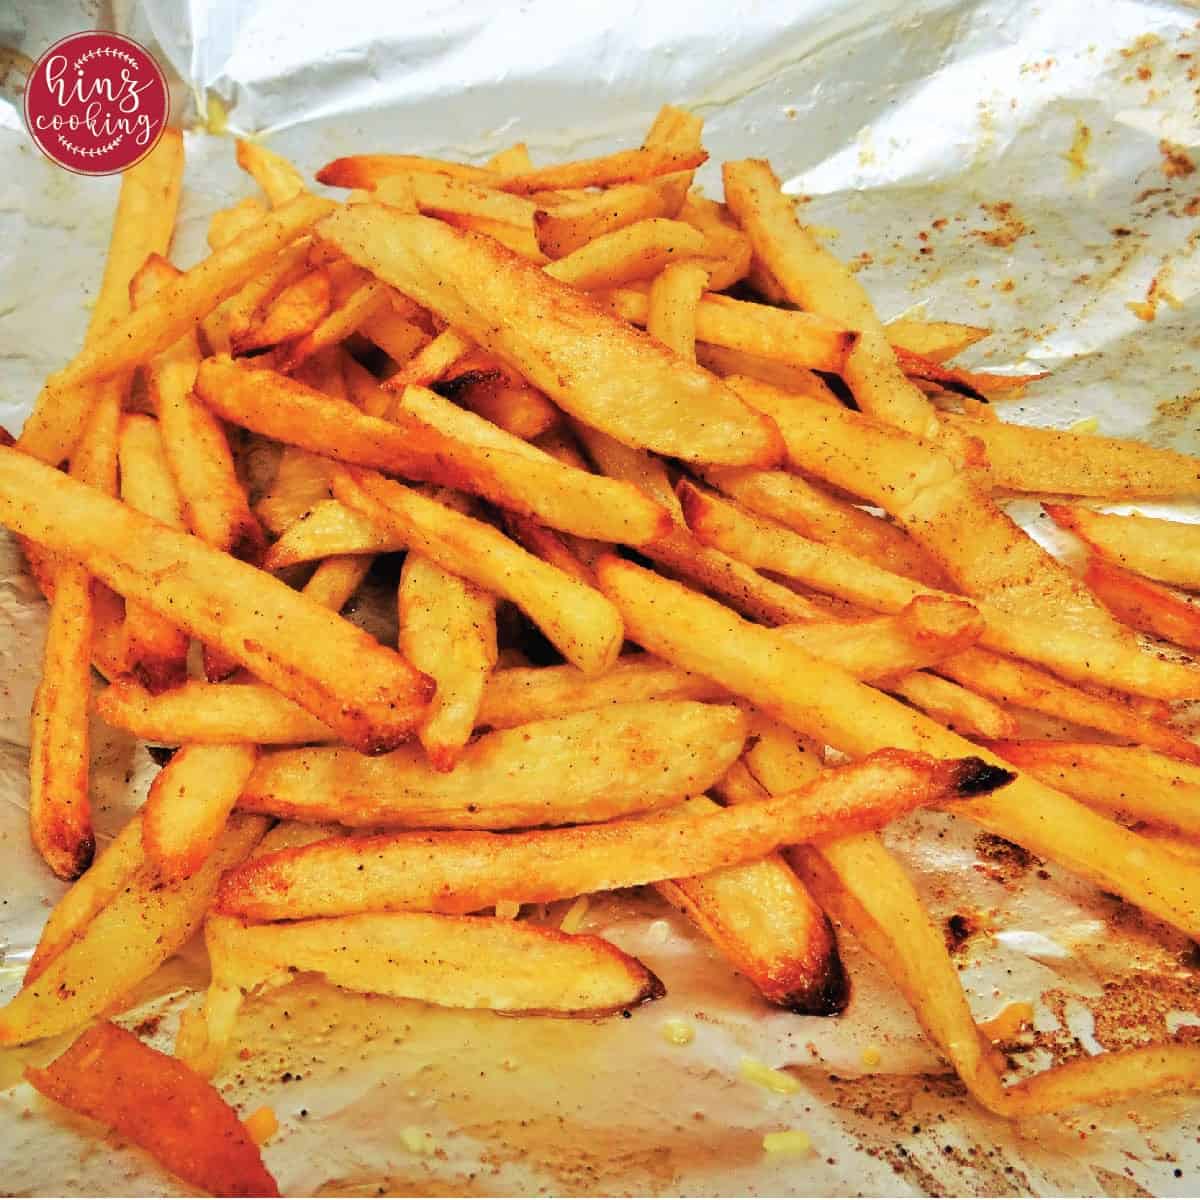
- French fries — oven-baked fries at high heat (220°C) on a preheated tray give a genuinely crispy result as close to deep-frying as an oven can achieve.
Roasting and Pakistani cooking:
Though the traditional Pakistani kitchen relies more heavily on stovetop cooking, oven roasting appears increasingly in modern Pakistani home cooking — particularly for whole chicken dishes, tikka-marinated meats, and vegetable sides. The yogurt-and-spice marinade used across Pakistani cooking is particularly well-suited to roasting: the yogurt creates a coating that protects the meat from drying while the spices caramelise against the oven heat, producing the charred, complex exterior characteristic of tandoor cooking.
Pro tip: Always roast on a preheated tray. Placing food on a cold tray that goes into a hot oven delays the bottom surface reaching temperature and the underside of the food steams rather than searing. A tray preheated in the oven for 10 minutes before the food goes on it ensures immediate contact heat from below.
→ Try roasting in my Honey Garlic Roasted Potatoes, Healthy Baked Chicken Breast, and Oven Baked French Fries.
7. Baking
Baking and roasting both use dry heat in an enclosed oven — but they are applied to fundamentally different types of food and produce completely different results. Roasting is for solid foods: meat, vegetables, fish. Baking is for structured foods that begin as a batter, dough, or mixture and are chemically or physically transformed by heat into something with entirely new structure — bread that rises, cakes that set, pastry that flakes, cookies that spread and crisp.
How baking works:
When a dough or batter enters a hot oven, multiple things happen simultaneously. Leavening agents — yeast, baking powder, baking soda, or trapped air — produce gas that expands with the heat, causing the mixture to rise. Proteins in flour (gluten) and eggs coagulate and set, giving the risen structure permanence. Starches gelatinise, absorbing moisture and contributing to the final texture. Sugars on the surface caramelise, producing the golden-brown crust and the sweet aromatic compounds that make baked goods smell the way they do. All of this happens within a specific temperature window — too cold and nothing sets properly, too hot and the outside burns before the inside has time to transform.
The importance of precision in baking:
Baking is frequently described as the science of cooking, and the description is accurate. A curry or a stir-fry tolerates imprecision — an extra tablespoon of oil, a pinch more spice — because the result is adjusted throughout the cooking process. Baking does not work this way. The ratios of flour, fat, liquid, and leavening are a chemical formula. Change any variable and the outcome changes in a way that cannot be corrected mid-bake. Measuring ingredients by weight rather than volume, using the correct oven temperature, and not opening the oven door during the first two-thirds of baking — these are not optional guidelines, they are requirements.
What to bake:
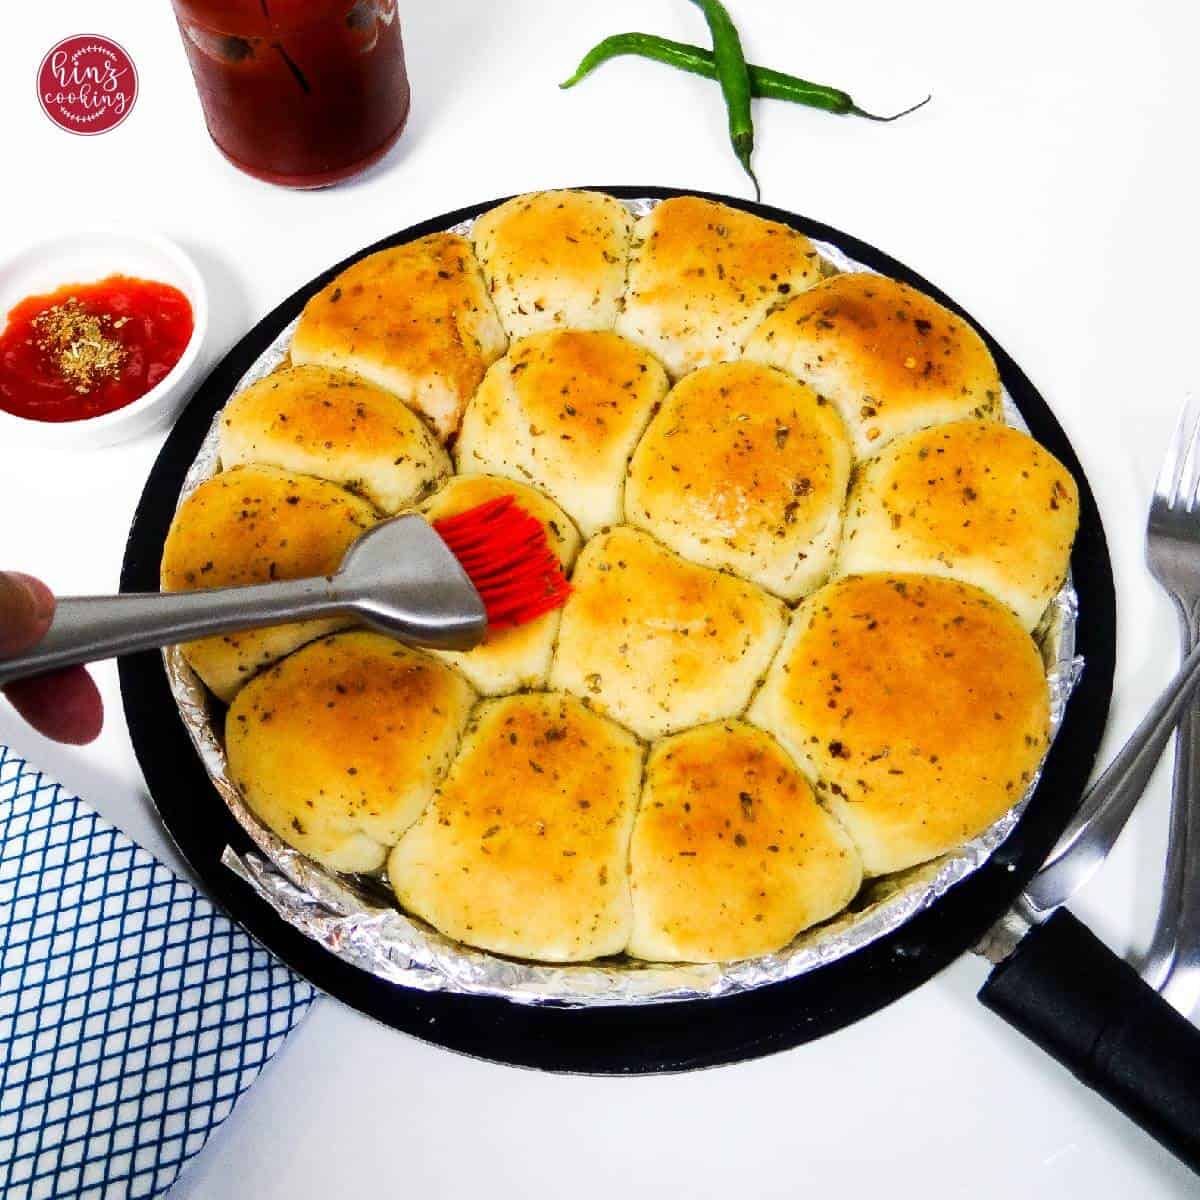
- Bread and naan — all leavened breads are baked, either in a conventional oven, a cast iron skillet (for tawa naan), or a clay tandoor. The combination of yeast activity, gluten development, and oven heat transforms raw dough into something with structure, crust, and chew.
- Pizza — the dough bakes at high heat (220–250°C) while the toppings cook simultaneously. A preheated pizza stone or baking steel replicates the intense bottom heat of a pizza oven.
- Cakes and cookies — sugar, fat, eggs, and flour combined in precise ratios and baked at moderate temperatures (160–180°C) produce the range of textures from the dense richness of a brownie to the delicate crumb of a sponge cake.
- Calzone and stuffed pastries — enclosed fillings bake inside sealed dough at high heat. The dough cooks and browns while the filling heats through simultaneously.
Baking in South Asian cooking:
Traditional South Asian cooking is predominantly stovetop — the tandoor is the main baking tradition in Pakistani and Indian culture. But modern South Asian home baking has expanded significantly to include oven-baked naan, tikka-marinated proteins, samosas baked rather than fried, and desserts like shahi tukray (bread pudding) and various milk-based baked sweets. The overlap between Pakistani spicing and Western baking technique — tikka-spiced baked chicken, masala-stuffed baked rolls, spiced cookies — is one of the most creatively interesting areas of contemporary Pakistani home cooking.
Pro tip: Invest in an oven thermometer. Most domestic ovens run 10–25°C hotter or colder than the temperature displayed on the dial — a calibration error that systematically ruins baked goods. Knowing your oven's true temperature and compensating for it is the single most impactful upgrade a home baker can make.
→ Try baking in my Pizza Poppers, Coffee Cookies, and Easy Homemade Calzone.
8. Smoking
Smoking is one of the oldest food preservation and flavour-development techniques in human history — predating refrigeration, seasoning, and most cooking equipment we take for granted today. Food is exposed to smoke produced by the slow combustion of wood, and that smoke deposits hundreds of aromatic compounds onto and into the food's surface, creating flavour complexity that no other cooking method can replicate. Smoked food tastes of time, of wood, of fire — a depth that is immediately recognisable and impossible to fake.
How smoking works:
Wood combustion at low temperatures (below 300°F / 150°C) produces an incompletely burned mixture of gases, liquids, and fine particles — collectively experienced as smoke. This smoke contains compounds including phenols, carbonyls, and organic acids that deposit on the surface of food during extended exposure. These compounds do three things simultaneously: they add complex flavour, they act as mild preservatives by inhibiting bacterial growth on the surface, and they contribute to the characteristic mahogany colour of properly smoked meat.
Hot smoking vs cold smoking:
In hot smoking, the food is both smoked and cooked in the same process — temperatures run between 225–275°F (107–135°C). Food is placed in the same chamber as the burning wood. This is the BBQ tradition — smoked brisket, pulled pork, smoked chicken. The extended time at low temperature breaks down collagen in tough cuts while the smoke flavour develops simultaneously.
In cold smoking, temperatures stay below 90°F (32°C) — cool enough that food is not cooked, only flavoured and partially preserved. Cold-smoked salmon, cold-smoked cheese, and smoked chili peppers are produced this way. Cold smoking requires careful food safety practices as the low temperature does not kill harmful bacteria — food must be cured or brined before cold smoking.
The dhungar technique — smoking in South Asian cooking:
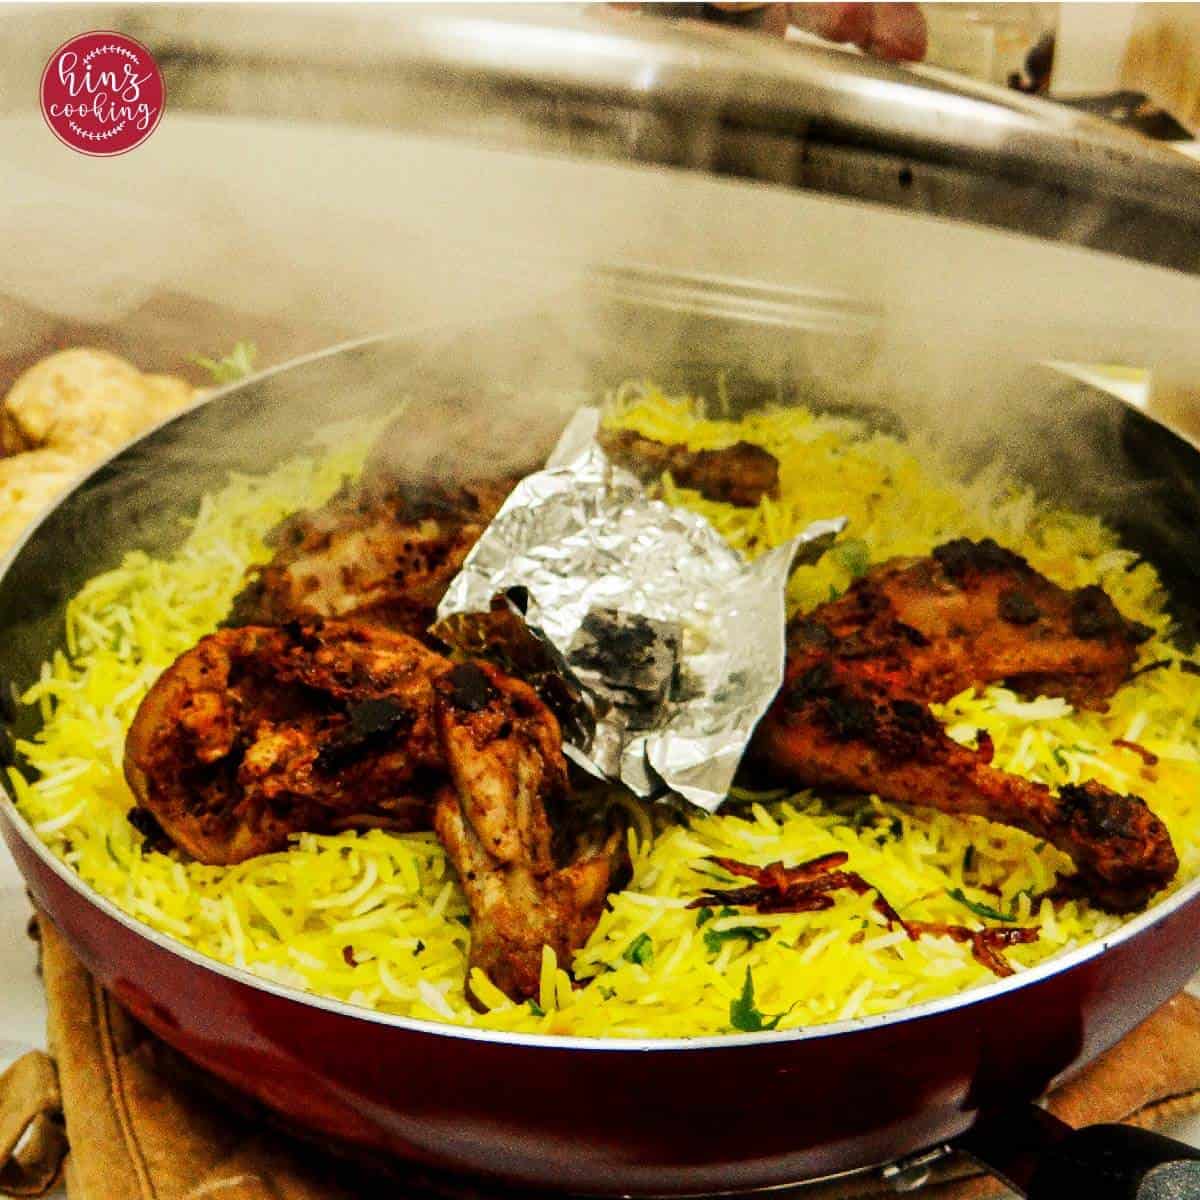
Pakistani and Indian cooking has its own indigenous smoking technique called dhungar (also written dhungaar). A piece of natural charcoal is heated over an open flame until red-hot. A small steel bowl or piece of foil is placed in the centre of the finished dish — biryani, dal, keema, or raita. The red-hot coal is placed in the bowl, a teaspoon of ghee is poured over it, and the whole pot is immediately sealed with a tight lid. The ghee combusts on the hot coal, producing fragrant smoke that permeates the dish within 3–5 minutes. The result is a subtle but unmistakable smokiness that characterises restaurant-style biryani and kabab. This technique is accessible to every home cook with a piece of charcoal — no smoker required.
What to smoke:
- Kebabs and tikka — exposure to charcoal smoke during grilling is what gives street-style Pakistani BBQ its distinctive flavour. The dhungar technique applied after cooking replicates this indoors.
- Chicken tikka biryani — the smoked tikka pieces layered into biryani during the dum stage add a complexity that regular baked chicken cannot match.
- Brisket and beef — long, slow hot smoking at 225°F for 8–12 hours transforms a tough, inexpensive cut into something extraordinarily tender and flavourful through the combination of collagen breakdown and smoke penetration.
- Fish — smoked fish takes on a rich, complex flavour. Salmon, mackerel, and trout are the most commonly cold-smoked fish in Western cooking.
Pro tip: For dhungar smoking at home, the key is speed — once the ghee hits the hot coal and smoke begins to form, seal the pot immediately and completely. Any gap in the seal allows the fragrant smoke to escape before it can penetrate the food. Keep the lid on for a minimum of 5 minutes.
→ Try smoking techniques in my Beef Bihari Kabab and Chicken Tikka Biryani.
Moist-Heat Methods
Moist-heat cooking involves water, stock, or steam to transfer heat. It’s ideal for delicate or fibrous foods that need softening without browning.
9. Poaching
Poaching is one of the gentlest cooking methods available — food is submerged in liquid and cooked at a temperature well below boiling, typically between 160–180°F (70–82°C). At this temperature the liquid barely moves — you'll see the occasional small bubble rising but nothing close to a simmer. This controlled, quiet heat is what makes poaching so effective for delicate foods that would toughen, dry out, or fall apart under more aggressive heat.
How poaching works:
The low temperature means the proteins in food cook slowly and gently. Eggs set without turning rubbery. Fish stays flaky and moist rather than tight and dry. Chicken poached in spiced stock becomes impossibly tender — the kind of texture you can shred with two forks without any effort. The liquid itself becomes flavoured during cooking, which is why a good poaching liquid is never just plain water.
The poaching liquid matters as much as the technique:
A plain water poach gives you a clean, neutral result. But poaching in stock, spiced broth, milk, or flavoured water transforms both the food and the liquid simultaneously. The food absorbs the flavour of the liquid as it cooks. In Pakistani and South Asian cooking, chicken is frequently poached in a spiced broth — ginger, whole cardamom, a cinnamon stick, and a pinch of salt — before being shredded for dishes like chicken corn soup, club sandwiches, or cold salads. The resulting broth is then used as the soup base or cooking liquid. Nothing is wasted.
What to poach:
- Eggs — the most classic poached food. The white sets while the yolk stays runny. Water temperature must be maintained at just below simmering — 180°F maximum.
- Fish and seafood — salmon, white fish, and prawns all poach beautifully. The gentle heat keeps the flesh moist and flaky. Poach in stock with a squeeze of lemon and fresh herbs.
- Chicken breast — the best method for moist, shreddable chicken. Boneless breast poached in spiced water or stock for 15–18 minutes gives you perfectly cooked chicken for salads, sandwiches, or any recipe that calls for cooked chicken.
- Fruit — pears, peaches, and plums poached in spiced syrup (sugar, cinnamon, star anise, a strip of orange zest) become a simple, elegant dessert. The fruit softens and absorbs the syrup, becoming deeply aromatic.
- Dumplings and wontons — poached rather than fried for a lighter, softer result.
Poaching in South Asian cooking:
Though not always called poaching by name, the technique appears throughout Pakistani and Indian kitchens. Doodh pati chai — the beloved milk tea of Pakistan — is essentially tea leaves poached in spiced milk at a low temperature to extract flavour without burning the milk. Chicken poached in keema shorba (spiced meat broth) is the base for several traditional Pakistani soups. And the simmering stage of most curries, where whole spices are bloomed in water with the chicken before the masala stage begins, is fundamentally a poaching step.
Pro tip: Add an acid to your poaching water — a splash of white vinegar for eggs, a squeeze of lemon for fish, or a tablespoon of yogurt for chicken. The slight acidity helps proteins coagulate gently and stay together without toughening.
→ Try poaching in my Chicken Corn Soup — chicken is poached in spiced stock, shredded, and returned to the broth.
10. Simmering
Simmering is cooking in liquid maintained at a gentle, steady temperature just below the boiling point — between 180–200°F (82–93°C). At this temperature, the liquid moves with small, lazy bubbles rising slowly from the bottom rather than the vigorous, rolling activity of a full boil. This distinction — gentle movement versus turbulent boiling — makes all the difference to the quality of the final dish.
How simmering works:
The lower temperature of simmering compared to boiling means heat is applied more gently and more consistently. Proteins cook without tightening aggressively. Collagen in connective tissue breaks down slowly into gelatin, enriching the cooking liquid with body and depth. Spices and aromatics release their essential oils gradually into the surrounding liquid, building flavour complexity over time rather than in one aggressive burst. The gentle movement of simmering liquid circulates flavour-laden liquid around the food continuously, ensuring even, thorough seasoning throughout.
This time-dependent flavour development is why most curries, soups, stocks, and braised dishes have a minimum simmering time in their recipe — not because the food needs that long to cook through, but because the flavour needs that long to fully develop. A chicken curry simmered for 40 minutes tastes noticeably different and better than the same curry simmered for 15 minutes.
The difference between simmering and boiling:
The distinction matters far more than most home cooks realise. A full rolling boil (212°F) is appropriate for pasta, rice, and potatoes — foods that need rapid hydration or straightforward cooking. Applied to meat, the violent turbulence of boiling contracts proteins aggressively, squeezing out moisture and making meat tough and stringy. Legumes boiled hard become mushy on the outside before the centre is soft. Delicate fish and vegetables disintegrate. Simmering avoids all of these problems because the gentle heat treats proteins more kindly, gives starches more time to hydrate uniformly, and maintains the structure of delicate ingredients.
Simmering in South Asian cooking:
Simmering is the dominant cooking stage of virtually every Pakistani and Indian curry, dal, and stew. After the initial high-heat bhuna stage — where the masala is fried dry until the oil separates — the protein and additional liquid are added and the heat is reduced to a simmer. This simmering stage is where Pakistani cooking happens. It is during the simmer that the spices marry with the tomato and onion base, that the chicken or mutton releases its natural juices into the curry, and that the shorba (sauce) develops its characteristic depth and colour. The length of the simmer is what separates a well-developed curry from a flat one.
Pro tip: Cover the pot partially during simmering rather than completely. A full cover traps all steam and raises the internal temperature closer to boiling — defeating the purpose of simmering. A partial cover allows some steam to escape, maintaining the correct lower temperature while preventing excessive evaporation.
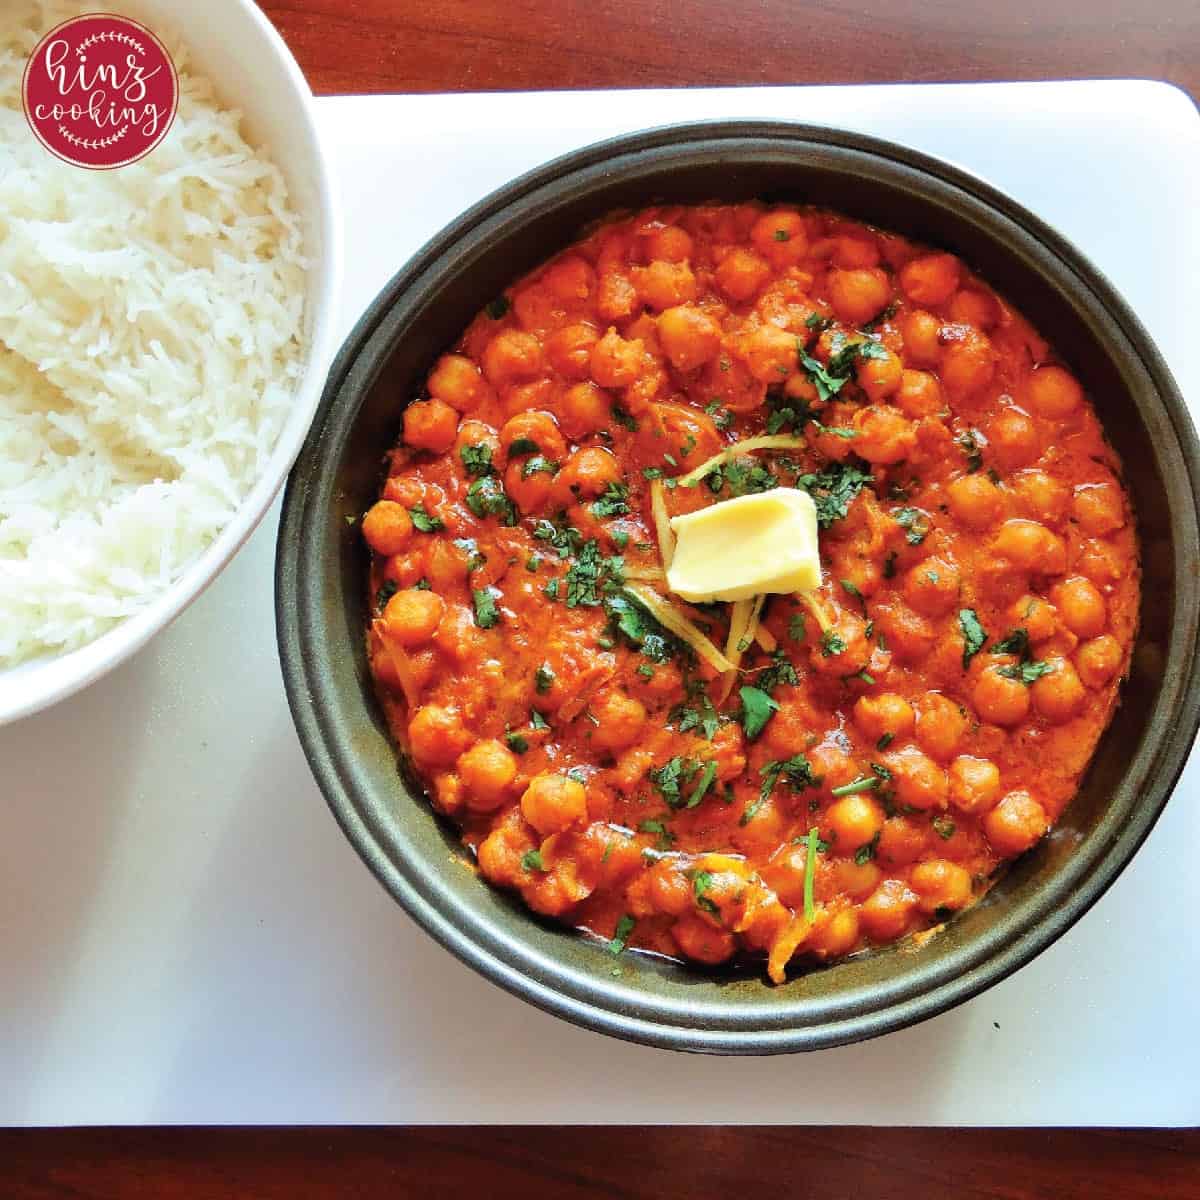
→ Try simmering in my Honey Garlic Chicken, Chickpea Curry, and Palak Chicken.
11. Boiling
Boiling is the most fundamental of all cooking methods — so simple and ubiquitous that it is often taken for granted. Water heated to 212°F (100°C) at sea level reaches its boiling point: vigorous, rolling bubbles form throughout the liquid and the surface churns continuously. This is a full boil. Food submerged in boiling water cooks through rapid heat transfer from the surrounding liquid — fast, efficient, and completely controllable by adjusting the heat.
How boiling works:
Water at boiling point maintains a constant temperature of 212°F regardless of how high the heat is turned — adding more heat only produces more steam, not hotter water. This constant temperature means boiling is reliably reproducible: pasta boiled in salted water for 10 minutes produces the same result every time. The rapid movement of boiling water also keeps food moving slightly, preventing it from settling on the base of the pot and sticking.
Al dente and the importance of timing:
The concept of al dente — pasta cooked until just firm in the centre, with a tiny resistance to the bite — illustrates why timing matters in boiling more than almost any other method. Pasta goes from undercooked to perfectly al dente to overcooked in a window of roughly 2 minutes. The same applies to vegetables: green beans or asparagus boiled for exactly 3 minutes are bright, firm, and vibrant; boiled for 7 minutes they are dull, soft, and have lost much of their character. A timer and attention are the only tools required.
Salting the water:
Salted boiling water is the standard for pasta, rice, potatoes, and most vegetables. Salt raises the flavour ceiling of boiled food significantly — it seasons the food from the inside as it cooks, rather than just coating the surface afterwards. Water for pasta should be generously salted — it should taste noticeably seasoned, like mild sea water. Under-salted pasta water produces flat pasta regardless of how good the sauce is.
What to boil:
- Basmati rice for biryani — parboiled in heavily salted boiling water until 70–80% cooked before layering for dum. The exact doneness at the boiling stage is critical — fully cooked rice becomes mushy during dum, undercooked rice stays hard.
- Potatoes — boiled from cold water for even cooking throughout. Starting potatoes in cold water and bringing to a boil together ensures the outside and inside reach temperature simultaneously.
- Pasta — boiled in a large volume of salted water at a full rolling boil. A large volume maintains the boil temperature when pasta is added.
- Dried chickpeas and lentils — after soaking, boiled until completely tender. The boiling liquid becomes the cooking stock for many dishes.
- Eggs — boiling time precisely controls the doneness of the yolk: 6 minutes for a runny centre, 8 minutes for a jammy centre, 10–12 minutes for a fully set hard-boiled yolk.
Pro tip: Save pasta water, potato water, and chickpea cooking water. These starchy, seasoned liquids are liquid gold for adjusting sauces, thinning curries, and adding body to soups. Pasta water in particular — milky with dissolved starch — is the secret ingredient that makes Italian pasta sauces emulsify and cling to the pasta rather than pooling at the bottom.
→ Try boiling in my How to Cook Basmati Rice for Biryani, How to Cook Dried Chickpeas, Creamy Garlic Mashed Potatoes, Dal, and Chicken Kabsa.
12. Steaming
Steaming is cooking food in water vapour — the food never touches the water, only the steam it produces. Food is placed on a rack, basket, or perforated surface above boiling water in a covered vessel, and the rising steam surrounds and heats the food on all sides. The result is some of the most nutritious, cleanly flavoured, and gently textured food that any cooking method produces.
How steaming works:
Steam at 212°F (100°C) transfers heat to food's surface through condensation — the vapour contacts the cooler food surface, condenses into water, and releases its latent heat in the process. This condensation heat is significantly more intense than the equivalent temperature of dry air, which is why steaming cooks faster than oven heat at the same temperature. As steam continuously rises and condenses on the food, it also keeps the food's surface moist — preventing the drying and surface browning that dry-heat methods produce. This is why steamed food stays tender, moist, and retains its natural colour.
Nutrient retention — the science:
Steaming consistently outperforms boiling for nutrient retention, and the reason is straightforward: water-soluble vitamins (B vitamins, Vitamin C) leach from food into the surrounding liquid during boiling. Steam cooking keeps food above the water — nothing leaches away. Studies consistently show that steamed broccoli retains significantly more Vitamin C than boiled broccoli. For leafy greens, fish, and vegetables where nutrition and texture are the priority, steaming is the most protective cooking method available.
What to steam:
- Fish — steamed fish is one of the great clean preparations in Asian cooking. Whole fish or fillets placed over ginger and spring onion, steamed for 8–12 minutes, retain all their moisture and delicate flavour. The steaming liquid becomes a flavourful broth in itself.
- Vegetables — broccoli, green beans, asparagus, and peas all steam in 3–6 minutes. The result is vibrant colour, retained nutrients, and a clean vegetable flavour that boiling cannot match.
- Dumplings — from Chinese dim sum to South Asian modak, dumplings are typically steamed in bamboo or metal baskets. The steam cooks the wrapper to a translucent, silky texture while the filling heats through.
- Chicken — steamed chicken is the basis for several Pakistani preparations where clean, unseasoned cooked chicken is required. Marinated, then steamed until cooked through, the chicken retains its juices completely.
- Rice — the final stage of many rice preparations (including biryani dum) is essentially steaming — the rice finishes in its own trapped moisture over very low heat.
Improvising a steamer at home:
A steamer basket is ideal but not essential. Any covered pot with a rack, colander, or heatproof plate elevated above the waterline works perfectly. Place the food on the elevated surface, ensure the water doesn't touch the food, cover tightly, and maintain a steady boil below. This is how Pakistani home cooks have steamed chicken and vegetables for generations without specialist equipment.
Steaming in South Asian cooking:
Steaming appears throughout Pakistani and South Asian cooking, often in combination with other methods. The dum technique — sealing a biryani or pulao and finishing it over low heat — is essentially a steaming process inside the pot. Dhokla (a fermented chickpea flour cake from Indian cuisine) is steamed. Idli (South Indian rice and lentil cakes) are steamed. Many Pakistani desserts like steamed puddings use the method. And the steam chicken preparation — marinated chicken steamed until cooked through, then roasted briefly for colour — is a modern Pakistani recipe that combines two methods for the best qualities of each.
Pro tip: Don't overfill the steamer. Food needs space for steam to circulate around it — overcrowding means uneven cooking where the outside pieces are done before the inside ones. Steam in a single layer or with adequate gaps between pieces.
→ Try steaming in my Steam Chicken Recipe.
Combination Cooking Methods
Combination methods use both dry and moist heat to achieve tenderness and flavor depth.
13. Braising
Braising is a two-stage combination cooking method that begins with high-heat browning and finishes with long, slow, covered cooking in a modest amount of liquid. It is the technique specifically designed for tough, collagen-rich cuts of meat and fibrous vegetables that would remain chewy and unpleasant under quick, high-heat cooking — but that transform into something extraordinarily tender and flavourful when given time and gentle, moist heat.
How braising works:
Stage one: the food — typically a large piece of meat or whole portions — is seared in hot oil over high heat until deeply browned on all sides. This is not about cooking the food through, only about developing the Maillard reaction browning on the surface. This initial sear creates the flavour compounds that will dissolve into the braising liquid and give the finished sauce its depth and colour.
Stage two: aromatics, liquid (stock, water, wine, tomato), and spices are added to the pot. The liquid level comes roughly halfway up the sides of the meat — enough to create steam and keep the environment moist, but not so much that the meat is fully submerged (which would make it a stew). The pot is covered tightly and placed in a low oven or on the lowest stovetop heat. Over 1.5–3 hours, the collagen in the meat's connective tissue breaks down into gelatin, the muscle fibres relax and absorb the braising liquid's flavour, and the cooking liquid reduces and concentrates into a rich, naturally thickened sauce.
Why collagen matters:
Collagen is the structural protein found in connective tissue, tendons, and around bones. In cuts like lamb shoulder, beef cheek, chicken thighs, and oxtail, collagen makes up a significant proportion of the meat's structure — which is why these cuts are tough when cooked quickly. But when heated above 160°F (71°C) for an extended period, collagen melts and converts into gelatin — a protein that is liquid when hot and sets like jelly when cold. Gelatin gives braised food its characteristic silky, unctuous texture and gives the braising liquid its body. This transformation cannot be rushed — it takes time at sustained low heat, which is precisely what braising provides.
Braising in South Asian cooking:
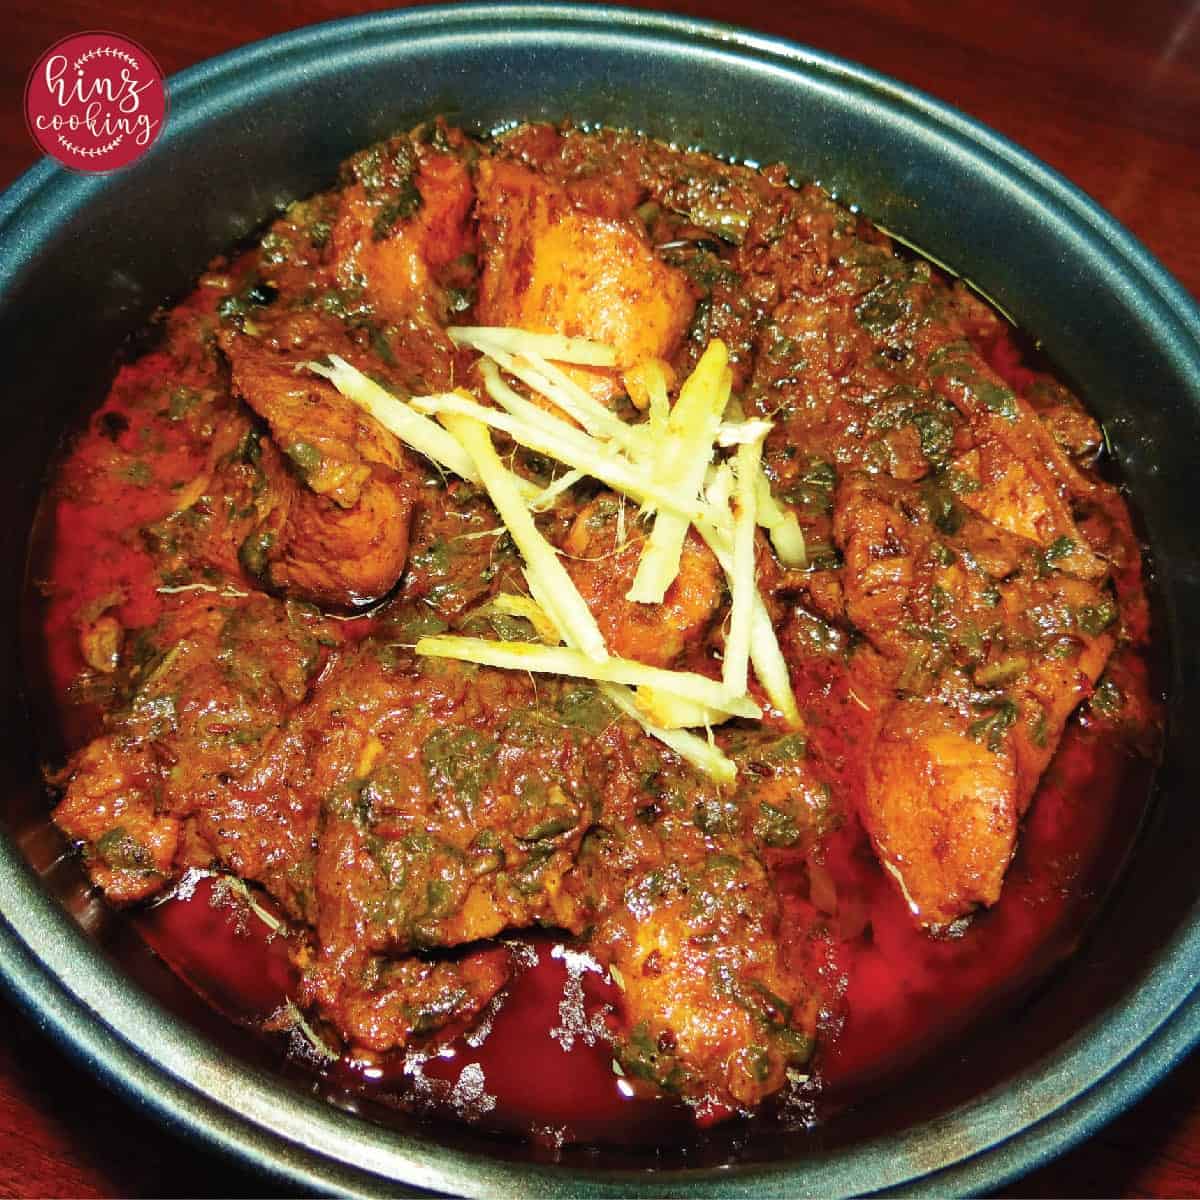
The principle of braising is embedded deeply in Pakistani and Indian cooking, even when the technique isn't called by that name. Slow-cooked karahi, aloo gosht, and lamb rogan josh all follow the fundamental braising structure: initial high-heat frying of the masala and meat, followed by the addition of liquid and long, covered simmering. The covered pot traps steam, the liquid never fully submerges the meat, and the collagen in bone-in mutton or lamb breaks down into the curry sauce — giving it a richness and body that boneless, quick-cooked versions simply cannot replicate.
Pro tip: Always use bone-in cuts for braising when possible. The collagen around bones breaks down into gelatin during the long, slow cook, giving the braising liquid extraordinary body and richness. Boneless braised meat cooks fine but produces a noticeably thinner, less satisfying sauce.
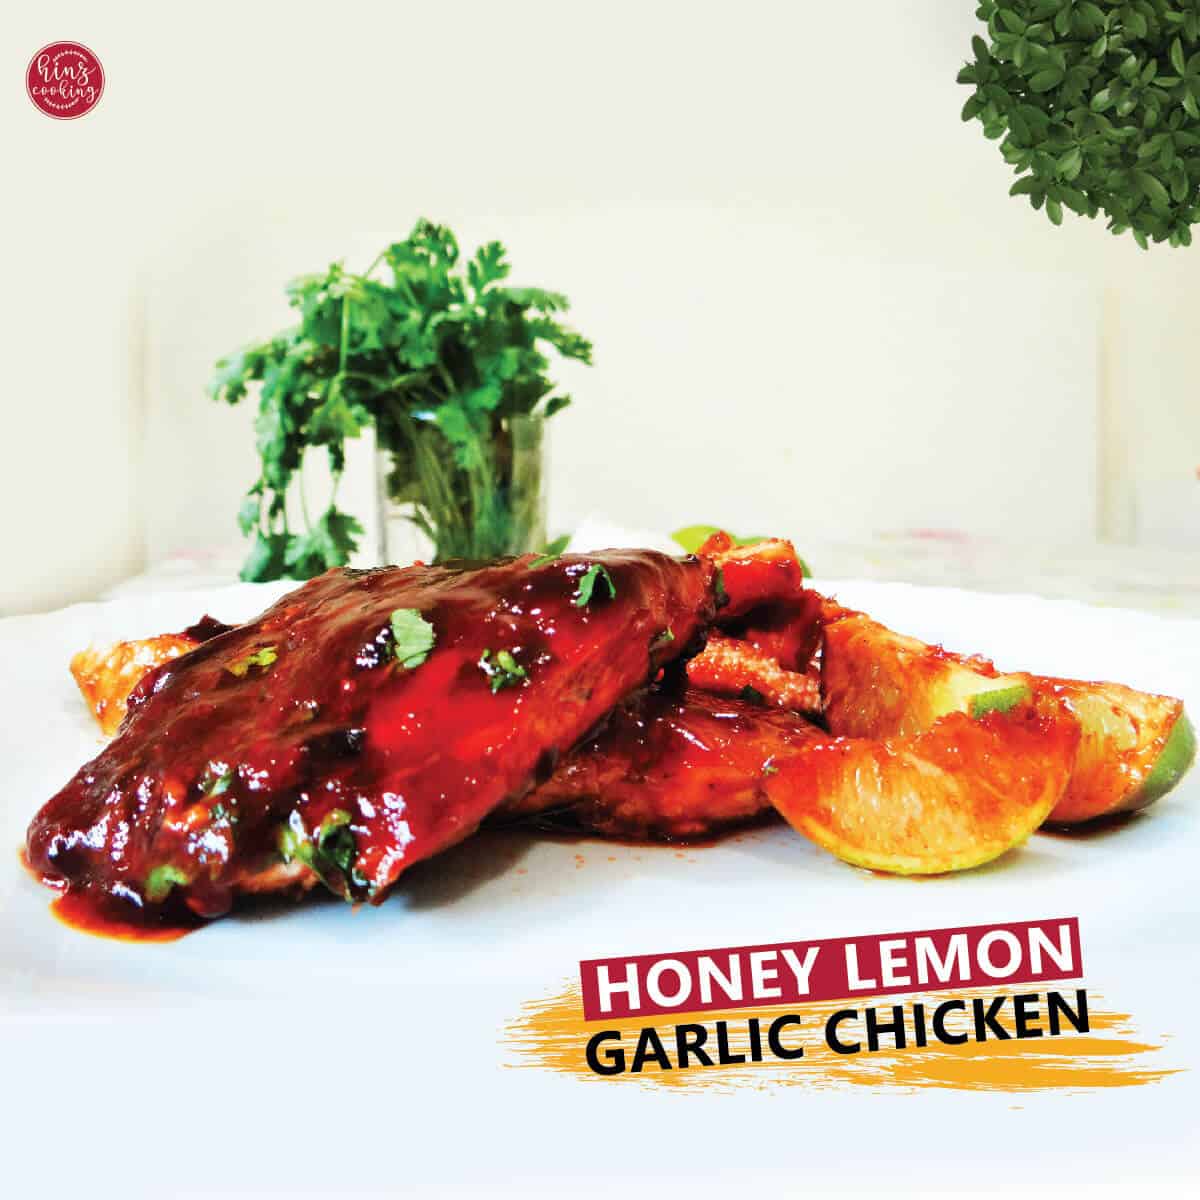
→ Try braising in my Honey Garlic Lemon Pepper Chicken and Hot Honey Chicken Tenders.
14. Stewing
Stewing and braising are closely related — both use a combination of searing and slow, covered cooking in liquid. The fundamental difference is quantity of liquid: in braising, liquid comes halfway up the food. In stewing, the food is completely submerged. This distinction changes the texture of the finished dish, the concentration of the sauce, and the types of food that benefit from the method.
How stewing works:
Food is cut into smaller, uniform pieces — unlike the large whole cuts used in braising — and fully submerged in seasoned liquid. The pot is covered and maintained at a gentle simmer over low heat for an extended period. Because the food is fully submerged, it cooks in the liquid from all sides simultaneously and the liquid flavours the food throughout rather than just on the exposed surfaces. As the food cooks, it releases its own flavour and juices into the surrounding liquid, enriching it progressively. The result is a unified dish where the food and the sauce have exchanged flavour so thoroughly that neither can exist without the other.
Why uniform size matters in stewing:
Cutting food into uniform pieces is not optional in stewing — it is the foundation of the method working correctly. Uneven pieces mean some cook through and become tender while others remain tough. In a 90-minute stew, large pieces may be correct while small pieces are overcooked and falling apart. A general rule: cut all meat and vegetables to approximately the same size — 3–4cm cubes for most proteins and root vegetables — so everything reaches tenderness at the same time.
Stewing vs currying:
For South Asian cooks, the distinction between a stew and a curry is primarily one of spicing and technique rather than method. A Pakistani shorba-style curry — lamb or mutton with potatoes in a loose, liquid gravy — is technically a stew. The meat is cut into pieces, fully submerged in liquid, and slow-cooked until tender. The difference is the South Asian spicing: the bhuna masala base, the whole garam masala, the ginger and garlic — these transform what is structurally a stew into something that tastes unmistakably South Asian.
What to stew:
- Lamb, mutton, and goat — the classic stewing meats across Pakistani, Middle Eastern, and European cooking. Fully submerged in spiced stock or tomato-based liquid, simmered for 1.5–2 hours until the meat falls away from the bone.
- Chicken pieces — bone-in chicken in a liquid curry base is a stew, even when called a curry. 40–50 minutes at a gentle simmer produces tender, flavourful chicken in a deeply spiced sauce.
- Legumes and lentils — dal, chana, rajma, and kidney beans all stew beautifully. The cooking liquid thickens naturally as starches leach from the legumes, creating the characteristic creamy sauce.
- Root vegetables — potatoes, carrots, and turnips added to meat stews in the final 30–45 minutes absorb all the spiced liquid and become deeply flavoured throughout.
Pro tip: Resist the urge to stir a stew too frequently. Constant stirring breaks up the food as it becomes tender, turning your stew into a mush. Stir gently and infrequently — just enough to check the bottom isn't catching.
→ Try stewing in my Aloo Gosht and North Indian Lamb Curry.
15. Pot Roasting
Pot roasting is one of the most rewarding cooking methods in a home kitchen — it combines the browning power of dry heat with the tenderising magic of steam, all in one covered pot. The result is meat that is deeply caramelised on the outside, fall-apart tender on the inside, and surrounded by a rich, concentrated sauce that forms entirely on its own during cooking.
How pot roasting works:
The process has two distinct stages. First, the meat is seared in a hot pot with a little oil over high heat — this creates the golden-brown crust through the Maillard reaction, locking in surface flavour and giving the finished dish its colour and depth. Then a small amount of liquid is added (stock, water, tomato, or aromatics like onion and garlic), the pot is covered tightly, and the whole thing goes into a low-to-medium oven.
Inside the sealed pot, the liquid heats and creates steam. That steam circulates continuously, basting the meat from all sides as it cooks — something an open roasting pan cannot do. The meat simultaneously roasts in the dry heat of the oven and steams in the trapped moisture. This is why pot-roasted meat is always more tender and juicier than oven-roasted meat from an uncovered pan.
The key difference from braising and stewing:
All three methods use heat plus liquid in a covered pot — but the amount of liquid is the defining factor.
- Stewing: meat is completely submerged in liquid
- Braising: meat is half-submerged — liquid comes halfway up
- Pot roasting: just a small amount of liquid — enough to create steam, but the meat sits above it and roasts rather than boils
This small distinction makes a significant difference to texture and flavour. Pot-roasted meat has a firmer, more roasted character than braised or stewed meat — the surface develops colour and crust while the inside becomes tender.
Temperature and timing:
Pot roasting works best at a low-to-moderate oven temperature — 160–175°C (320–350°F). High heat defeats the purpose because it evaporates the liquid too quickly before the meat has time to become tender. Plan for 2–3 hours for a large joint of meat, or 45–60 minutes for smaller cuts like chicken thighs or lamb shanks.
What to pot roast:
Pot roasting is specifically designed for tougher cuts that need time to break down — it is not a method for quick-cooking tender cuts like steak or chicken breast. The best candidates are:
- Lamb shoulder or leg — becomes shreddably tender after 3 hours
- Mutton or goat — especially well-suited to pot roasting with South Asian spices
- Whole chicken — pot-roasted chicken stays incredibly moist compared to open oven roasting
- Beef chuck or brisket — the classic Western pot roast cut
- Root vegetables — potatoes, carrots, and turnips added in the final hour absorb all the cooking juices and become deeply flavoured
Pot roasting with South Asian spices:
Pot roasting adapts beautifully to Pakistani and Indian flavour profiles. Instead of Western aromatics like rosemary and thyme, use whole garam masala (cinnamon, cardamom, cloves), ginger garlic paste, and tomato as your liquid base. Sear the mutton or lamb first, add the spices and a cup of water, cover tightly, and slow-roast at 160°C for 2–3 hours. This is essentially how Pakistani nihari and slow-cooked karahi achieve their deep, concentrated flavour — the pot roasting principle applied to desi cooking.
Pro tip: The lid must seal tightly. If your pot lid doesn't fit snugly, place a sheet of aluminium foil over the pot before pressing the lid on top — this traps the steam completely and prevents the liquid from evaporating too quickly.
→ Try pot roasting in: Aloo Gosht — Pakistani lamb and potato curry slow-cooked in its own steam, and North Indian Lamb Curry — a deeply spiced combination cooking recipe.
Specialty & Modern Cooking Methods Used In 2026
These techniques combine creativity with precision — perfect for experimental cooks or advanced kitchen setups.
16. Sous Vide
Sous vide (pronounced soo-veed) is a French technique that translates literally to "under vacuum." Food is sealed in an airtight bag — either vacuum-sealed or in a ziplock bag with the air pressed out — and then submerged in a precisely temperature-controlled water bath for an extended period. The result is the most consistent, perfectly cooked food that any home cooking method can produce.
Why sous vide is different from every other method:
Every other cooking method involves some degree of guesswork about internal temperature. You grill a chicken breast and hope the outside doesn't burn before the inside reaches 165°F. You roast a leg of lamb and cut it open to check. With sous vide, the water bath is set to exactly the temperature you want the food to reach — and the food can never exceed that temperature, no matter how long it stays in. Leave a chicken breast in a 145°F water bath for 2 hours or 4 hours — it will be exactly 145°F throughout, perfectly cooked edge to edge, every single time.
How it works in practice:
A sous vide circulator (a wand-shaped device that clips onto any pot or container) heats the water and circulates it continuously to maintain a precise temperature — accurate to within 0.1°F. Season your food, seal it in a bag, submerge in the water bath, and walk away. The cooking time is flexible — sous vide has a wide window of perfect doneness rather than a narrow one. A steak might be perfect anywhere from 1 to 4 hours at the right temperature.
After the water bath, most proteins are given a final 60–90 second sear in a screaming-hot pan or on a grill. This finishes the exterior with colour and crust — the Maillard reaction that sous vide alone cannot produce. The result is steak with a perfectly even pink interior wall to wall, finished with a proper charred crust. This is the combination that made sous vide famous in professional kitchens.
What to cook sous vide:
- Steak — the application that made sous vide famous. 129–135°F (54–57°C) for medium-rare, 1–4 hours. Final sear 60 seconds per side in a very hot cast iron pan.
- Chicken breast — 145°F (63°C) for 1.5–4 hours. Produces the most consistently juicy, tender chicken breast possible. Night-and-day compared to oven-baked breast.
- Lamb chops and mutton — 131°F (55°C) for 2–4 hours for medium-rare. The gentle heat breaks down connective tissue while keeping the meat rosy and juicy — excellent with Pakistani spice marinades.
- Eggs — 167°F (75°C) for 13 minutes produces a perfectly set white with a custardy, jammy yolk. Precision egg cooking at its finest.
- Vegetables — carrots, asparagus, and root vegetables cooked sous vide at 183°F (84°C) for 1 hour retain their colour, nutrients, and a pleasant bite that boiling and steaming can't replicate.
Sous vide for South Asian cooking:
Sous vide adapts well to Pakistani and Indian marinades. Chicken tikka marinated in yogurt and tikka spices, vacuum-sealed and cooked sous vide at 145°F for 90 minutes, then finished under a hot broiler or on a charcoal grill — the result is the most evenly cooked, juiciest tikka possible. The sous vide step ensures the chicken is fully cooked through before the high-heat finishing step, eliminating the common problem of chicken tikka that chars outside before it cooks inside.
Equipment needed:
An immersion circulator (sous vide wand) — brands like Anova and Joule are the most popular home options, typically priced between $80–$200. A large pot or container to hold the water bath. Vacuum sealer bags or heavy-duty ziplock bags. That's it.
Pro tip: For the best sear after sous vide, pat the food completely dry with paper towels before it hits the hot pan. Any moisture on the surface creates steam that prevents browning. Dry surface + screaming hot pan + 60 seconds = perfect crust.
17. Pressure Cooking
17. Pressure Cooking
Pressure cooking is one of the most transformative methods in the home kitchen — and one of the most used in Pakistani and South Asian cooking, even when home cooks don't consciously think of it as a technique. The principle is straightforward: by sealing food in an airtight pot and bringing the liquid inside to a boil, pressure builds up. That pressure raises the boiling point of water from 212°F (100°C) to approximately 250°F (121°C). Higher temperature means faster cooking — significantly faster.
How pressure cooking works:
In a regular open pot, water can never exceed 212°F no matter how high the flame — at that temperature it turns to steam and escapes. In a sealed pressure cooker, that steam cannot escape. Pressure builds. The boiling point rises. Food that would normally take 90 minutes at 212°F now cooks in 25–30 minutes at 250°F. The higher temperature and pressurised environment also force liquid deeper into the food's fibres, resulting in more tender, more flavourful results than conventional boiling or simmering.
The pressure cooker in Pakistani cooking:
The pressure cooker — cooker as it's simply called in Pakistani kitchens — is arguably the most used piece of equipment in South Asian home cooking. It is how most families cook chickpeas, dal, mutton, and bone-in curries every day. A chickpea that needs 8–10 hours soaking and 90 minutes boiling in an open pot takes 25–30 minutes in a pressure cooker. Mutton that needs 2 hours of slow simmering becomes fall-off-the-bone tender in 35–40 minutes. This time efficiency is not just convenient — for many families cooking multiple dishes daily, it is essential.
The Instant Pot — the modern upgrade:
The traditional stovetop pressure cooker has been largely replaced in modern kitchens by the Instant Pot and similar electric multi-cookers. The Instant Pot adds precise digital control, automatic pressure release timers, multiple cooking functions (sauté, slow cook, steam, yogurt making), and safety mechanisms that make the occasional anxious hiss of a stovetop cooker a thing of the past. For Pakistani cooking specifically, the Instant Pot's sauté function allows you to brown onions and bhuna the masala directly in the pot before switching to pressure — eliminating the need for a separate pan and reducing washing up significantly.
What pressure cooking does best:
- Dried legumes — chickpeas, kidney beans, lentils, and black-eyed peas all cook dramatically faster under pressure. Dried chickpeas (soaked overnight) go from 90 minutes to 25 minutes. Unsoaked lentils cook in 10–15 minutes.
- Tough cuts of meat — mutton, lamb shoulder, beef chuck, goat — any bone-in or collagen-rich cut that needs time to become tender is transformed by pressure cooking. The pressurised steam breaks down collagen into gelatin faster than any other method.
- Bone broths and stocks — a rich, deep bone broth that would take 12 hours on the stovetop takes 3–4 hours in a pressure cooker. The pressure extracts collagen and minerals from the bones more efficiently than gentle simmering.
- Pakistani nihari — traditionally a 6–8 hour overnight cook, achievable in 1.5–2 hours in a pressure cooker without any compromise in depth of flavour.
- Haleem — the slow-cooked wheat and meat dish that normally takes 5–6 hours reduces to under 2 hours with a pressure cooker.
- Rice — many Pakistani cooks pressure-cook rice for biryani dum stage, using the pressure cooker's sealed environment to replicate the sealed-pot dum technique at a faster pace.
Stovetop vs electric pressure cooker:
Traditional stovetop pressure cookers heat faster, reach higher pressures, and give slightly more caramelisation. Electric models like the Instant Pot are safer, more precise, and more versatile — but cook at slightly lower pressure than stovetop models. For everyday Pakistani cooking, either works perfectly. For absolute tenderness on very tough cuts like beef shank or whole trotters (paya), a stovetop cooker's higher pressure gives a marginally superior result.
Pro tip: Never fill a pressure cooker more than two-thirds full — the remaining space is needed for steam to build pressure. For legumes and foods that expand during cooking (lentils, chickpeas, rice), fill no more than half. Overfilling is the most common cause of pressure cooker problems.
→ Try pressure cooking in my Chickpea Curry — dried chickpeas pressure-cooked until perfectly tender, and How to Cook Dried Chickpeas — the complete guide to pressure cooking legumes from scratch.
18. Air frying
Air frying is one of the most significant shifts in home cooking of the past decade — a method that delivers the crunch and colour of deep frying using a fraction of the oil. Despite the name, an air fryer is not technically a fryer at all. It is a compact convection oven that circulates extremely hot air at high speed around food in a small, enclosed basket. This rapid, concentrated hot air movement mimics the effect of submersion in hot oil, producing results that are genuinely close to deep-fried food without the oil, the mess, or the calories.
How air frying works:
A heating element above the food basket and a powerful fan create a high-speed circulation of hot air — typically reaching 180–200°C (360–400°F). Food placed in the basket is surrounded by this moving hot air on all sides simultaneously. The rapid air movement strips away the thin boundary layer of cooler air that normally forms around food in a conventional oven, bringing the hot air into more direct, consistent contact with the food's surface. This produces faster, more even browning and crispier results than a conventional oven at the same temperature.
The small volume of the air fryer chamber — compared to a full-size oven — means the temperature recovers instantly when the basket is opened or when cold food is added. This thermal consistency is one reason air fryer results are more reliable than oven results for small batches.
Why air frying is not quite the same as deep frying:
Air frying produces excellent crunch and browning — but the mechanism is different from deep frying. In deep frying, food is surrounded by oil that conducts heat far more efficiently than air, and the rapid evaporation of surface moisture creates the specific steam-barrier crust that is characteristic of properly deep-fried food. Air frying relies on hot air alone. The results are genuinely crispy and visually similar — but a deep-fried samosa and an air-fried samosa, eaten side by side, have a subtly different texture. The air-fried version is drier and lighter; the deep-fried version has a slightly richer, more complex crust from the oil.
For home cooking, the air fryer is not a compromise — it is a genuinely excellent method in its own right. The reduction in oil makes it lighter. The ease and speed make it more practical for daily cooking. And for South Asian cooking specifically, it opens up possibilities for making traditionally deep-fried foods — samosas, pakoras, kababs, kachori — as accessible weeknight options rather than occasional special preparations.
Air frying for South Asian and Gulf cooking:
The air fryer's greatest contribution to Pakistani and Middle Eastern home cooking is making deep-fried street food achievable any day of the week. Air-fried samosas take 15 minutes at 180°C with a light oil brush — the pastry crisps and browns beautifully. Pakoras air-fry in 12–14 minutes. Seekh kabab develops a proper outer crust at 190°C in 10–12 minutes. Roasted chickpeas become shatteringly crispy at 200°C in 15–18 minutes. All without a vat of oil, without the smell of deep frying permeating the house, and without the cleanup.
Temperature guide for air frying:
- Chips and fries: 200°C, 15–20 minutes, shake halfway
- Chicken pieces (bone-in): 180°C, 25–30 minutes, turn halfway
- Samosas and pastries: 180°C, 12–15 minutes, brush with oil
- Kebabs and kofta: 190°C, 10–14 minutes, turn halfway
- Stuffed naan (aloo, keema): 175–180°C, 8–11 minutes
- Plain or garlic naan: 185°C, 4–5 minutes
- Roasted chickpeas: 200°C, 15–18 minutes, shake every 5 minutes
Pro tip: Always preheat the air fryer for 2–3 minutes before adding food. A cold air fryer start means the food sits in warming air rather than immediately hot air — the crust doesn't form quickly and the food absorbs more oil (if brushed) rather than crisping immediately. Preheating costs 3 minutes and makes a significant difference to the final result.
→ Try air frying in my complete collection of Air Fryer Recipes, including Air Fryer Roast Potatoes and Roasted Chickpeas in Air Fryer.
19. AI-Assisted & Automated Cooking
Artificial intelligence has moved from science fiction into everyday kitchens. In 2026, AI-assisted cooking means smart appliances that don't just follow your instructions — they think alongside you, adjusting heat, time, and technique automatically based on what's inside the oven.
How it works in practice:
The June Oven uses an internal camera and AI to visually identify your food the moment you place it inside, then selects the perfect cooking program automatically — no settings to adjust. The Tovala Smart Oven connects to a meal kit service and scans QR codes on packaging to cook meals precisely without any guesswork.
The Thermomix TM7 goes further still — it guides you through recipes step by step, controls its own cooking temperature, stirs automatically, and weighs ingredients in real time. It replaces a blender, food processor, steamer, and stovetop simultaneously.
AI recipe assistants like Samsung Food and Cookidoo suggest meals based on what ingredients you have at home, generate shopping lists, and walk you through every step with voice guidance.
What this means for everyday cooks: You no longer need to watch the pot. The appliance manages the technique — you focus on flavour.
Best for: Busy households, beginner cooks, people who cook complex recipes regularly.
20. Induction Cooking
Induction is the fastest-growing cooking method in modern kitchens — and one of the most misunderstood. Unlike gas or electric hobs that heat a burner which then heats your pan, induction uses electromagnetic energy to heat the pan itself directly. The surface of the hob stays cool; only the cookware gets hot.
The result: Water boils in roughly half the time of gas. Temperature changes are instant — turn the heat down and the pan responds in seconds, not minutes. There is no open flame, no residual heat on the surface, and almost no energy wasted.
Because the heat goes directly into the pan rather than the surrounding air, induction is also significantly more energy efficient than gas or conventional electric. In 2026, most new kitchen renovations in the US, UK, Canada, and Australia include induction as standard.
What you need to know: Induction only works with magnetic cookware — cast iron, magnetic stainless steel, and most modern non-stick pans. Aluminium, copper, and older non-stick pans will not work unless they have an induction-compatible base.
Best for: Curries, sauces, anything requiring precise temperature control. Excellent for bhuna technique — the instant heat response lets you control your masala perfectly.
Not ideal for: Wok cooking at very high heat — a round-bottomed wok won't sit flat on an induction hob.
21. Smart Multi-Functional Cooking (Air Fry + Roast + Dehydrate + Steam)
The single biggest shift in home cooking since 2023 is the rise of multi-functional smart appliances that replace five separate kitchen tools in one unit. This is different from standard air frying — these machines combine multiple cooking methods simultaneously or in sequence, guided by smart programming.
The leading examples in 2026:
The Ninja Foodi series air fries, pressure cooks, slow cooks, steams, sears, bakes, and dehydrates in one pot. The COSORI Smart Air Fryer Pro connects to a smartphone app, lets you control cook time and temperature remotely, and saves custom programs for your most-used recipes. The Breville Smart Oven Air handles air frying, convection roasting, dehydrating, slow cooking, and proofing bread dough — making it one of the most versatile single appliances a home cook can own.
Why this matters for South Asian and Gulf cooking:
These appliances are game-changers for making samosas, kebabs, pakoras, and roasted chickpeas without deep frying — and getting results that rival the original. At Hinz Cooking, I've tested many of these — see my full collection of air fryer recipes for authentic Pakistani and Middle Eastern dishes made in the air fryer.
Best for: Crispy results without deep frying, one-appliance cooking, meal prepping multiple components at once.
Pro tip: When air frying South Asian snacks — samosas, pakoras, kachori — brush a thin layer of oil on the surface before cooking. It replicates the crisp you'd get from deep frying without the oil.
South Asian & Middle Eastern Cooking Methods
These four techniques are the backbone of Pakistani, Indian, and Gulf cooking. You'll see them referenced in almost every recipe on this site — and now you'll know exactly what they mean.
22. Dum Cooking (Slow Steam)
Dum is a slow-cooking technique where food is sealed in a heavy pot — traditionally with dough around the lid — and cooked over very low heat. The food cooks in its own steam, concentrating flavors and creating tender, deeply aromatic results.
It is the method behind authentic biryani. Once the rice and meat are layered, the pot is sealed and placed on the lowest possible heat (sometimes with a flat pan underneath to diffuse the heat further) for 20–30 minutes. The steam circulates inside without escaping, which is why dum biryani has that distinctive fragrance when you open the pot.
Pro tip: You can replicate dum at home by sealing your pot lid with a rolled strip of aluminum foil or simply by placing a heavy flat pan on top of the lid to prevent steam escaping.
→ Try it in my Chicken Biryani Recipe and Chicken Mandi
23. Reverse Searing
Reverse searing flips the traditional steak-cooking method on its head. Instead of searing first and finishing in the oven, you cook the meat low-and-slow (225–250°F / 107–121°C) until it's nearly at your target temperature, then sear it in a screaming-hot pan for 60–90 seconds per side.
The result is edge-to-edge even cooking with a deeply caramelized crust — without the grey overcooked band you get with traditional searing. It has become one of the most popular techniques with home cooks since 2023, and works beautifully with lamb chops, mutton, and thick chicken breasts too.
24. Slow Cooking (Crockpot/Slow Cooker)
A slow cooker uses very low heat (around 170–280°F / 77–138°C) over 4–10 hours to gradually cook food. It is perfect for tough cuts of meat, dals, stews, and curries — everything becomes fall-apart tender with almost no effort.
For Pakistani and Indian cooking, the slow cooker is excellent for nihari, haleem, and any bone-in meat curry. Set it in the morning and come home to a fully cooked meal.
25. Bhuna (High-Heat Dry Roasting)
Bhuna is one of the most important yet least-explained techniques in South Asian cooking. The word means "to fry" or "to roast dry" — and in practice it means cooking your onion, tomato, and spice masala over high heat while stirring constantly, until all the water evaporates and the oil begins to separate and pool at the edges of the pan.
This moment — when you see the oil separating — is the signal that your base is ready. The masala has been properly cooked, the raw spice flavor has cooked out, and everything is now deeply caramelized and concentrated. Skipping bhuna is the most common reason homemade curries taste flat.
Pro tip: Don't rush this step. Bhuna typically takes 10–18 minutes on medium-high heat. Keep stirring, keep the heat steady, and wait for the oil to separate before adding your meat or main ingredients.
→ See bhuna in action in my Chicken Karahi and Keema Curry
26. Tawa Cooking (Flat Iron Griddle)
A tawa is a flat, slightly concave iron griddle used throughout South Asian and Middle Eastern kitchens. It uses dry, direct heat — similar to a skillet — but the large flat surface and high heat retention make it perfect for flatbreads, kebabs, and quick-seared meats.
Tawa cooking is having a moment in Western kitchens too — the Blackstone griddle and cast iron flat top work on exactly the same principle. If you own a cast iron skillet or griddle pan, you can replicate tawa cooking at home perfectly.
Pro tip: Season your tawa or cast iron pan regularly with oil to maintain a natural non-stick surface. Always preheat for at least 3–4 minutes before adding food.
→ Try tawa cooking in my Roghni Naan and Cheese Paratha
27. Tandoor / Clay Oven Cooking
A tandoor is a cylindrical clay oven that reaches temperatures of 480–900°F (250–480°C) — far hotter than any standard home oven. Meats are marinated in yogurt and spices, then cooked on long skewers inside the oven where they are simultaneously roasted, grilled, and smoked. Flatbreads like naan are slapped directly onto the clay walls.
Most home cooks don't have a tandoor — but the flavors can be replicated using a very hot oven with the broil setting, a grill, or an air fryer. The key is marinating in yogurt (which mimics the way the clay oven tenderizes the surface) and cooking at the highest heat your appliance allows.
Pro tip: For tandoor-style results at home, marinate chicken for at least 4 hours in yogurt and spices, then broil on the highest rack for the last 5–7 minutes to get those char marks.
→ Try it in my Tandoori Chicken in Oven and Chicken Tikka Biryani
Tips for Choosing the Right Method
The cooking method you choose matters as much as the ingredients themselves. The same piece of chicken can be completely different depending on whether you grill it, braise it, or steam it — and knowing which method to reach for is what separates a confident cook from someone who follows a recipe blindly.
Match the method to the cut, not just the ingredient. Not all chicken is the same. A chicken breast is lean and tender — it needs quick, high-heat cooking (grilling, pan-searing, baking) or it dries out. A chicken thigh has more fat and connective tissue — it benefits from slower methods like braising or pot roasting that give the collagen time to break down into natural gelatin. The same logic applies to every protein: tender cuts need fast heat, tough cuts need slow heat.
Use dry heat when you want colour, crust, and concentrated flavour. Roasting, grilling, sautéing, and frying all create browning through the Maillard reaction — the chemical process that happens when proteins and sugars are exposed to high heat. That golden-brown crust on a piece of chicken, the char marks on a kebab, the crispy base of a naan on a hot tawa — all of that flavour comes from dry heat. If your dish needs visual appeal and roasted depth, dry heat is your tool.
Use moist heat when you need tenderness or gentle cooking. Steaming, simmering, poaching, and slow cooking all use liquid or steam to transfer heat gently. These methods are ideal for foods that would dry out, toughen, or fall apart under direct dry heat — fish, dumplings, lentils, chickpeas, and any tough meat that needs hours to become tender. Moist heat also preserves nutrients better than high-temperature frying or roasting.
Use combination methods for the deepest flavour. Braising, stewing, and pot roasting all start with a sear (dry heat) and finish with slow cooking in liquid (moist heat). The initial sear builds flavour through browning — the slow finish builds tenderness through time. Any time you're cooking a tough cut of meat for a curry, a stew, or a slow-cooked karahi, you're using a combination method whether you realise it or not.
Always match your method to the time you have. Sous vide and slow cooking give extraordinary results — but they need hours. Sautéing and air frying give excellent results in minutes. If it's a weeknight and dinner needs to be on the table in 30 minutes, choose methods that work with that constraint rather than fighting it. A quick-sautéed chicken with pan sauce can be as delicious as a four-hour braise — just different.
Think about equipment before you decide. The best cooking method is also the one that suits your kitchen. If you have an induction hob, your tawa technique and bhuna method need cast-iron cookware for the best results. If you have an air fryer, use it for any recipe that would otherwise require deep frying — the results are genuinely comparable with a fraction of the oil. Match the method to what you actually have, not what a restaurant kitchen uses.
Common Mistakes & How to Avoid Them
Even experienced cooks make these errors. Most of them come down to impatience or the wrong temperature — both are easy to fix once you understand why they matter.
Overcrowding the pan. This is the most common mistake in home cooking and it ruins more dishes than any other error. When you put too much food in a pan at once, the temperature drops immediately and the food releases steam. Instead of searing and browning, everything steams and turns pale and soft. The fix is simple: cook in batches. It takes a few extra minutes but the difference in result — properly golden, caramelised food versus pale, soggy food — is enormous. This applies to stir-frying, sautéing, air frying, and pan-frying equally.
Using high heat with delicate foods. High heat is not always better. Fish fillets, eggs, and delicate vegetables all need gentle, controlled heat — expose them to a screaming-hot pan and they toughen, break apart, or burn on the outside before cooking through. Delicate proteins need medium or medium-low heat with patience. Save high heat for searing beef, browning onions, and the bhuna stage of a masala — not for anything that can overcook in seconds.
Not preheating the pan or oil properly. Adding food to a cold or lukewarm pan is one of the most common reasons home cooking lacks restaurant-quality results. A cold pan means food sticks, absorbs oil instead of searing in it, and never develops proper colour. Always preheat your pan for 2–3 minutes before adding oil, and add the oil 30 seconds before the food. The oil should shimmer or just begin to smoke lightly before anything goes in. For a tawa or cast iron skillet, preheat for 3–4 minutes minimum — these materials take longer to come up to temperature but hold it far better once hot.
Not letting meat rest after cooking. Cutting into meat immediately after cooking releases all the juices that have been driven to the centre by the heat — they spill out onto the board and you're left with dry meat. Resting allows those juices to redistribute back through the fibres. A chicken breast needs 5 minutes rest. A lamb chop needs 3 minutes. A large pot roast needs 15–20 minutes tented loosely with foil. This single habit improves every meat dish you make.
Rushing moist-heat cooking. Simmering a curry for 20 minutes when it needs 45 will give you a dish that tastes raw and thin. The whole point of simmering and slow cooking is time — it is during the long, gentle heat that collagen breaks down into gelatin, flavours concentrate, and spices fully bloom. If a recipe says simmer for 45 minutes, that is not a suggestion. Turning up the heat to speed things along just boils the liquid away and toughens the meat. Low and slow is not optional — it's the method.
Skipping the bhuna step in South Asian cooking. This applies specifically to Pakistani and Indian curries — and it is the most common reason a homemade curry tastes flat compared to a restaurant version. Bhuna means cooking the onion, tomato, and spice masala over high heat, stirring constantly, until all the water evaporates and the oil separates and pools at the edges of the pan. Most home cooks rush this stage or cover the pan. Do not. The oil separation is the signal that the masala is properly cooked, the raw spice flavour has gone, and everything is concentrated and caramelised. Rushing bhuna is the single most fixable mistake in desi home cooking. See Chicken Karahi for the bhuna technique in action.
Adding too much water too early. In both South Asian and Western cooking, adding liquid before the initial frying or searing stage is done defeats the entire purpose of those high-heat steps. In a curry, water added to the masala before the oil separates stops the bhuna process immediately — the masala boils rather than fries and never develops depth. In a stir-fry, water in the pan creates steam that kills the sear. Add liquid only after the dry-heat stage is complete.
Pre-Cooking Techniques: Marination & Tenderizing
Before cooking, many chefs use tenderizing techniques to soften meat fibers and enhance flavor absorption.
Natural tenderizers such as papaya, pineapple, yogurt, and vinegar help break down proteins without artificial additives.
For a deeper dive, explore my full guide on 10 Natural Meat Tenderizers — where I share common kitchen ingredients that can transform tough meat into melt-in-mouth bites.
If you love using fresh ingredients, my recipe for Papaya Meat Tenderizer shows how this tropical fruit’s natural enzymes (papain) make it one of the most effective tenderizers used in traditional cooking.
Pro Tip: It's a good practice to tenderize tough meat before cooking — it reduces cooking time and helps retain moisture, especially when roasting, grilling, or pan-frying.
Frequently Asked Questions
The four main types of cooking methods are dry-heat, moist-heat, combination, and modern techniques.
Dry-heat cooking includes roasting, baking, grilling, and frying.
Moist-heat cooking includes boiling, steaming, and poaching.
Combination cooking blends both, like braising and stewing.
Modern techniques include sous vide and pressure cooking.
Steaming is often considered the healthiest cooking method because it preserves nutrients, flavor, and color without adding fat or oil. Other healthy options include grilling, baking, and poaching, as they require minimal added fats.
Steaming and sautéing with minimal oil keep the most nutrients in your food. Boiling often leads to nutrient loss since vitamins can leach into the cooking water. To retain flavor and nutrition, cook just until tender, not overdone.
Boiling happens at a higher temperature (212°F / 100°C) with rapid bubbles — great for pasta or potatoes.
Simmering is gentler (180–200°F / 82–93°C) and ideal for soups, curries, and stews, allowing flavors to develop slowly without breaking down delicate ingredients.
The best methods depend on the cut of meat:
Tender cuts → grill, roast, or pan-sear.
Tough cuts → braise, stew, or slow cook.
These methods enhance flavor and ensure juicy, tender results.
Sautéing and boiling are great for beginners — quick, simple, and hard to mess up! Once you’re comfortable, you can move to roasting, frying, and grilling for more advanced flavor and texture.
Grilling and roasting are known for creating bold, smoky, and caramelized flavors. When food is exposed to direct or dry heat, the natural sugars brown, producing that irresistible aroma and taste we love.
Both use dry heat in the oven.
Baking is usually for batters and doughs (bread, cakes, cookies).
Roasting is for solid foods (meats, vegetables).
They share similar temperatures but differ in what they’re used for.
Microwaving and pressure cooking are the fastest. Pressure cooking, in particular, cooks food up to 70% faster than conventional methods while retaining flavor and nutrients.
Roasting over an open fire is one of the oldest cooking methods in human history. It dates back thousands of years — the original way people discovered how heat could transform raw ingredients into flavorful meals.
Dum is a South Asian slow-steam technique where a pot is sealed airtight and placed over very low heat. In biryani, it allows the layered rice and meat to cook together in their own steam — concentrating aromas and creating the distinctive fragrance that sets authentic biryani apart. The pot is traditionally sealed with dough; at home, a tight lid with aluminum foil works just as well.
Bhuna is a dry-frying technique used in Pakistani and Indian cooking where onions, tomatoes, and spices are cooked over high heat, stirring constantly, until all moisture evaporates and the oil separates from the masala. It is the foundational step in most curries and karahi dishes — the flavor depth of your entire dish depends on bhunoing the base properly.
Related Topics
- Cooking Tips for Beginners
- How to cook basmati rice for biryani
- How to naturally tenderize meat
- How to make fluffy pizza dough
- How to reheat mashed potatoes
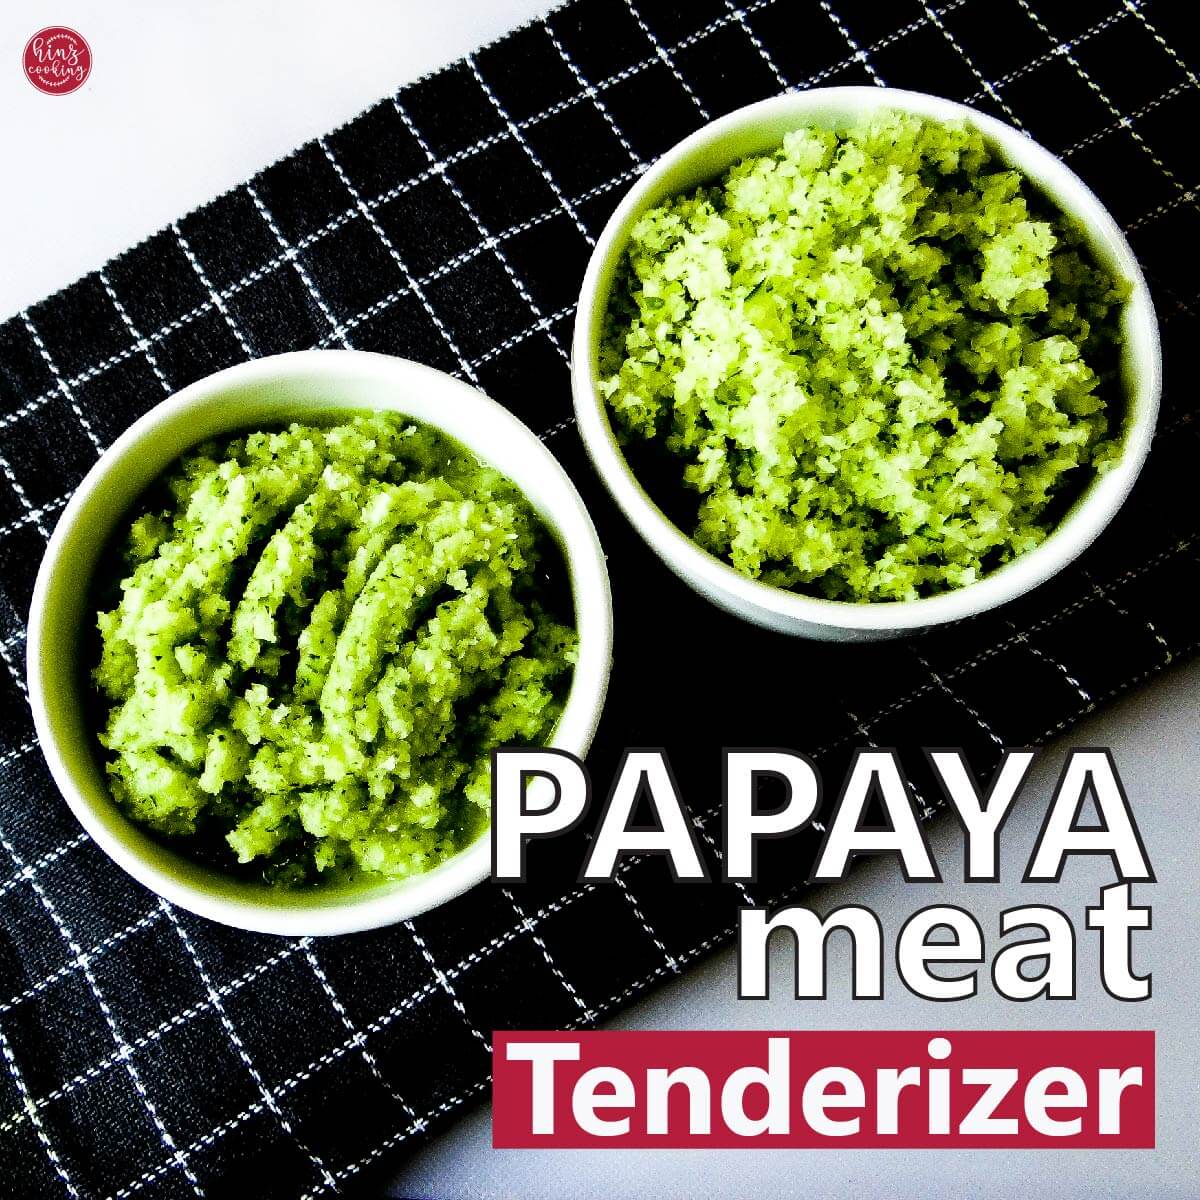
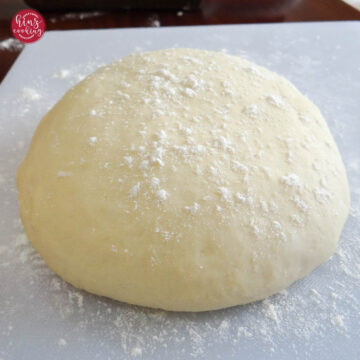
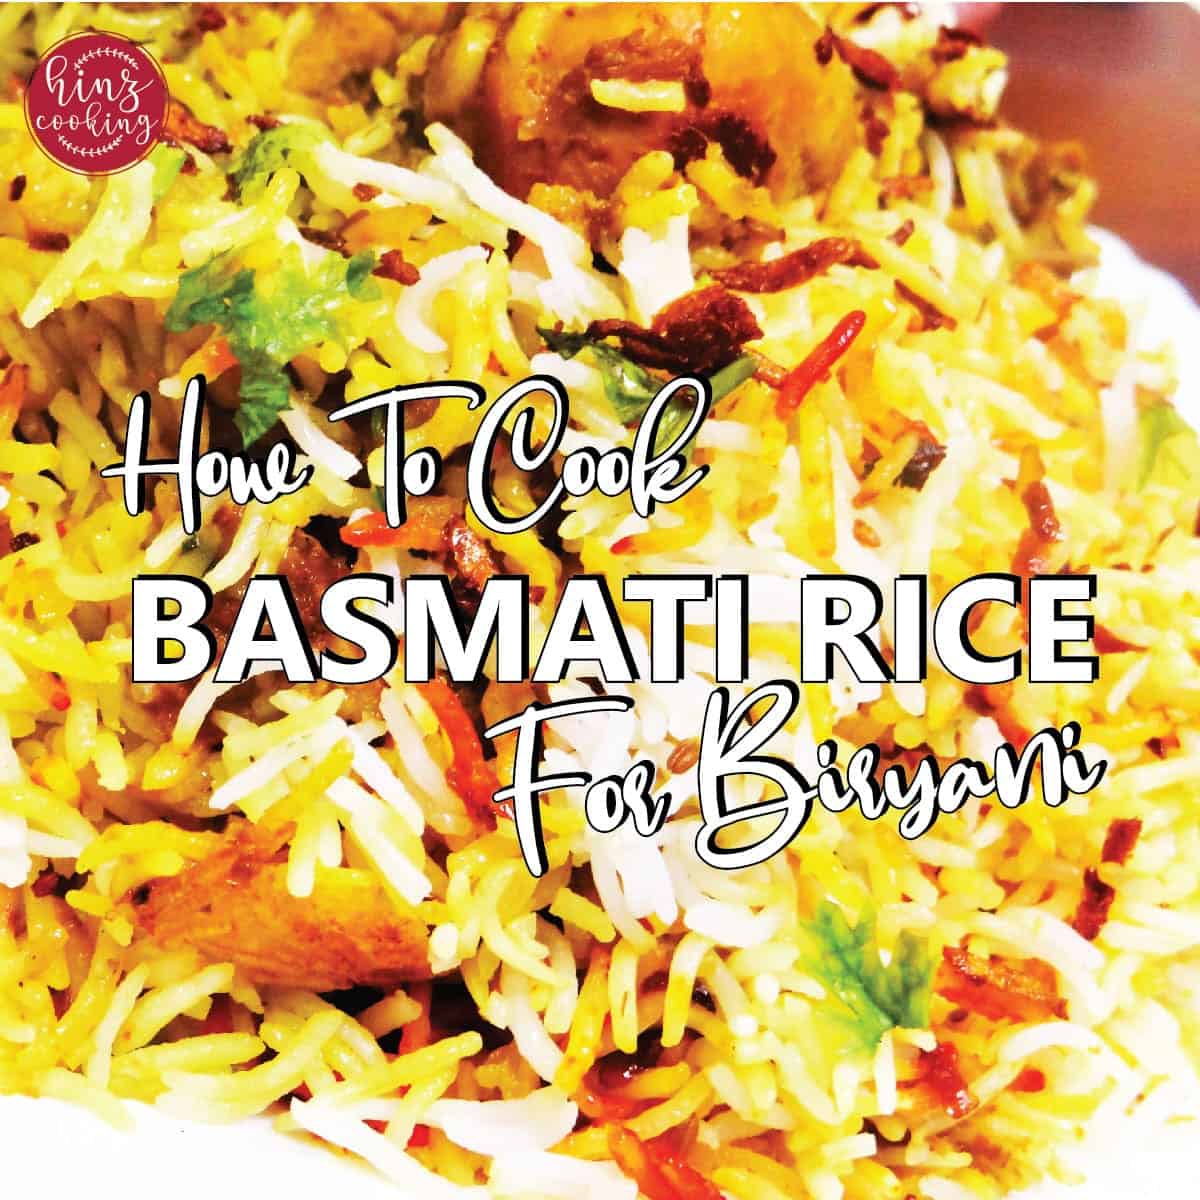

Final Thoughts / Cooking Experiment Ideas
These 27 cooking methods and techniques are your toolkit to experiment, adapt, and better understand food. The next time you cook chicken, vegetables, fish, or beans, think first: which method suits this ingredient best? Use this guide, test different techniques, and your cooking will always improve.
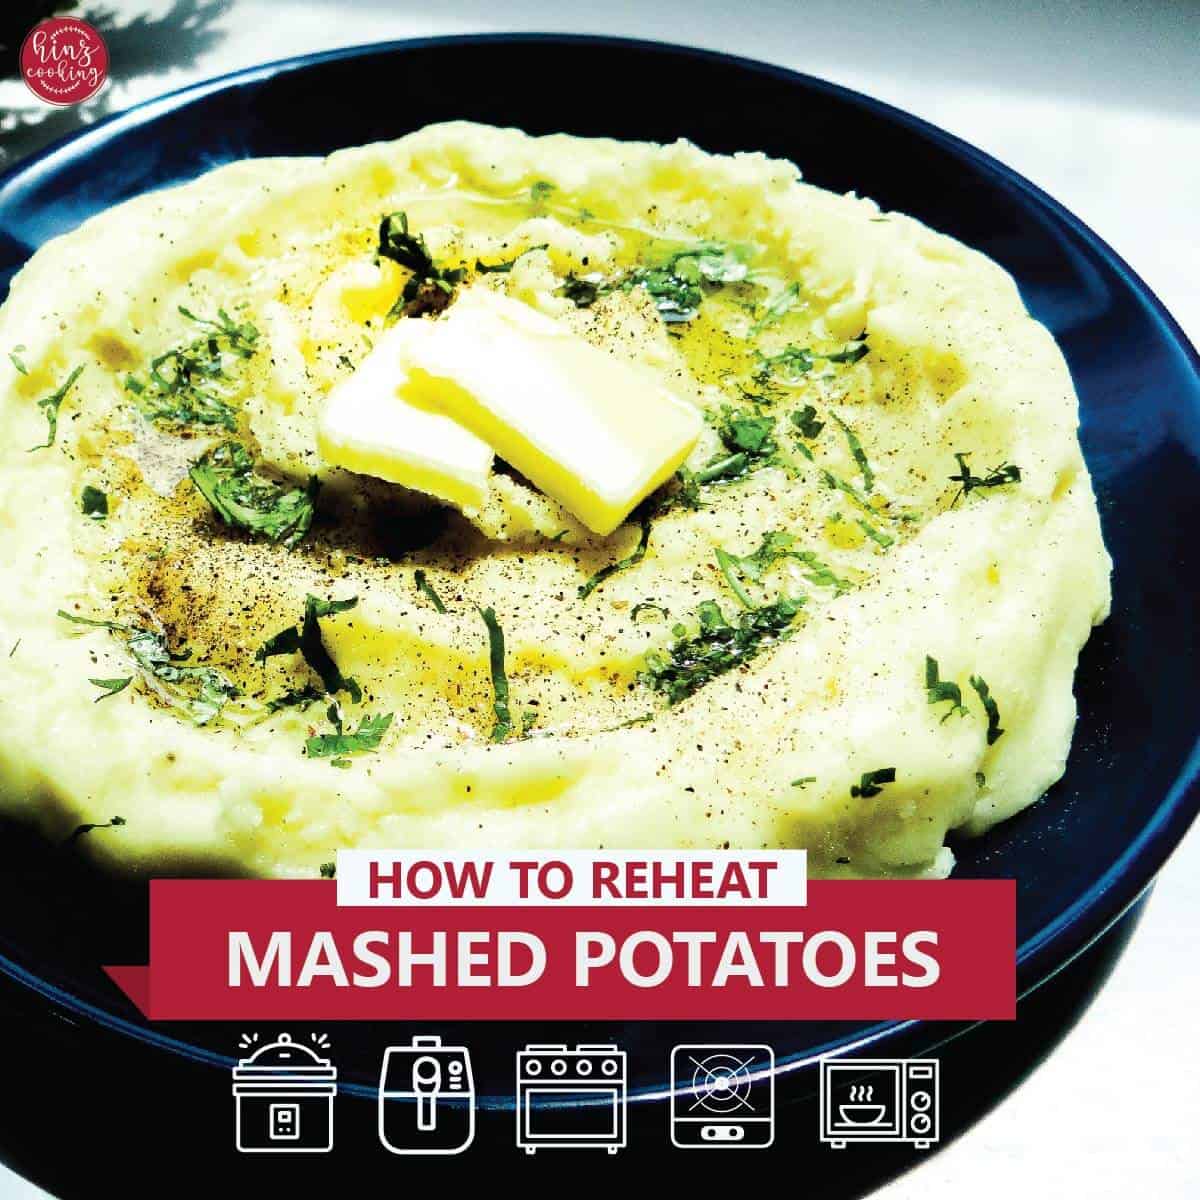

Jogendra maharana Maharana
Nice description given
Derrieka Williams
Thank u very much....
Davy Hamatimba
Thanks for your submitted your knowledge, I'm students at Libes Zambia, I'm studying food production this year.
Davy Hamatimba
Thanks for sharing, am also interested for learning about that.